Agent Dialer Guide
Document Metadata
Category: Customer Portal / Contact Center – Agent Guide
Audience: Agents, Support Team, Administrators
Difficulty: Beginner to Intermediate
Time Required: Approximately 15–25 minutes
Prerequisites: Active ConnexCS account, Customer Portal module enabled, Contact Center and Dialer configured, and agent account credentials with dialer permissions.
Related Topics: Creating Agents, Dialer Setup, Dialer Dashboard, Campaign & Leadset Management
Next Steps: Log in as an agent via the Customer Portal, access the dialer interface, review calling workflows, make/receive campaign-assigned calls, log outcomes as per script or process guidelines, and report any issues for follow-up.
Overview
This section applies only to Auto Dialer and Preview Dialer campaigns.
The Agent Dialer Guide explains how agents log in, join a campaign, and manage calls using the dialer interface. Once logged in, agents can select their assigned campaign and access key tools such as call controls, customer details, and scripts.
For Auto Dialer, calls are automatically connected to available agents when they are active, allowing continuous call flow. Agents can view customer information, flag invalid details, and submit dispositions after each call.
For Preview Dialer, agents manually initiate each call, review customer details before dialing, and can update or edit lead information as needed.
Both dialer types allow agents to manage live calls with features like hold, transfer, mute, and end, ensuring smooth handling of customer interactions and accurate campaign reporting.
Steps for Agent Caller
- Enter your domain. The screen will prompt the agent to enter the
UsernameandPassword. Click onLogin.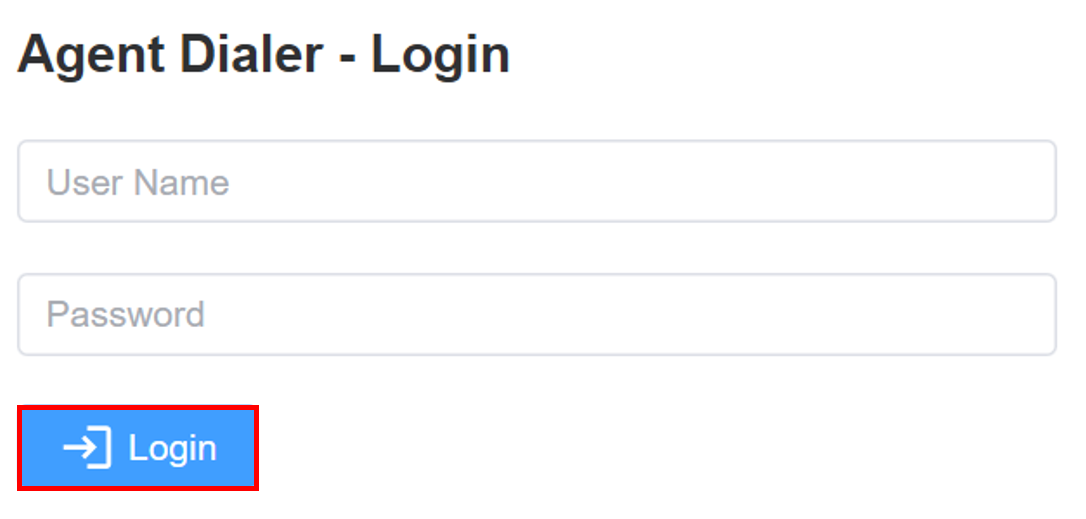
-
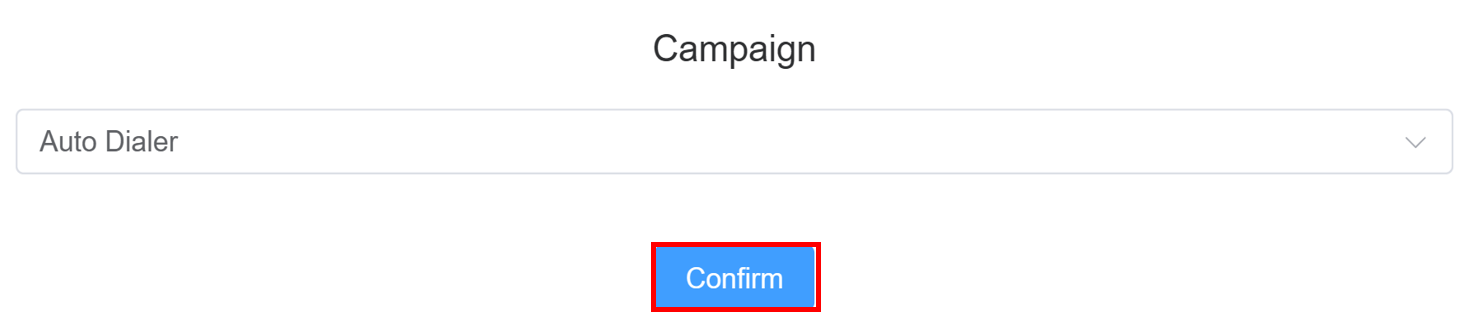
Select the campaign
Auto Dialer/Preview Dialerfrom the drop-down menu and clickConfirm.Auto Dialer
-
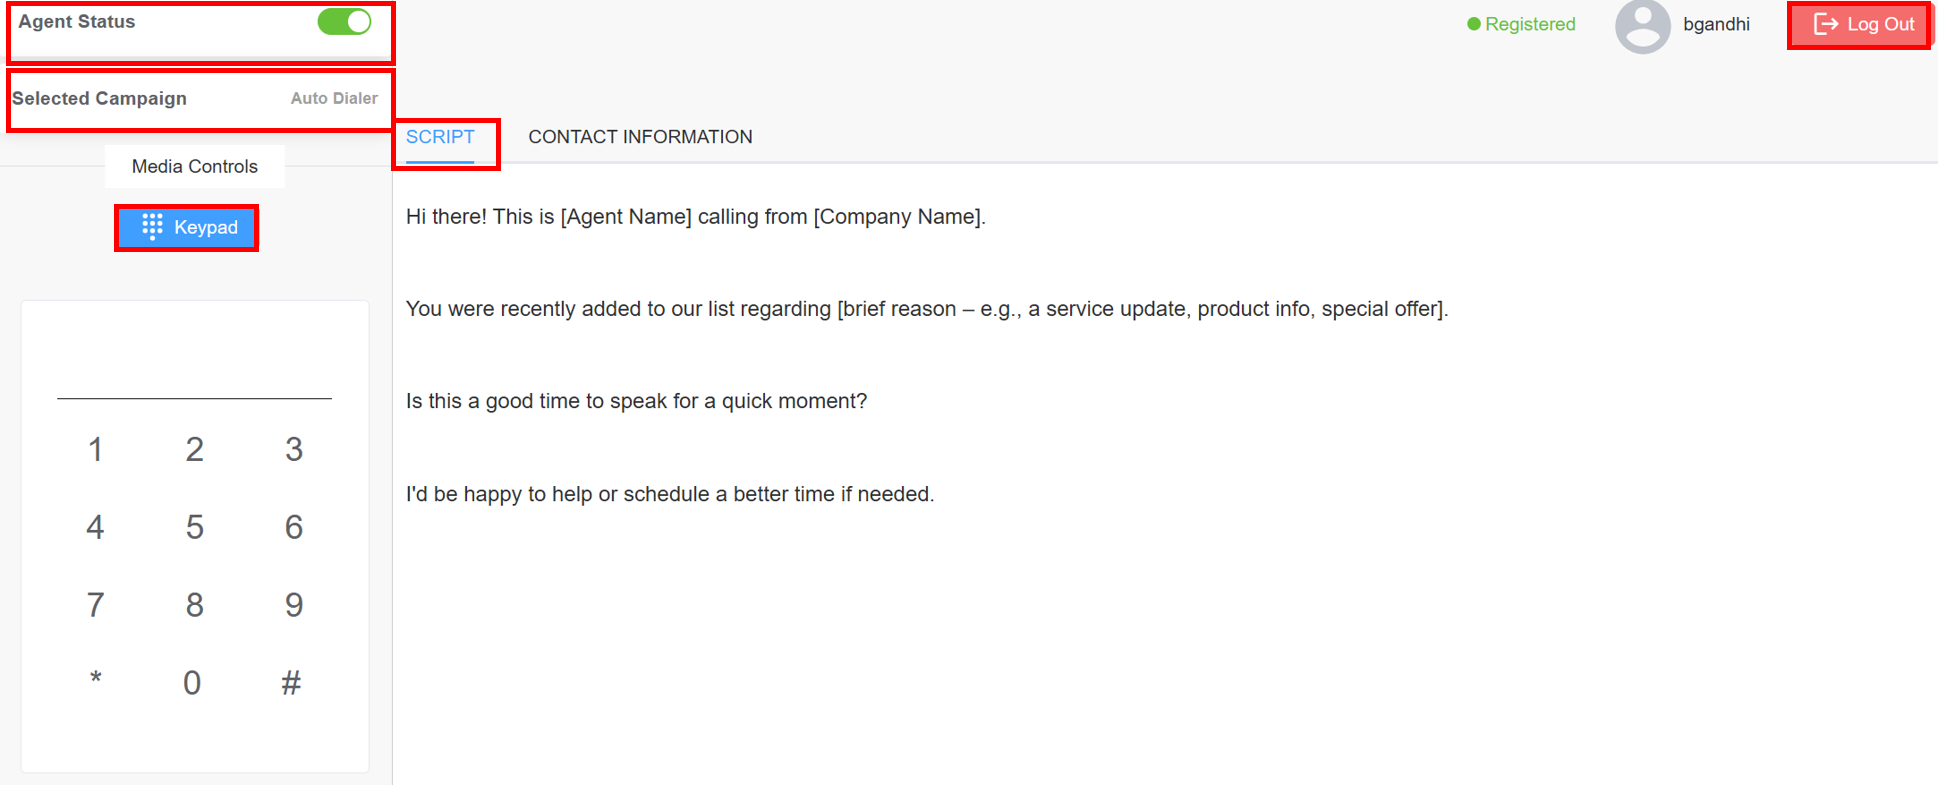
An Agent Dialer interface with the following fields will appear:
Agent Statustoggle (Only for Auto Dialer): Make sure itsenabled (green), meaning the agent is active and ready to take callsSelected Campgainfrom the drop-down menu.Keypadfor dialing the numbers.Script: Displays the call script the agent should follow.Logoutfor the agent to log off from the system.Auto Dialer
Preview Dialer
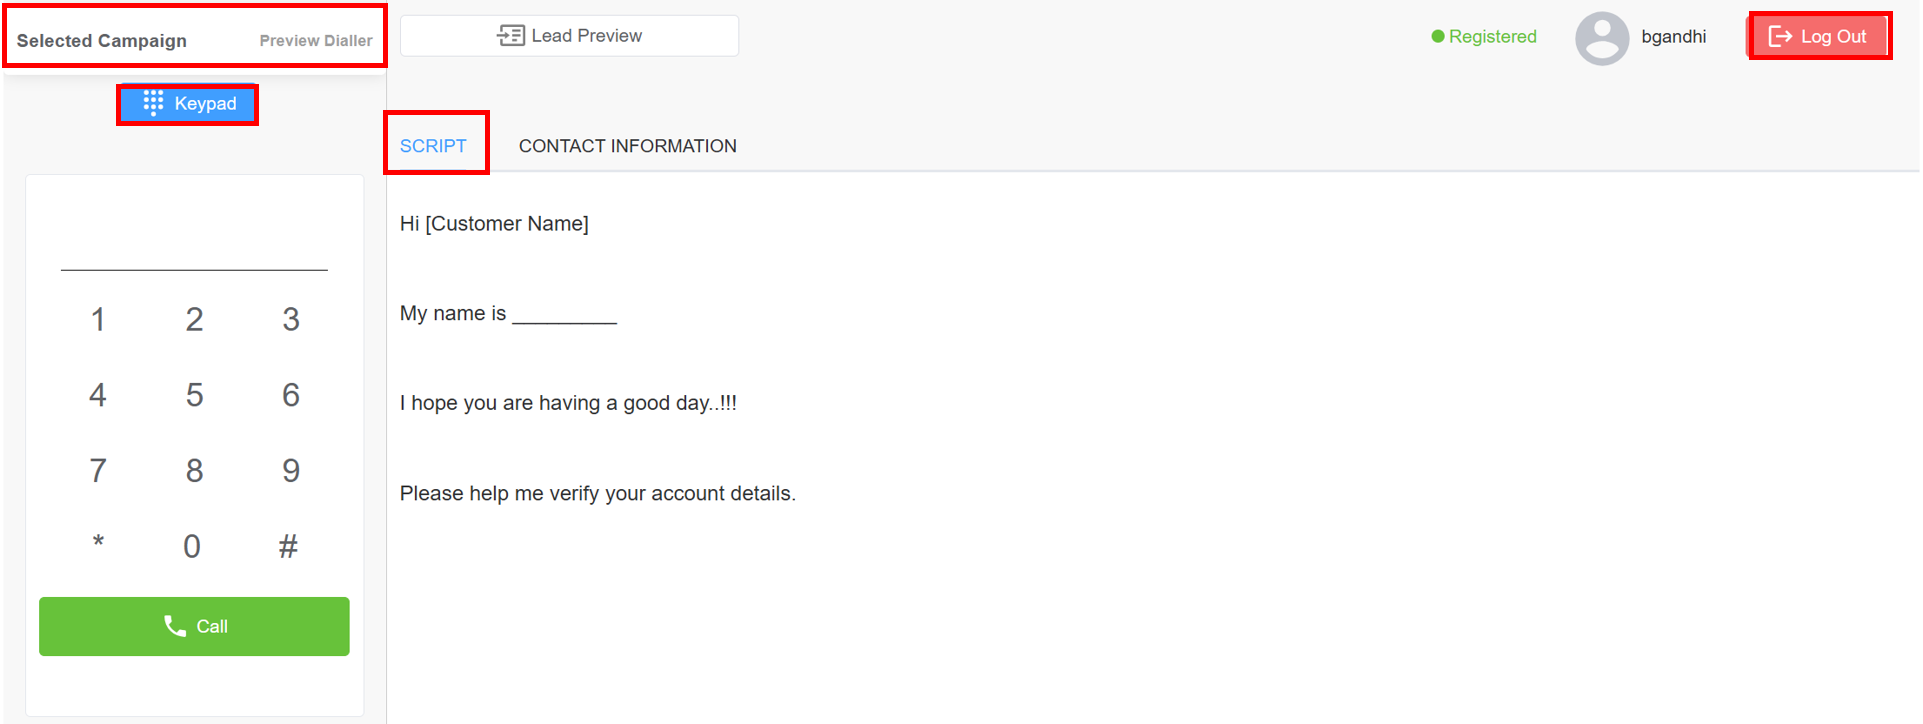
Contact informationof the customer sourced from the uploaded Leadset or entered manually via the Lead Form. The contact information of the customer will be updated after the agent receives the call.Lead Preview(Only for Preview Dialer): Opens lead details for the agent.Invalid Details(Only for Auto Dialer): Lets the agent flag the lead if information is incorrect or incomplete.Get Next Led(Only for Auto Dialer): It becomes active after the current call is concluded and displays the information of the next customer.- As soon as the
Agent Statusis enabled, the agent starts getting calls. (Only for Auto Dialer) Call(Only for Preview Dialer): Hit the call button to phone the customer.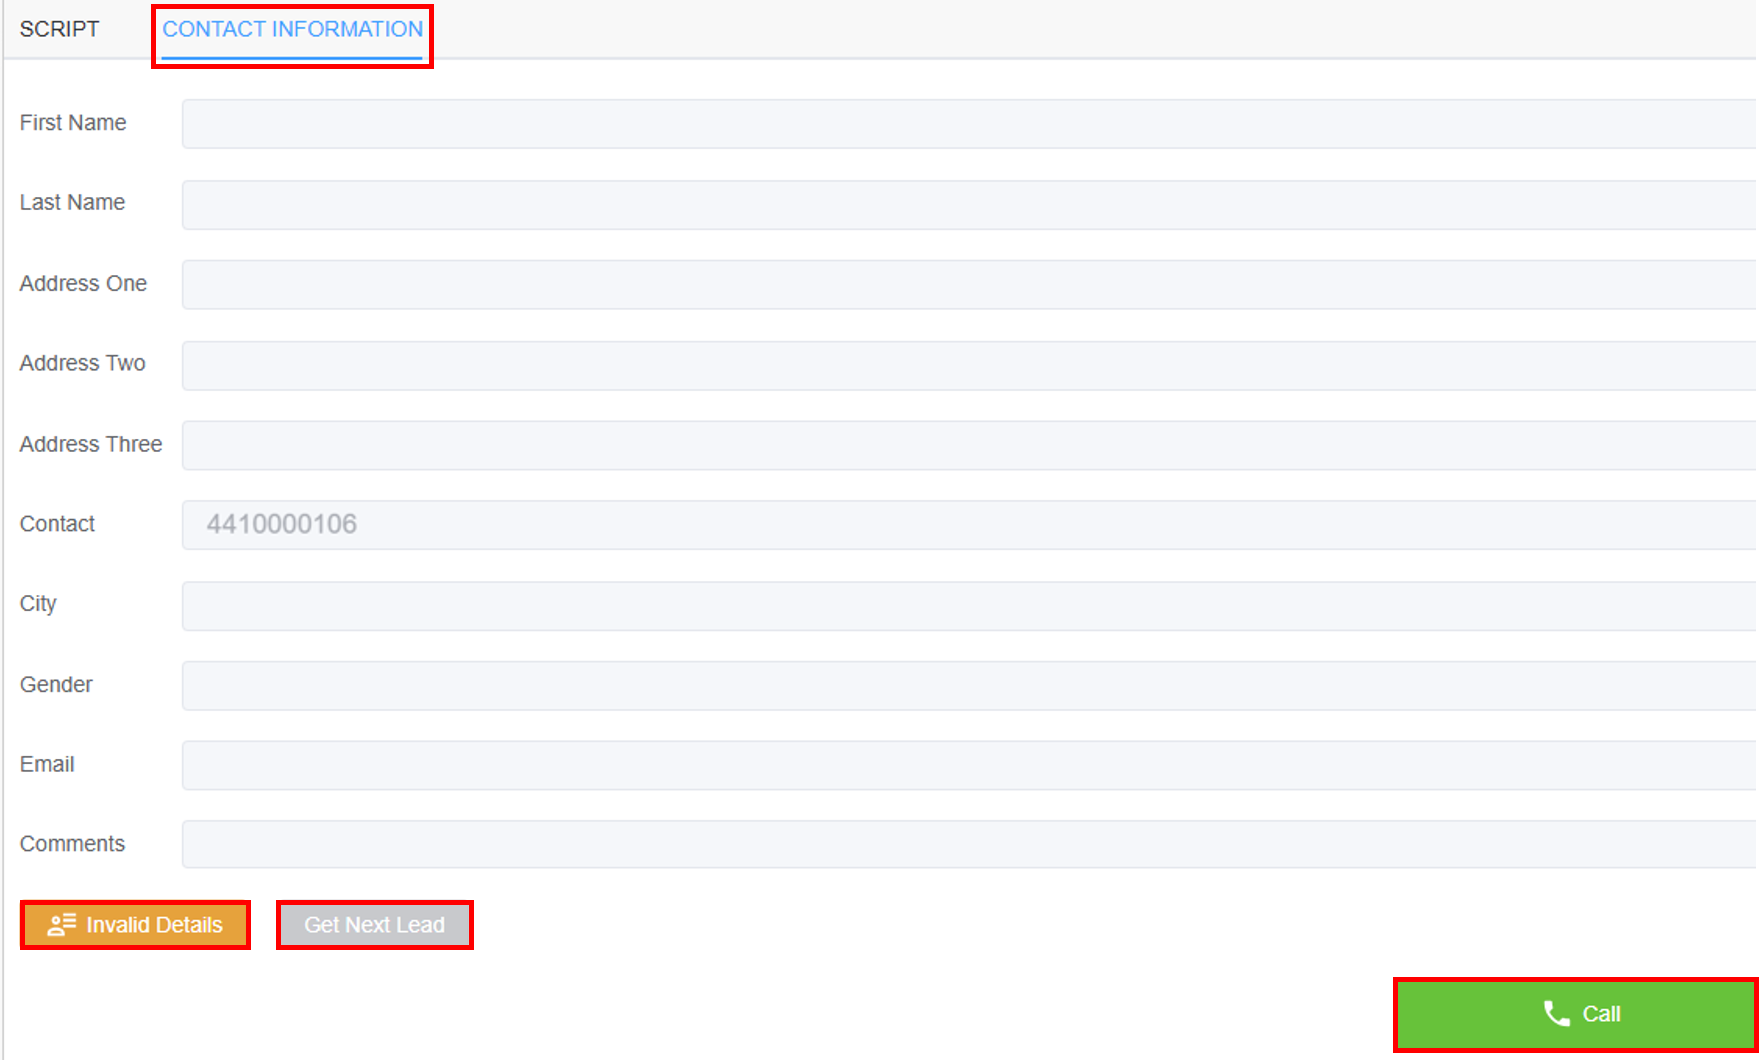
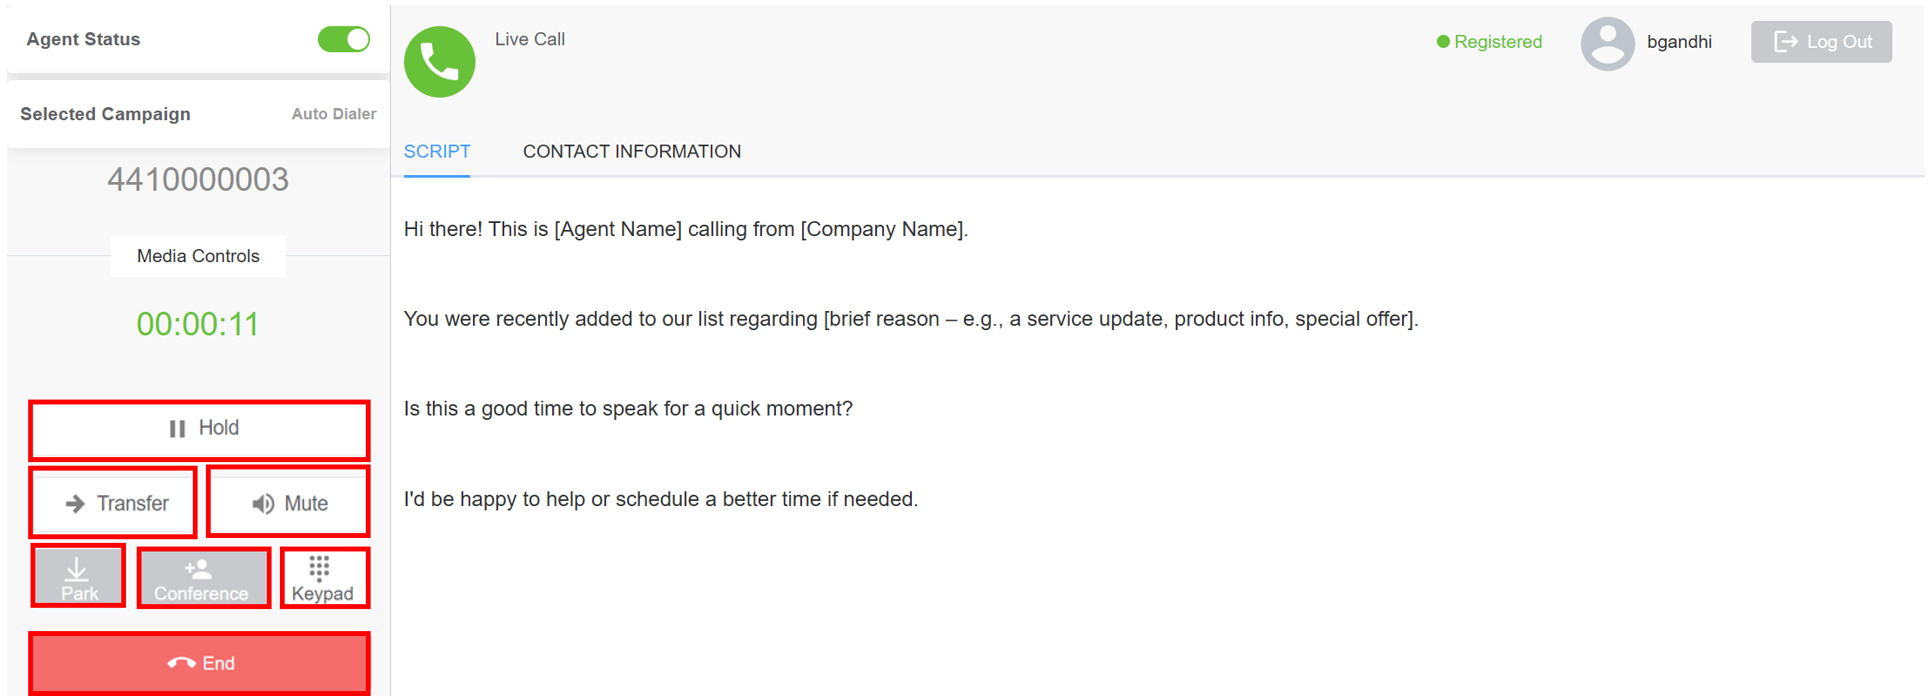
- A
Live Callwindow will appear.Auto Dialer
Preview Dialer
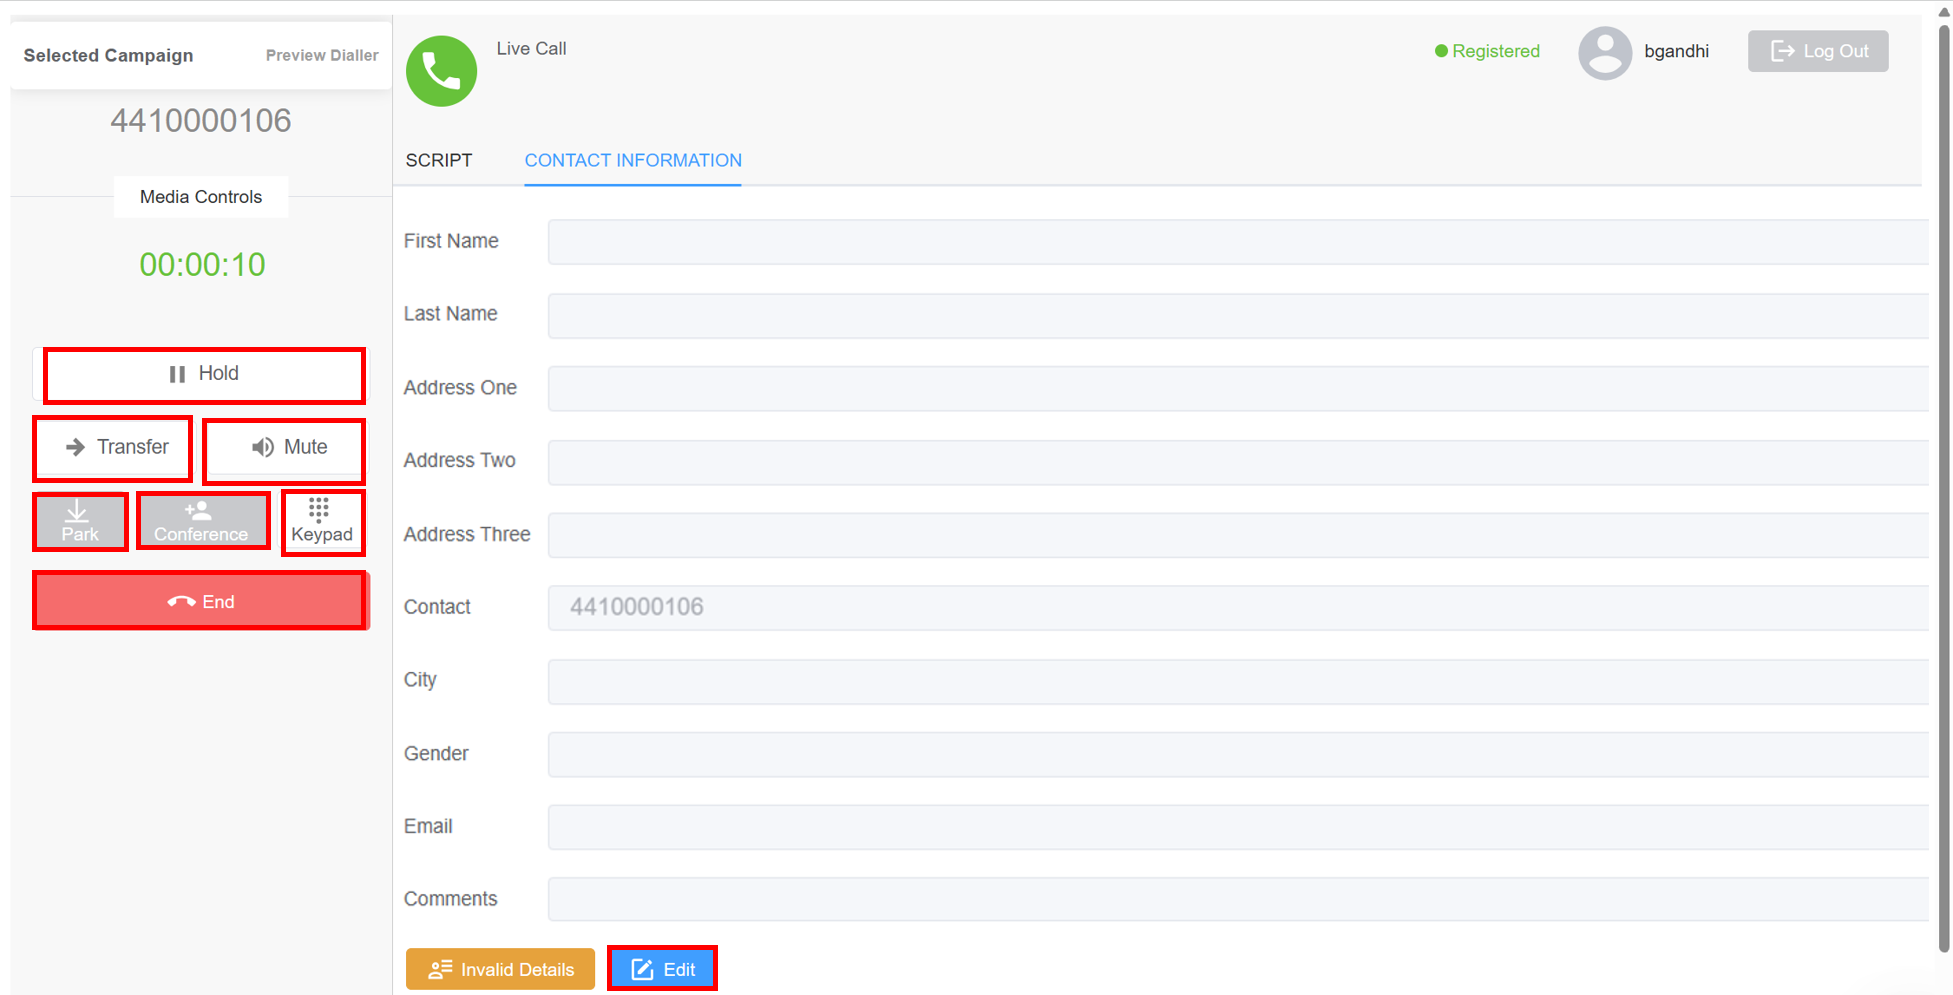
Hold: Allows your agent to place the call on hold.Transfer: Transfer call to another agent or manager.Mute: Allows your agent to mute your call.Park: Currently NOT IN USE.Conference: Currently NOT IN USE.Keypad: Displays the number keypad.End: Allows your agent to disconnect the call.
- After the call ends, your agent can either
Submitthe disposition and get ready for the next call orSubmit & Go On Pause. (For Auto Dialer)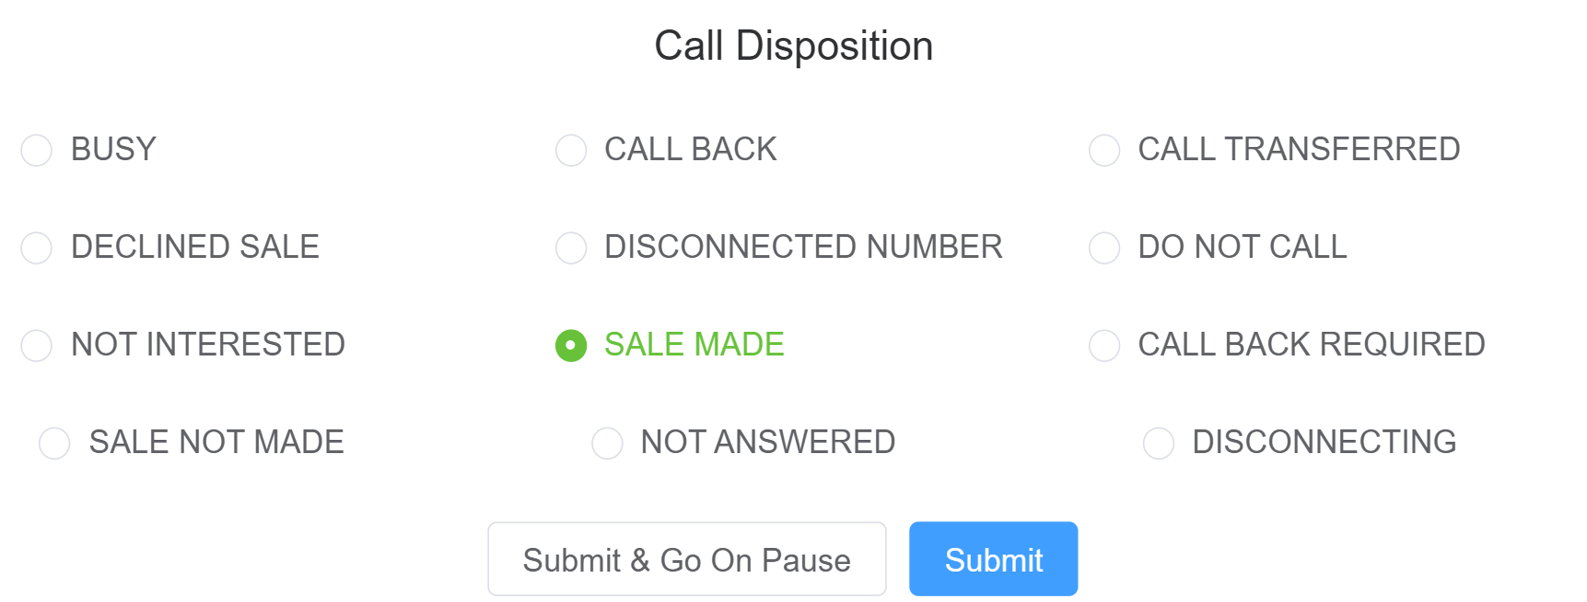
- A window will prompt you to either
Set DispositionorUpdate User Details. (For Preview Dialer)
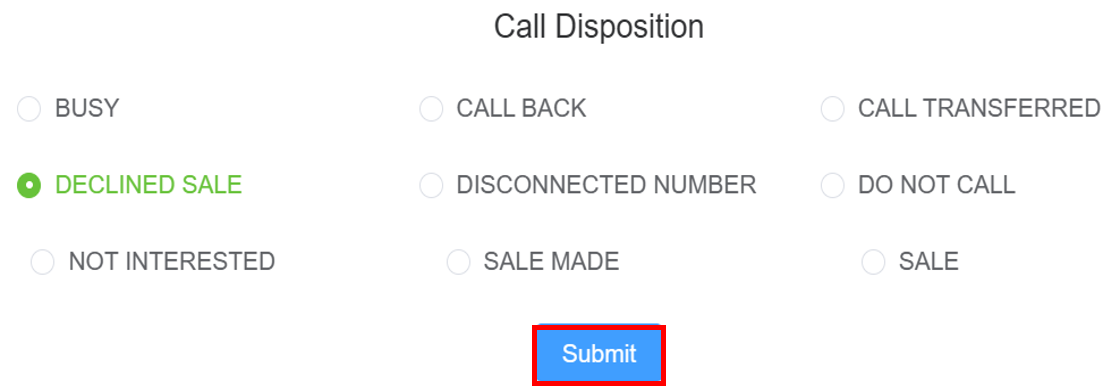
Invalid Details: Lets the agent flag the lead if information is incorrect or incomplete.- Your agents can also the update the customer details using the
Editbutton. - Click on
Get Next Leadto dial the next customer. ( Only For Preview Dialer) - The next call will go through after 30 seconds. ( Only For Auto Dialer)
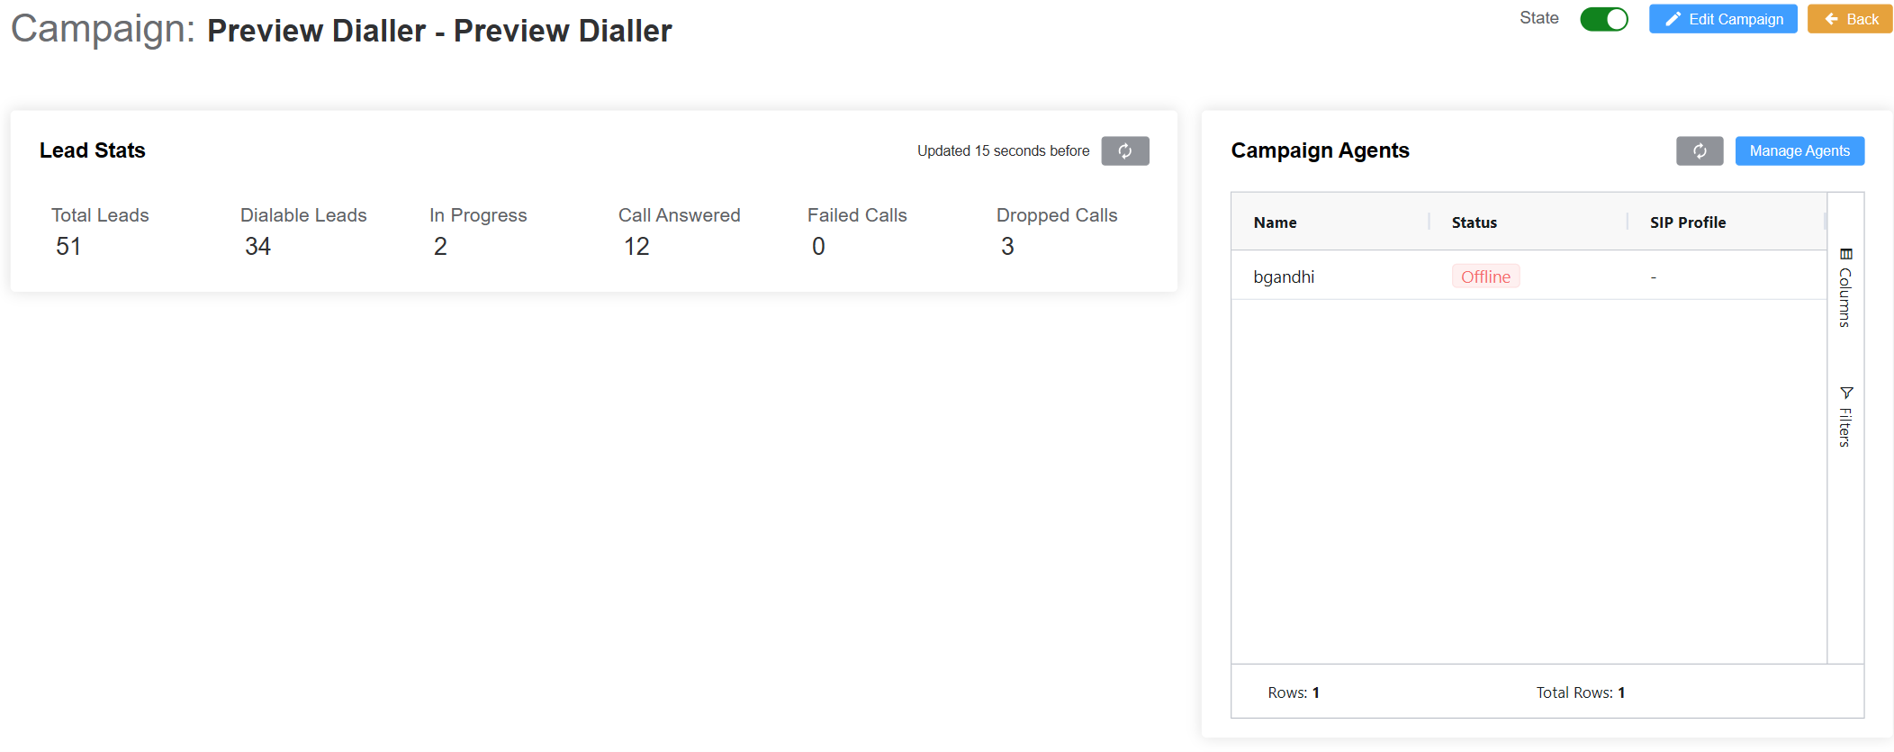
- The updated
Campaign Overviewcan be seen.Auto Dialer

Preview Dialer
- The updated
Leadset Overviewcan be seen.Auto Dialer
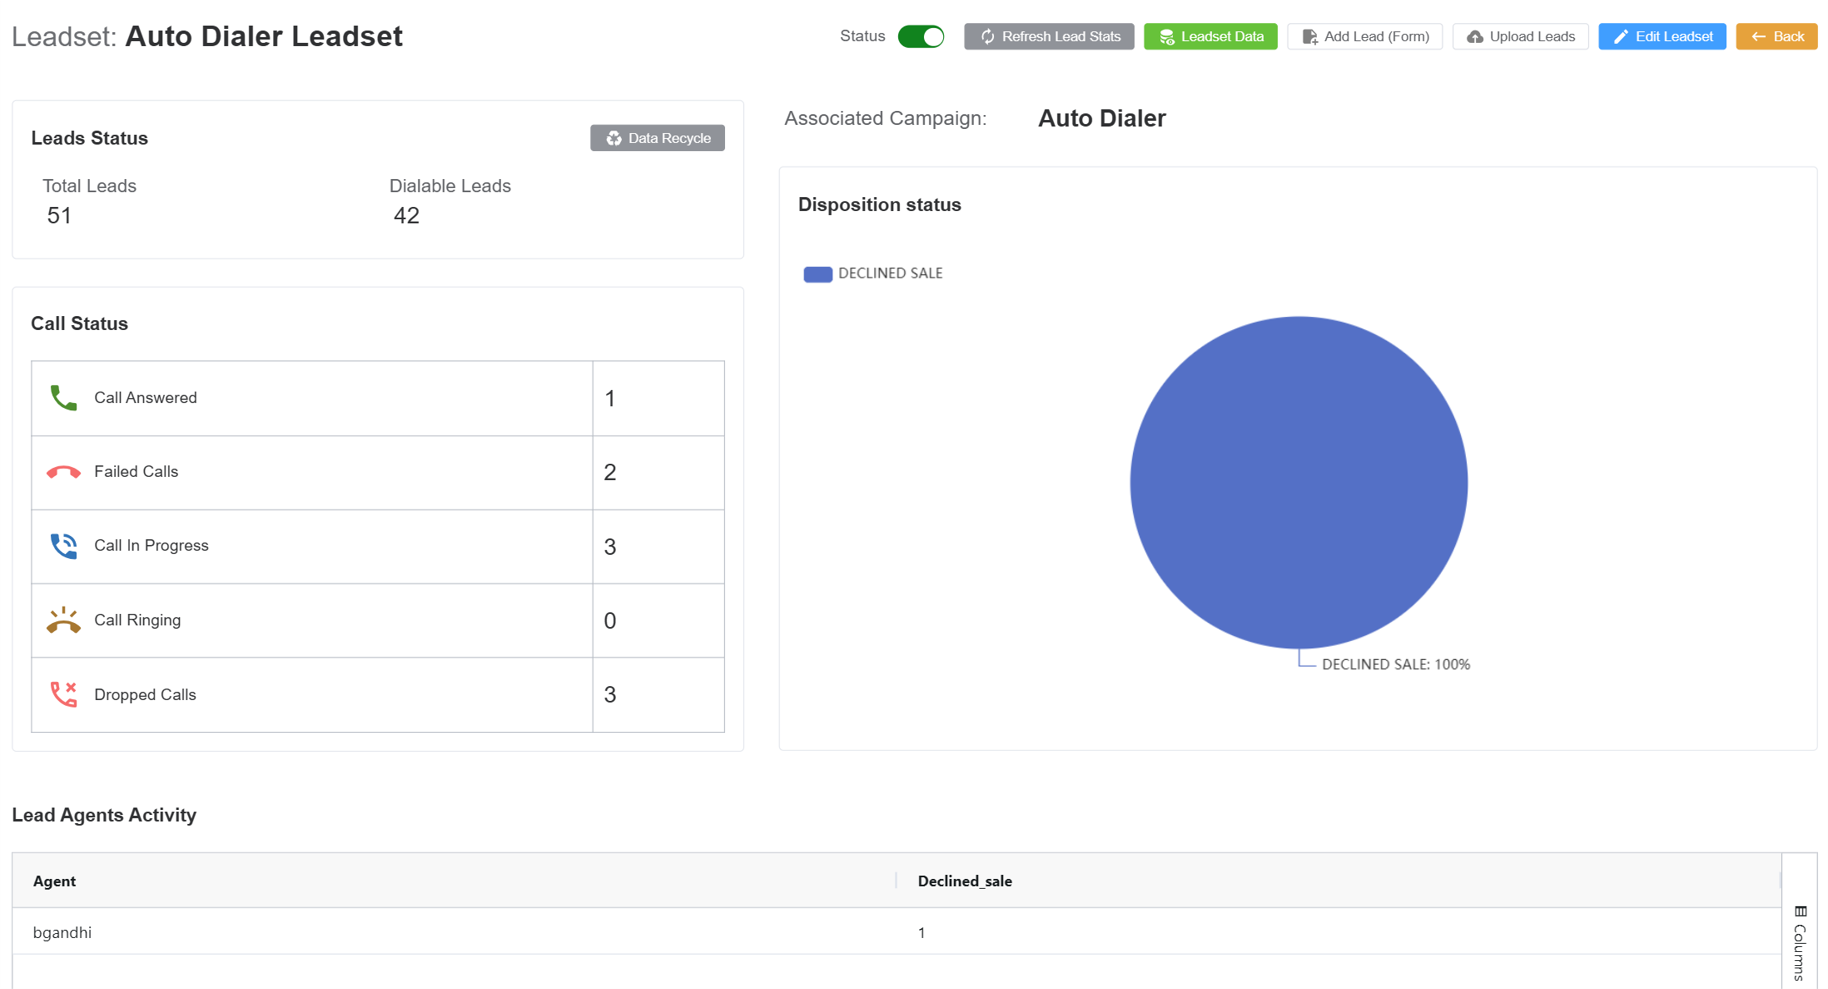
Preview Dialer
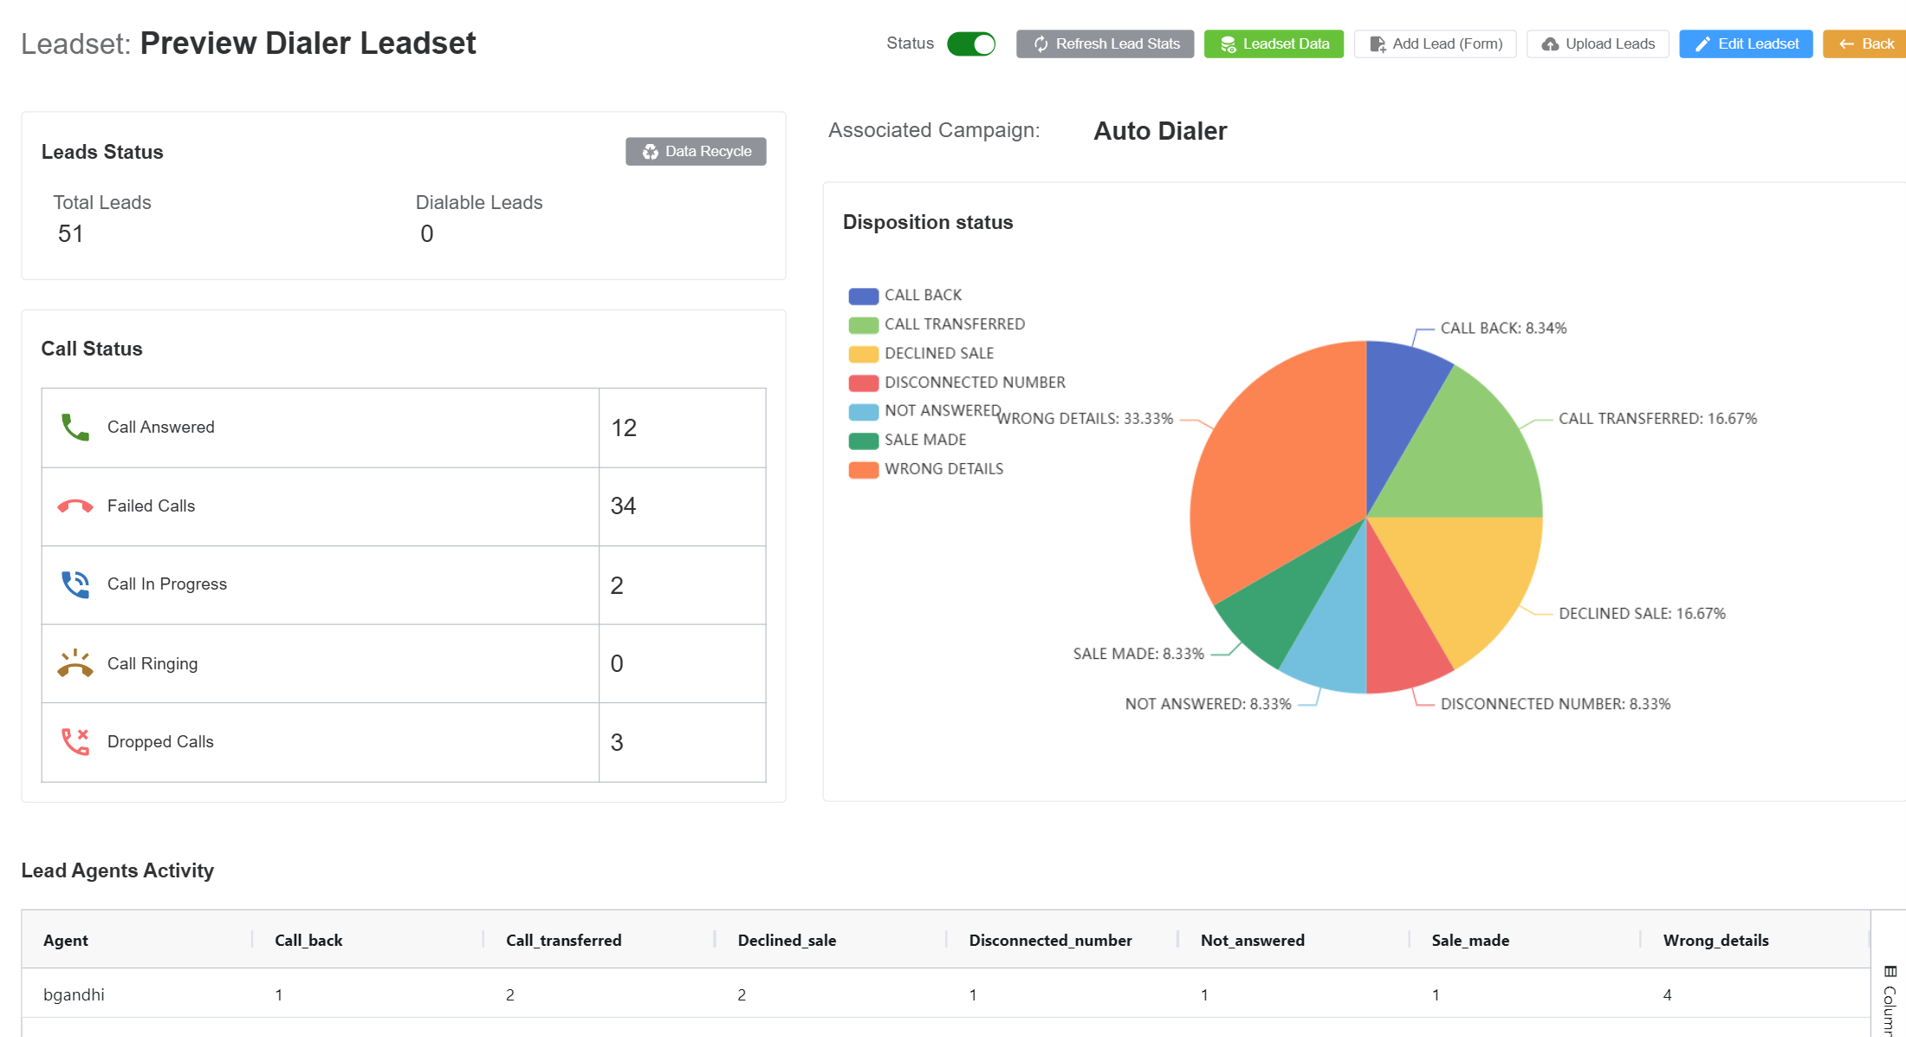
- The updated