Application Programming Interface Integrations
Document Metadata
Category: Setup & Configuration → Integrations → API
Audience: Administrators, Engineers, Support Team
Difficulty: Intermediate to Advanced
Time Required: 15–30 minutes
Prerequisites: ConnexCS account with API access enabled, basic knowledge of REST APIs and authentication
Related Topics: Developer Guide, Permissions & Roles
Next Steps: WebPhone Integrations
Introduction
Setup Integrations API
Configure API Integrations to let ConnexCS connect to external services. It provides seamless connectivity to external systems and payment processors.
For inbound APIs, please see the API in the Architecture documentation.
These integrations are custom written, offering similar capabilities as drivers.
Available Integrations
- PayPal Express Checkout: Lets you do online checkout via the customer portal using a PayPal Account.
- Configuration Options:
- Mode: Choose between live or test.
- Details: Enter all required PayPal account details.
- Fee Management: Option to automatically deduct PayPal fees.
- Save & Activate: Once configured, the system is enabled to accept PayPal payments.
- Configuration Options:
-
Key Benefits:
- Simplified payment processing.
- Flexible fee management.
-
PayPal IPN: Enable Instant Payment Notification (IPN) to use MassPay or to send money from the PayPal portal without using your site.
This also notifies the system of incoming PayPal payments, and we can top up based on that notification.
-
Functionality:
- Operates in the reverse direction compared to Express Checkout.
- Requires you to log into your PayPal account and enter a specific detail.
-
Notification Workflow:
- When a customer makes a payment (via mass pay or send money), PayPal sends a request to the server.
- The system then logs back into PayPal to verify the transaction.
-
-
Additional Settings:
- Specify which currencies to accept.
- Option to deduct PayPal fees.
- Automatically top up the customer’s account when funds are received.
-
Key Benefits:
- Real-time payment verification.
- Increased security and accuracy in transaction processing.
-
Stripe: Possibly the world's best credit card processor, Stripe; we can help with its availability on the portal. It enables streamlined credit card processing
-
Duo Security: Duo Security provides 2FA (2 Factor Authentication) via an out-of-band push notification to your mobile device to approve login.
It also provides fingerprint authentication for extra security.
- Functionality:
- Sends push notifications to mobile devices.
- Deployable for individual sites to secure customer accounts.
- Functionality:
-
Moneris: Moneris is a Canadian Credit Card Processing service.
-
ScriptForge: ScriptForge is the ConnexCS JavaScript Sandbox environment, where you can write drivers to intermediate connectivity to a large variety of providers.
-
Razor Pay: Razor Pay is a large payment processor from India.
-
Xero: Utilising any domestic bank account, Xero Pay with Wise enables you to pay all your vendors through Xero and reconcile transactions.
-
Paystack: With the help of Paystack, you may take payments from clients using a variety of methods, including cards, mobile money accounts, QR codes, bank account direct deposits, and USSD.
-
PayMongo: With the help of PayMongo, your company can conveniently take payments from customers using credit cards, e-wallets, and over-the-counter transactions.
-
NOWPayments: With the support for auto coin conversion and the ability to take payments in over 75+ cryptocurrencies, NOWPayments is a non-custodial cryptocurrency payment gateway enabling users to accept payments in any coin they choose.
-
Emetec: Emetec provides Merchant services, Payments processing, eCommerce Payment Gateway, Real-Time-Payments, Online Transfers.
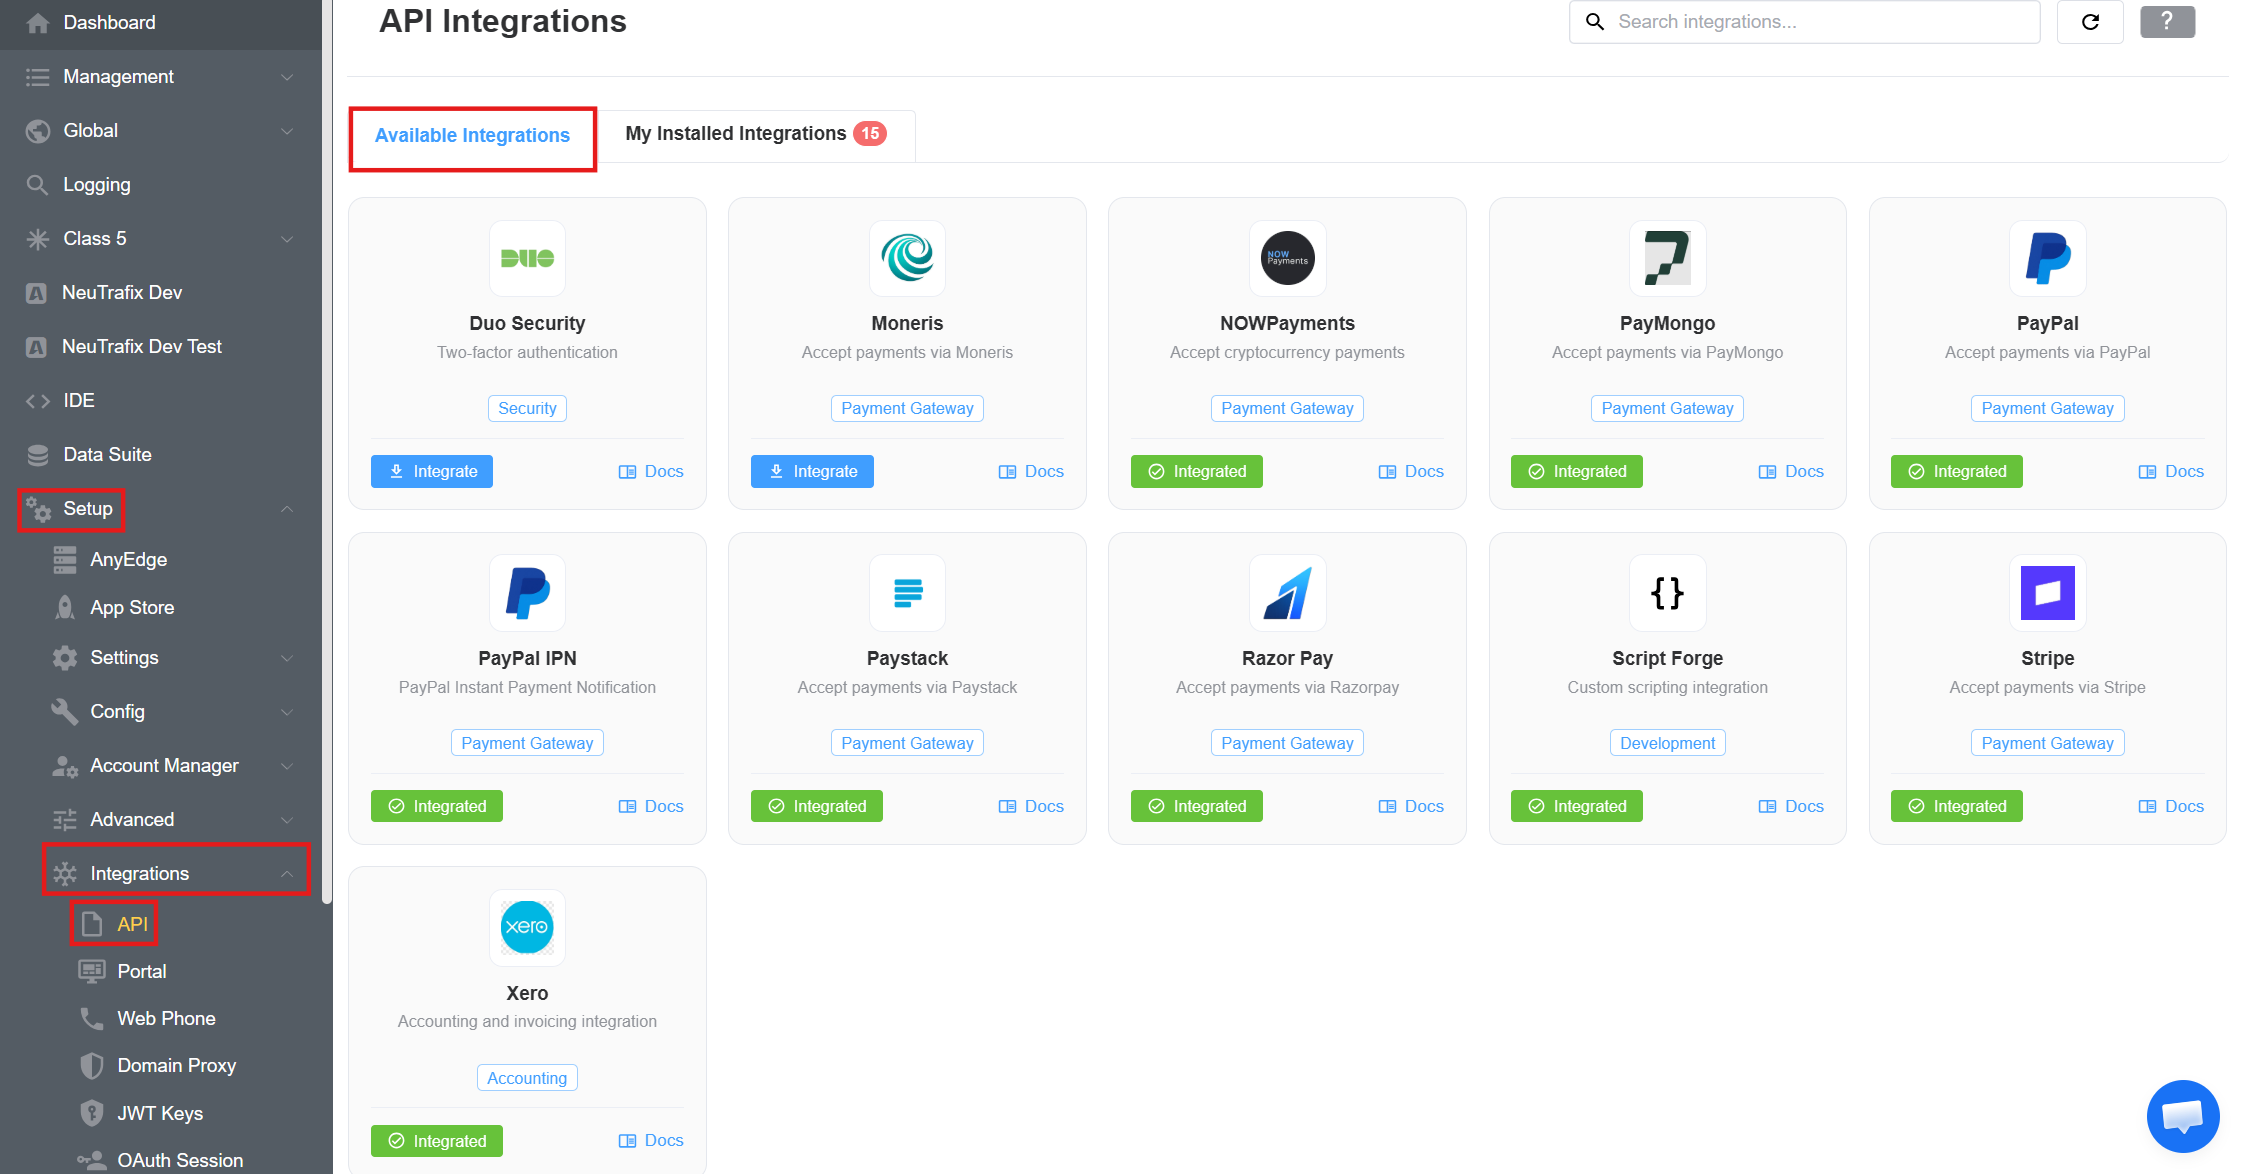
Enable API Integration
- Login to your Control Panel.
- Navigate to Setup Integrations API.
-
Select the required service from the available options.
-
Complete the available fields (see individual API integrations below for details for each provider).
- Click
Save.
API Service details
Each service requires different details.
You can find these using your account with the specific provider(s).
Compare PayPal Options
Mass Payment is a bulk payment method that sends funds in an uploaded file to PayPal, allowing the sender to pay less than the standard PayPal fees using their bulk order discounts.
Since this payment doesn't trigger anything in our VoIP system, we link into PayPal's IPN to accommodate notifications and balance sheet updates.
Mass Pay vs Express Checkout
Use this comparison chart to decide between Mass Pay and Express Checkout with PayPal.
| Mass Pay | Express Checkout |
|---|---|
| PayPal's website receives an upload of a CSV (Comma-Separated Values) | Made through customer portal |
| Slightly lower transaction fees | Standard PayPal fees (about 3.4% + $0.30) |
| Sender pays the fee | Recipient pays the fee |
| Sender pays a 2% transaction fee, capped at $1 per payment | Recipient pays by per-transaction deductions |
| Uses PayPal IPN | Uses PayPal API Signature |
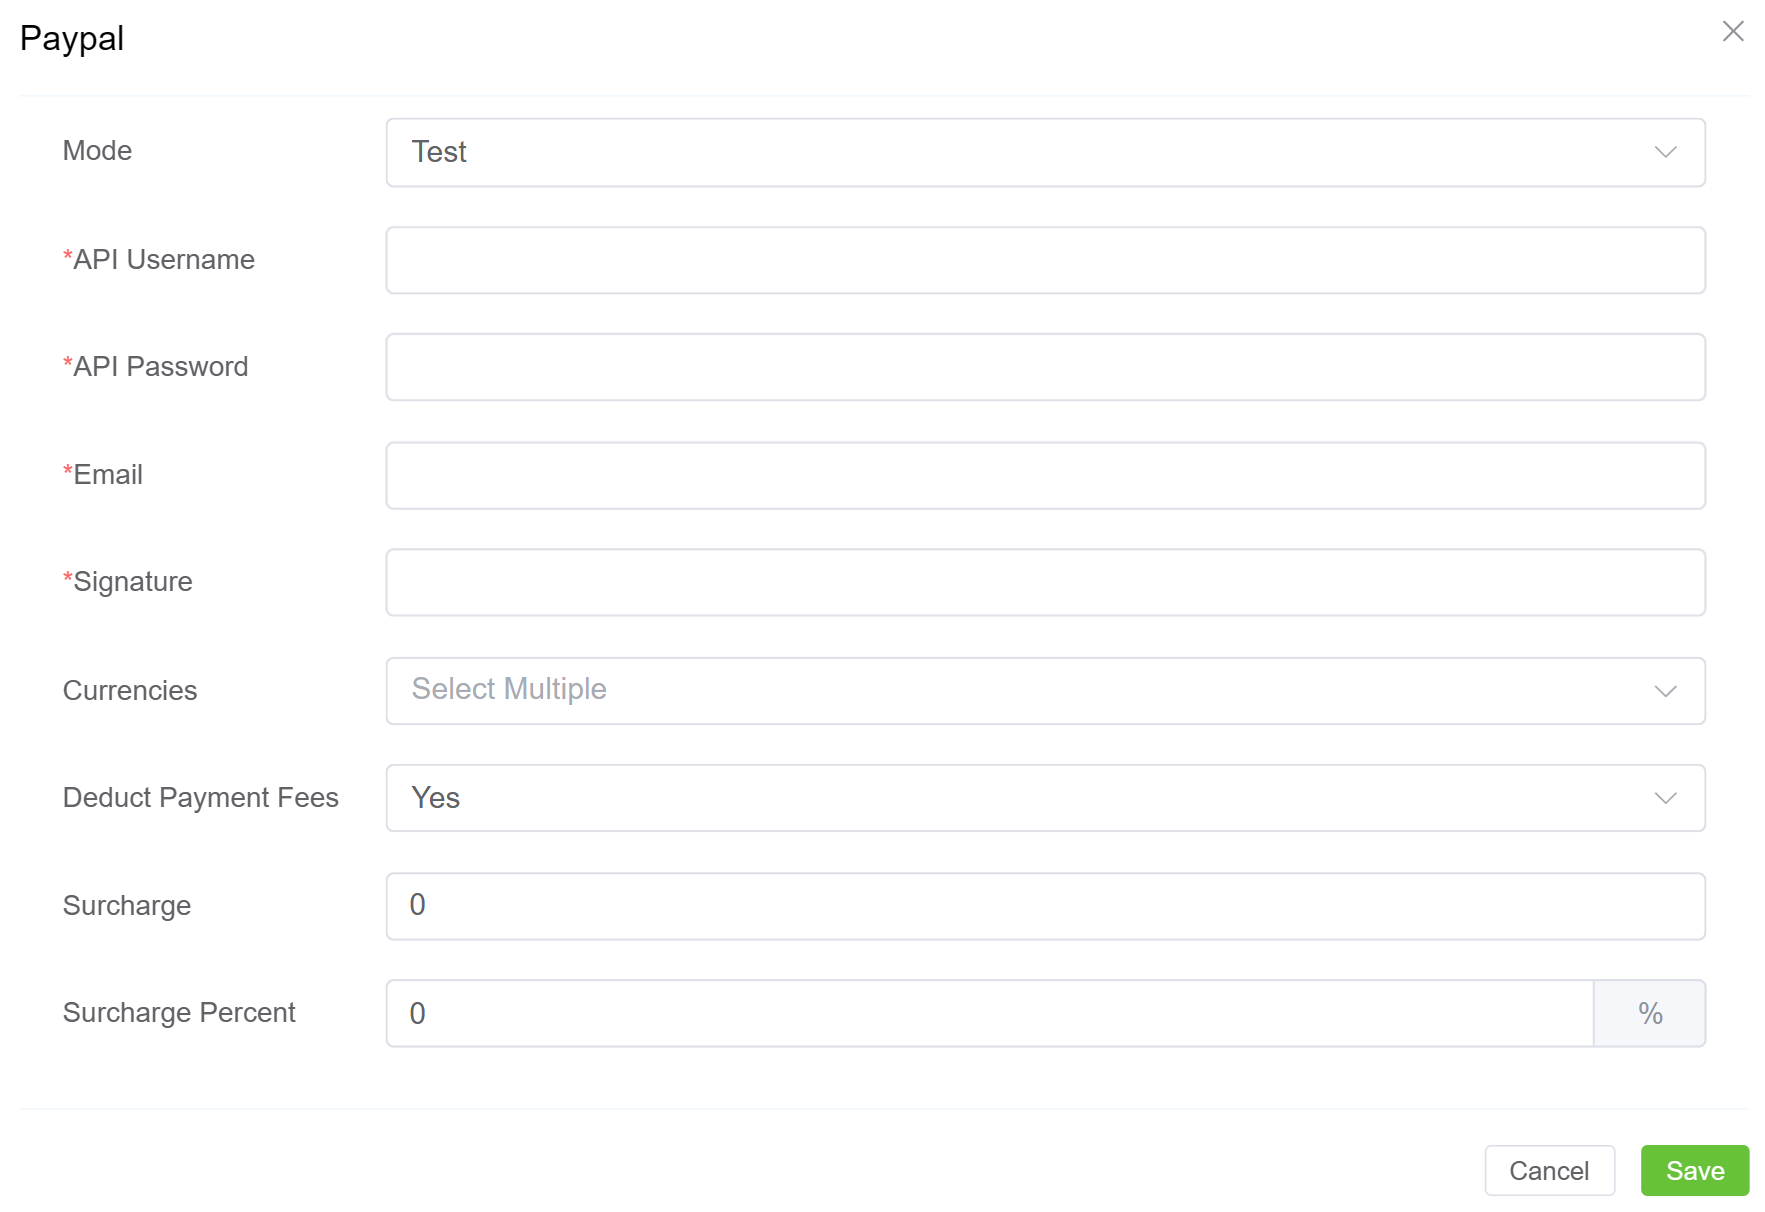
PayPal Express Checkout Integration
Enter your PayPal account information.
- Click
Integrateunder the PayPal option. A window will appear prompting you to complete the various fields. - Mode: Use
Testfor testing connections orLivefor an active account. -
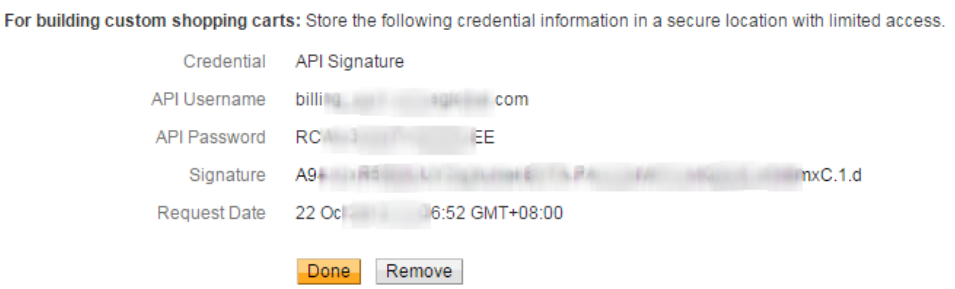
To find your Username, Password, and Signature:
- Access your PayPal account and navigate to Settings Account Settings Account Access.
- Click
Updatefor API Access. - In NVP/SOAP API integration (Classic) section, select Manage API Credentials
(NVP: Name-Value Pair, SOAP: Simple Object Access Protocol)
- Select Request API signature, and then click
Agree and Submit. - Copy the API Username, API Password, and Signature credentials from this page into the open PayPal form in ConnexCS.
-
Currency: Select one or more currencies that you will accept.
- Deduct Payment Fees: Set whether you will deduct the fees or not.
- Surcharge: A fixed amount added to the invoice total for PayPal transactions.
- Surcharge Percent: A percentage-based amount added to the invoice total for PayPal transactions.
- Click
Save.
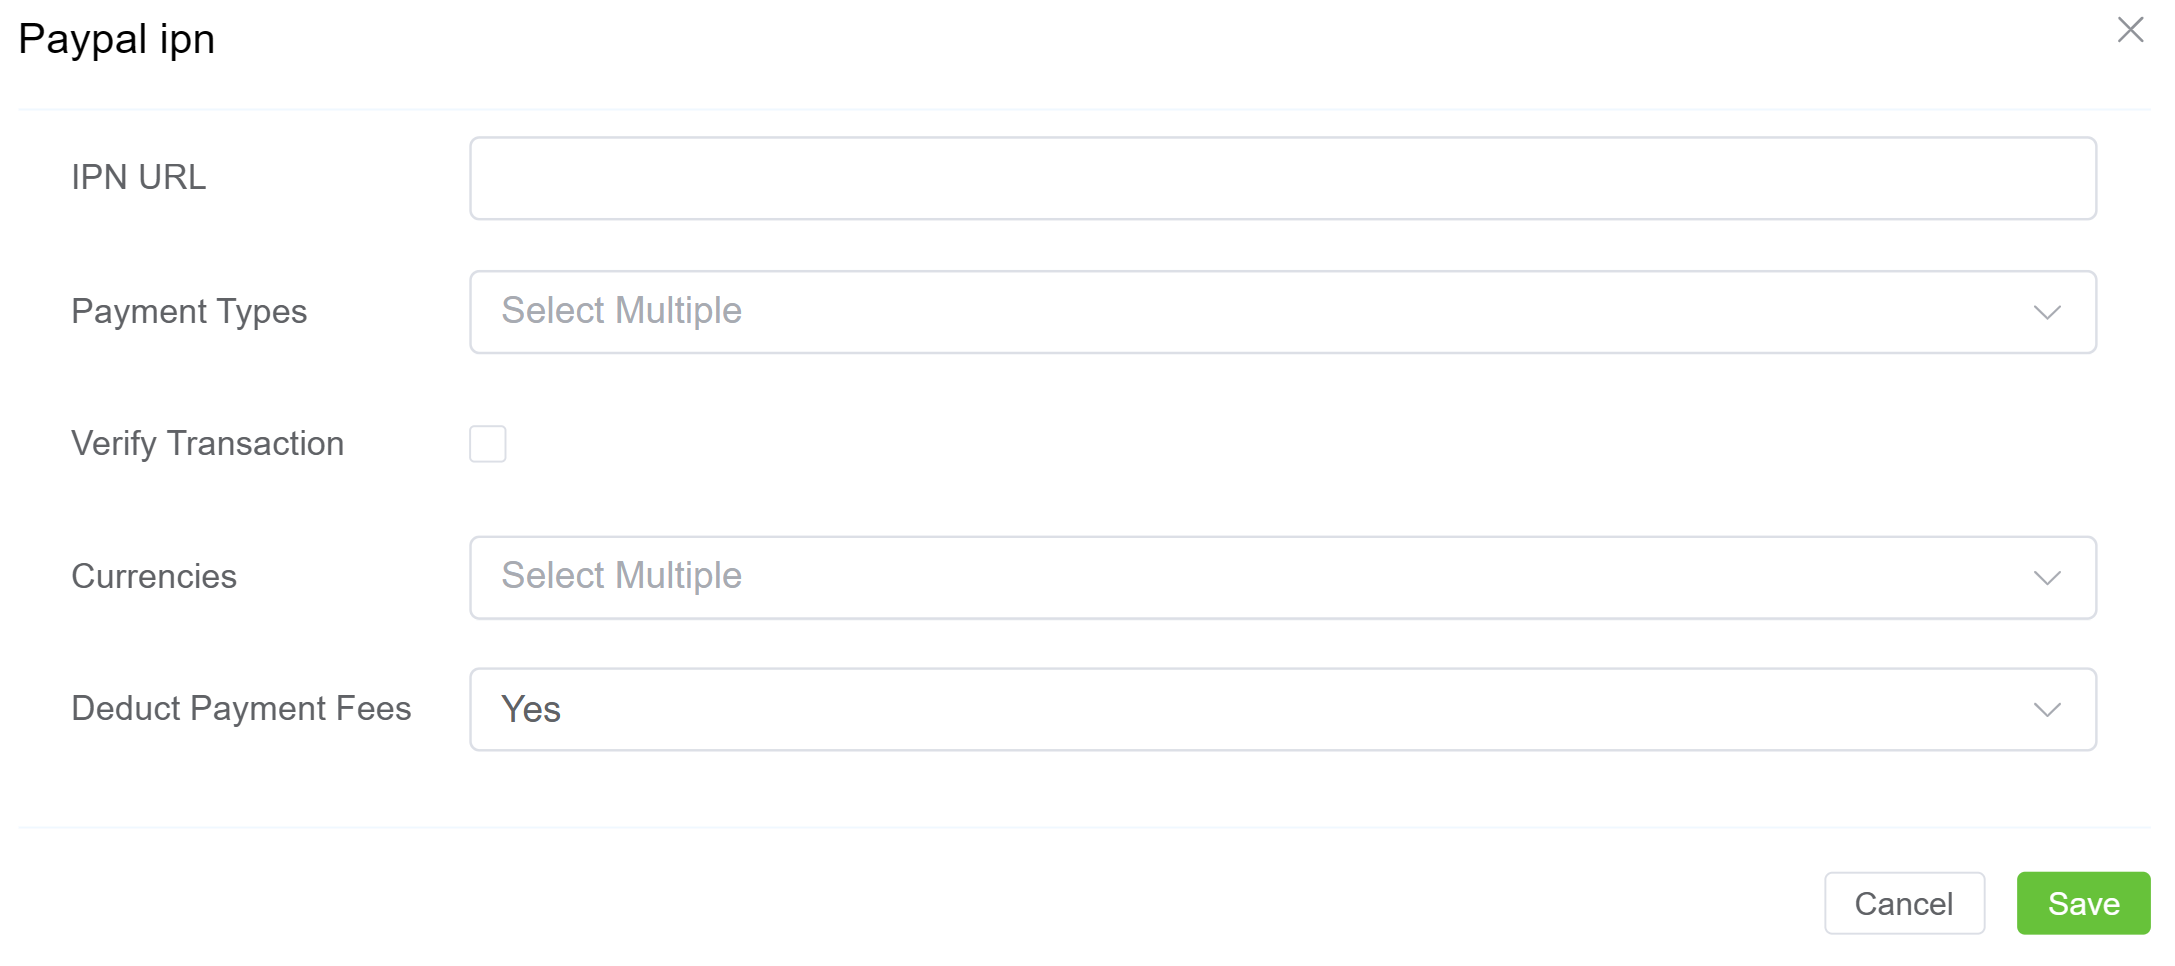
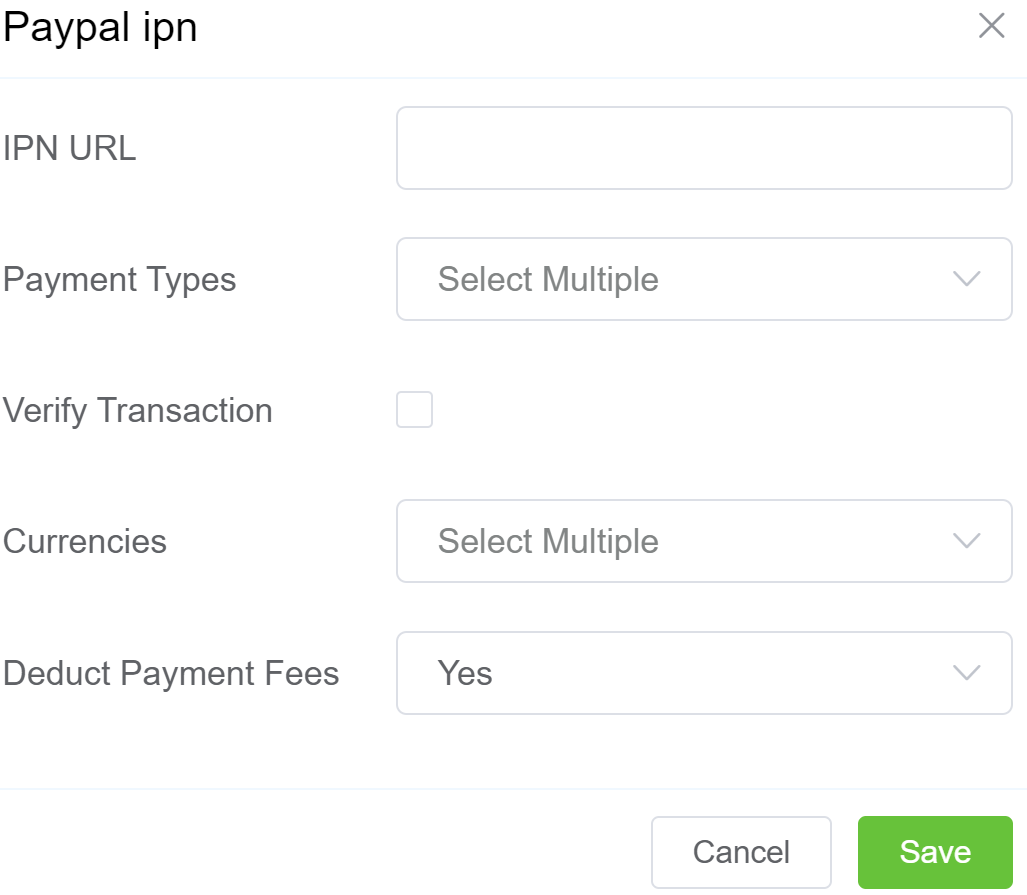
PayPal IPN Integration
PayPal's Instant Payment Notification (IPN) is a service that provides notifications for PayPal transactions.
Automation of Bulk payment processes uses IPN messages, where consumers still send PayPal payments as usual.
Payments made using this integration will automatically top up the customer's account in ConnexCS.
For this to work, you need to configure the settings on the ConnexCS control panel and in PayPal.
Configure PayPal IPN
Steps to configure IPN:
Step 1: Configure ConnexCS
- Click
Integrateunder the PayPal IPN option. A window will appear prompting you to complete the various fields. - Update the following:
- IPN URL: You should never revise this; it's required later to complete the integration.
- Payment Type: Select "Mass Pay" (described above) or "Send Money" (fees may apply).
- Verify Transaction: If selected, ConnexCS will check with PayPal to make sure the transaction is correct.
- Currency: Select one or more currencies that you will accept.
- Deduct Payment Fees: Set whether you will deduct the fees or not.
- Click
Save. - To find the IPN URL (needed later in configuration), open the
paypal_ipnnow listed in API.
Step 2: Identify your IPN listener to PayPal
After you have configured ConnexCS, add it to your PayPal account (taken from PayPal support here).
- Login to a PayPal Business Account (must be a Business account, not a regular PayPal account).
- Navigate to Settings Account Settings Notifications.
- Select Update next to Instant payment notifications.
- Click Choose IPN Settings.
- Enter the IPN URL under Notification URL and select Receive IPN Messages (Enabled),and then click Save.
- Fill in the settings, and then copy the API URL.
Configure Customer with PayPal Email address
The following are instructions on how to add a PayPal Email address to a ConnexCS customer account:
- Navigate to Management Customer [Customer name].
- In Contacts, click .
- Enter the customer's Name and PayPal email address, and then click
Save. - From the customer's main page, select Edit Config.
- Enter the customer's PayPal email ID and click
Save.
View PayPal IPN Payment Log
You can view these payments under Setup Information Payment Log.
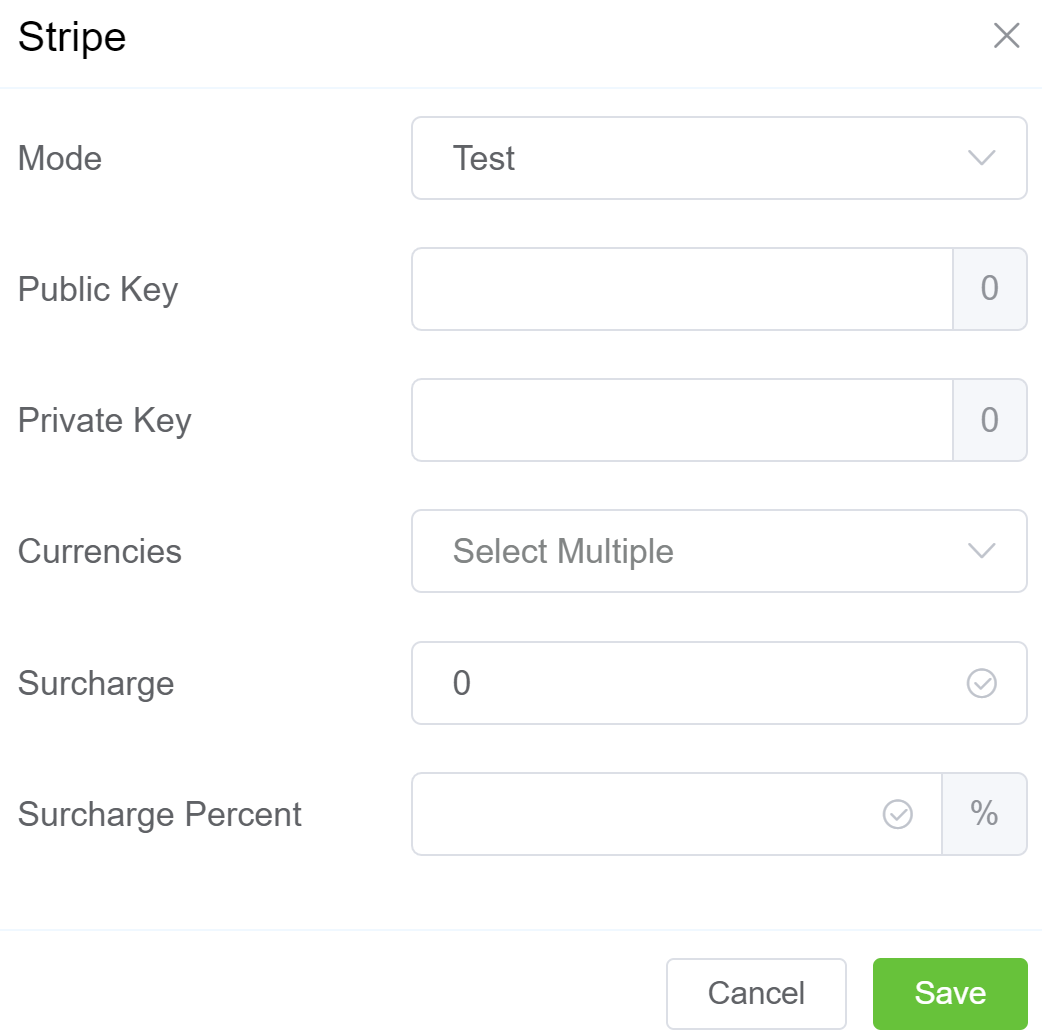
Stripe Integration
Configure the Stripe API Keys in ConnexCS:
- Click
Integrateunder the Stripe option. A window will appear prompting you to complete the various fields. - Mode: Use
Testfor testing connections orLivefor an active account. - Public Key (Publishable) and Private Key (Secret): Access the Stripe Dashboard (login if necessary) to access your keys (from Stripe Support;
Testkeys are also found in that link). - Currencies: Select one or more currencies that you will accept.
- Surcharge: Amount charged for each transaction.
- Surcharge Precent: It's the percentage of the total charge that's added as an extra fee.
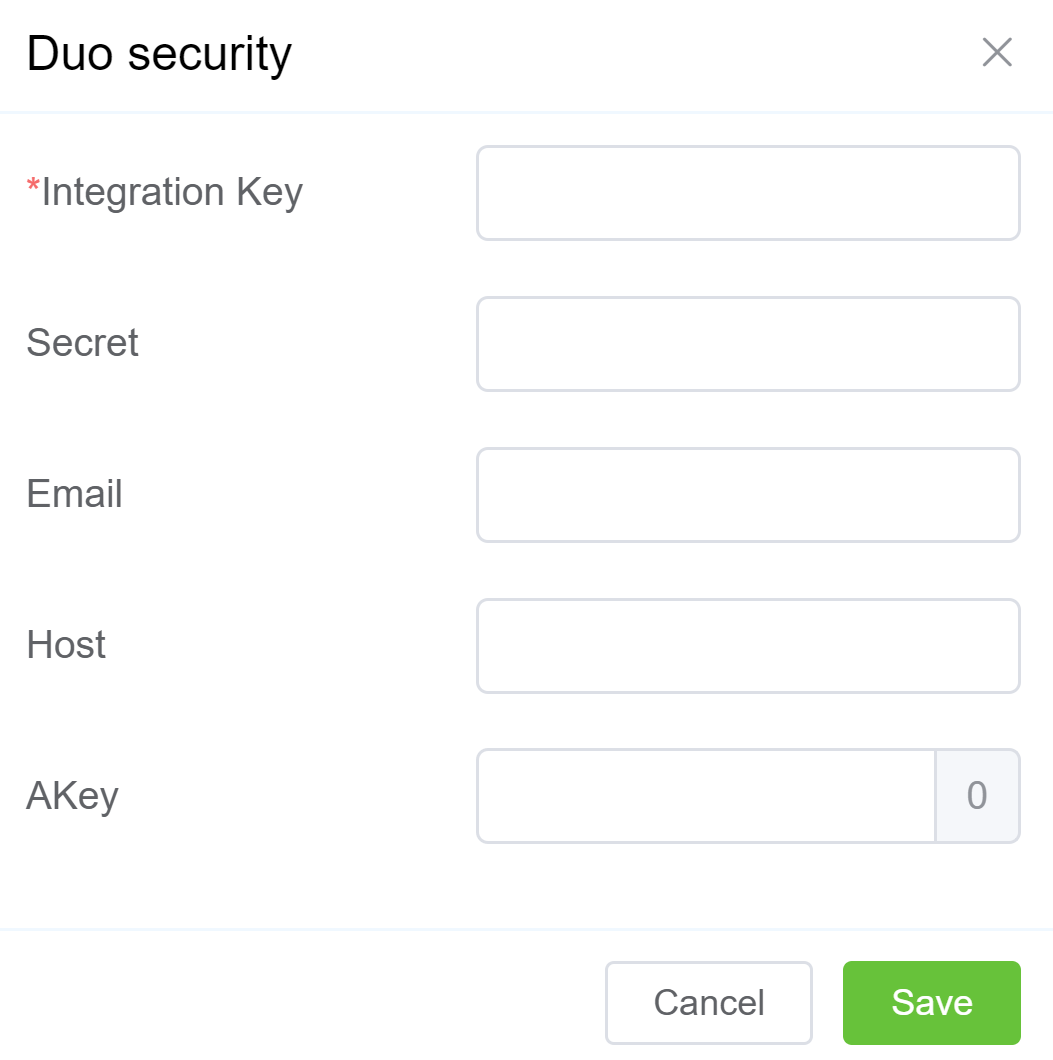
Duo Security Integration
Configure Duo Security Settings in ConnexCS:
- Click
Integrateunder the Duo Security option. A window will appear prompting you to complete the various fields. - Integration Key, Secret, and Host: Access the Duo Admin Panel, locate the
Auth API, clickProtect(from Duo Auth support). Find the Integration Key, Secret Key, and API Hostname to complete setup in ConnexCS. - AKey (Application Key): It's a secret key that's used to authenticate your application with Duo Security. You will need to provide the AKey to Duo Security when you configure your application to use Duo Security.
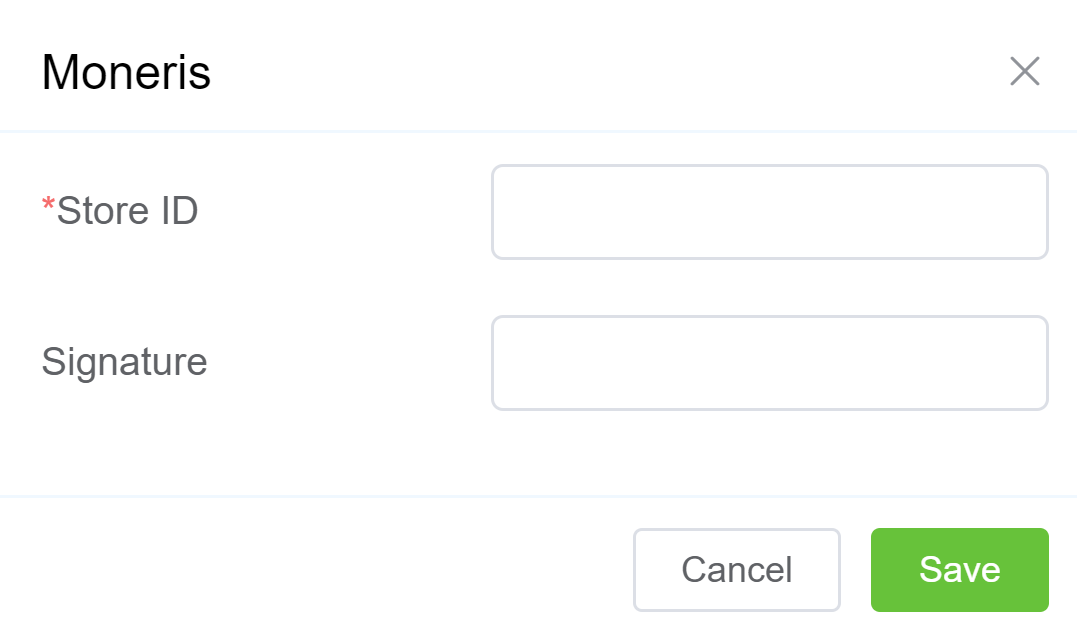
Moneris Integration
Link Moneris to ConnexCS:
- Click
Integrateunder the Moneris option. A window will appear prompting you to complete the various fields. - Store ID: You can find this in the MRC Welcome emails (contact Moneris for help finding it).
- Signature: It's used to verify the identity of the cardholder to prevent frauds.
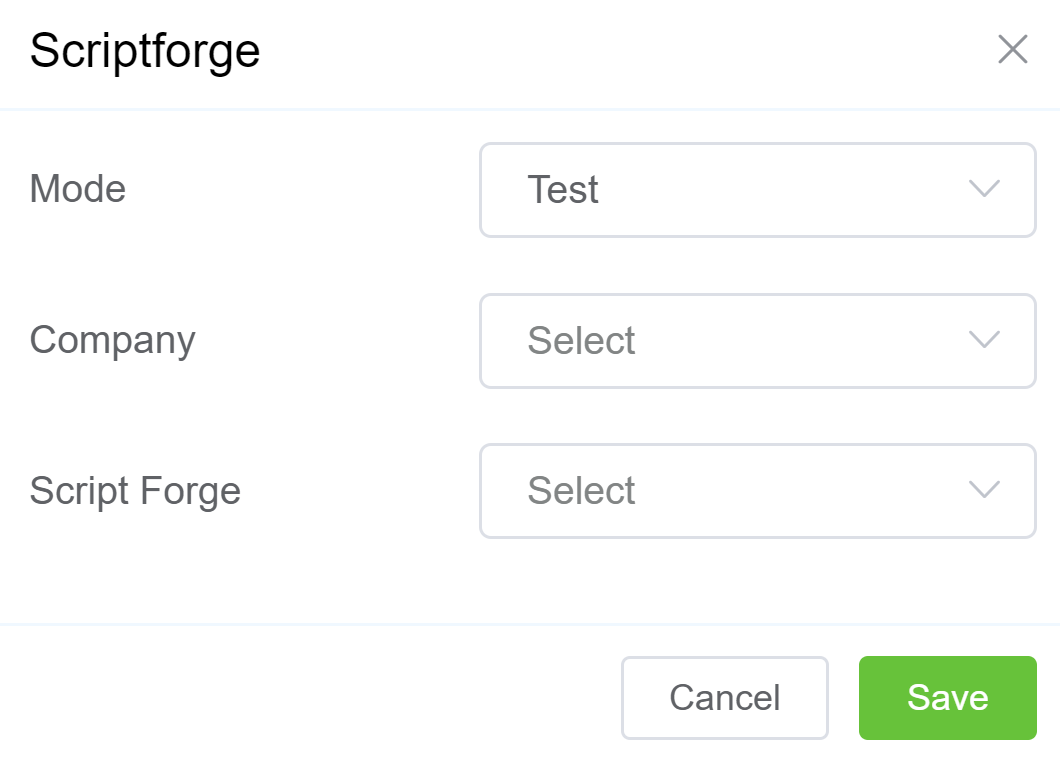
Scriptforge Integration
Usage:
-
Allows selection of a company from the list of carriers
-
Facilitates linking integrations to DID drivers.
-
Supports connection to an individual ScriptForge instance (e.g., as a DID provider).
Key Benefit:
- Streamlines the process of linking carrier information for DID driver functionality.
Configure Scriptforge Settings in ConnexCS:
- Click
Integrateunder the Scriptforge option. A window will appear prompting you to complete the various fields. - Mode: Use
Testfor testing connections orLivefor an active account. - Company: Select the customer to integrate.
- Script Forge: Select the predefined script (details found under Developer Scriptforge).
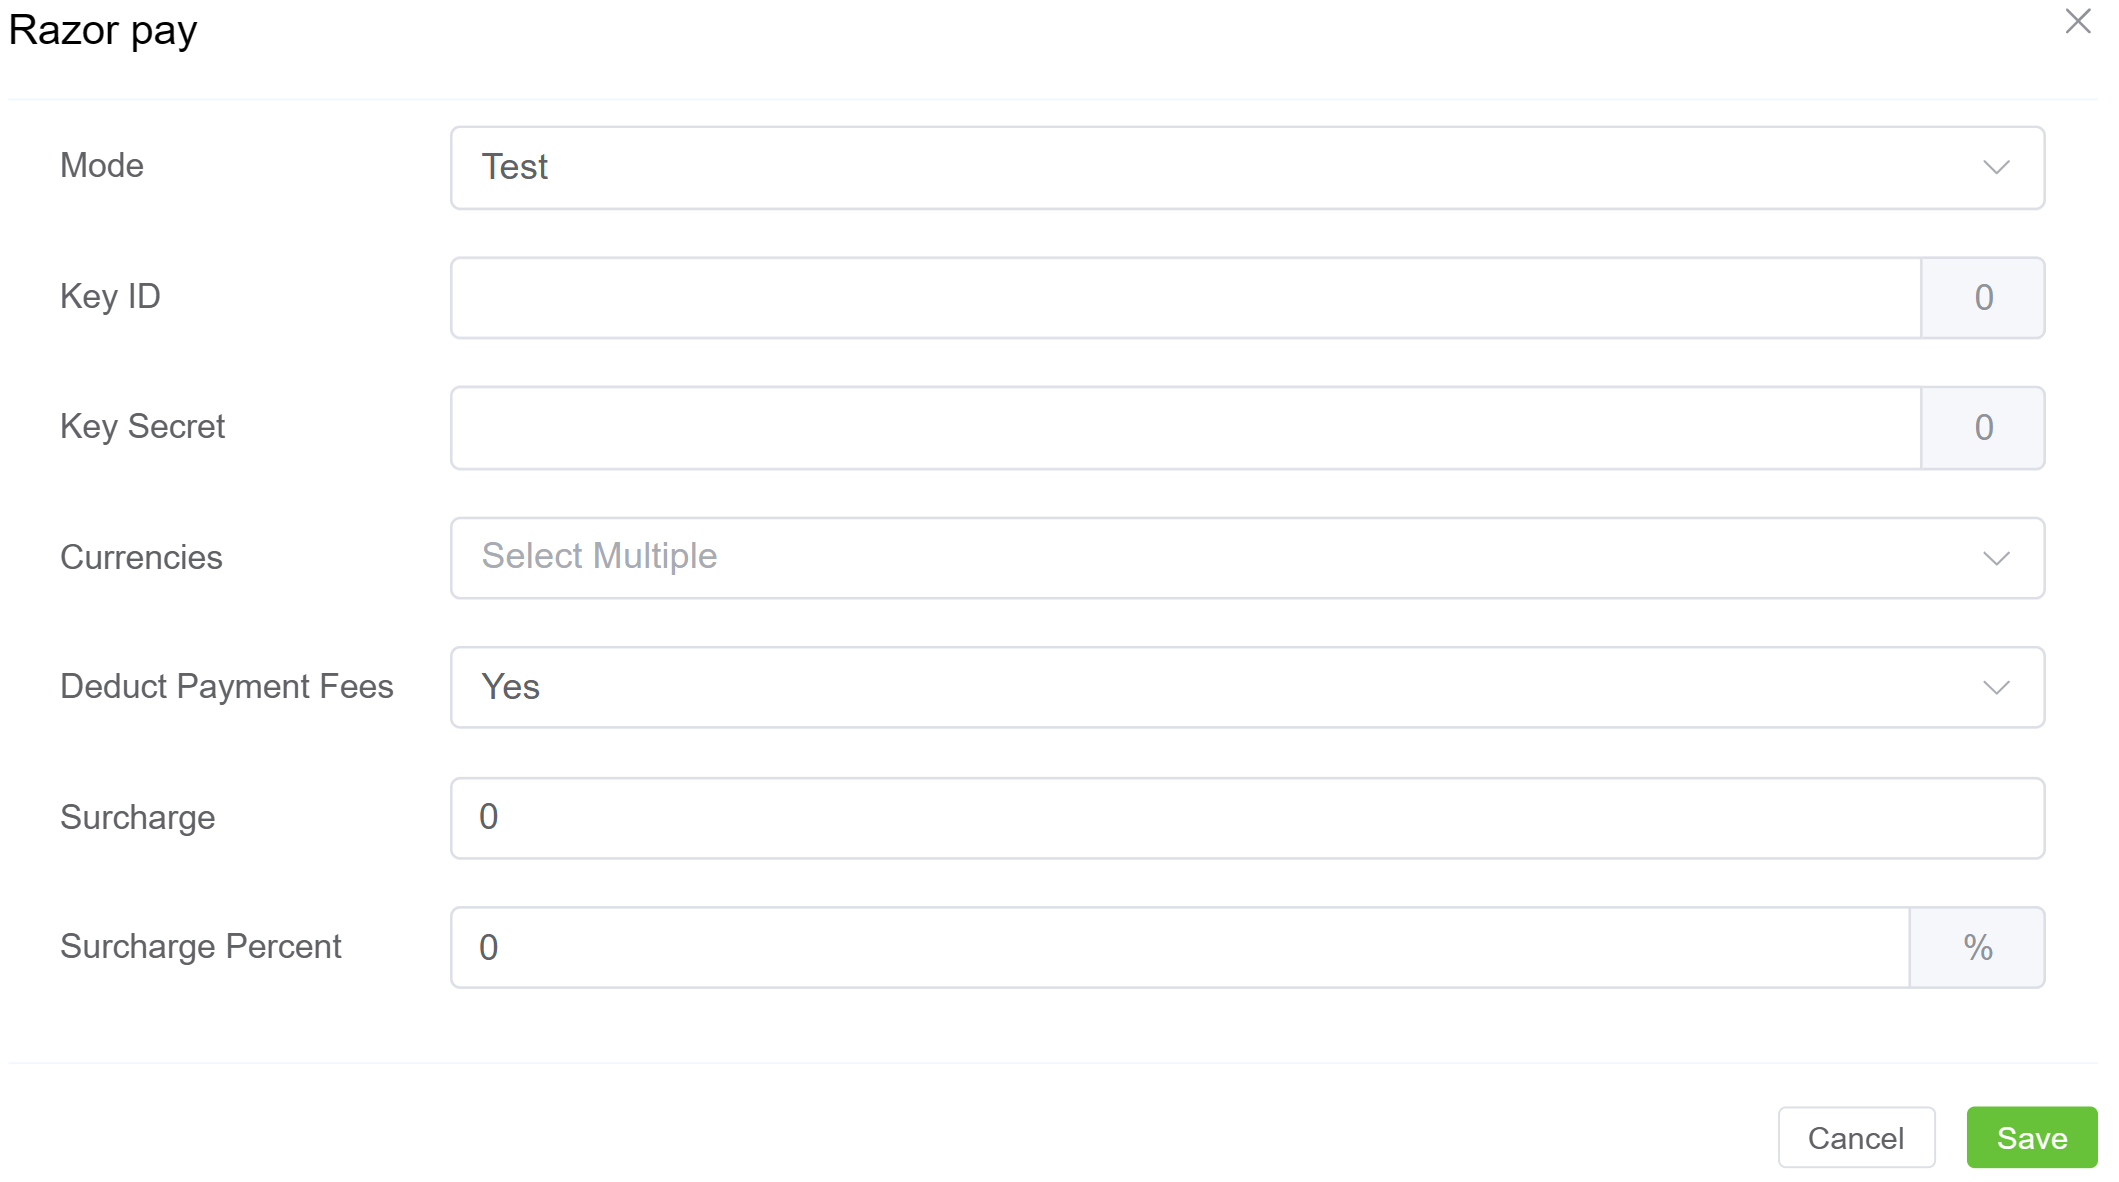
Razor Pay Integration
Enter Razorpay settings into ConnexCS:
- Click
Integrateunder the Razor Pay option. A window will appear prompting you to complete the various fields. - Mode: Use
Testfor testing connections orLivefor an active account. - Key ID and Key Secret: Access the Razorpay Dashboard, go to Settings and Generate Test Key (from Razorpay support)
- Currency: Select one or more currencies that you will accept.
- Deduct Payment Fees: Set whether you will deduct the fees or not.
- Surcharge: A fixed amount added to the invoice total for Razor Pay transactions.
- Surcharge Percent: A percentage-based amount added to the invoice total for Razor Pay transactions.
Xero Integration
Coming soon
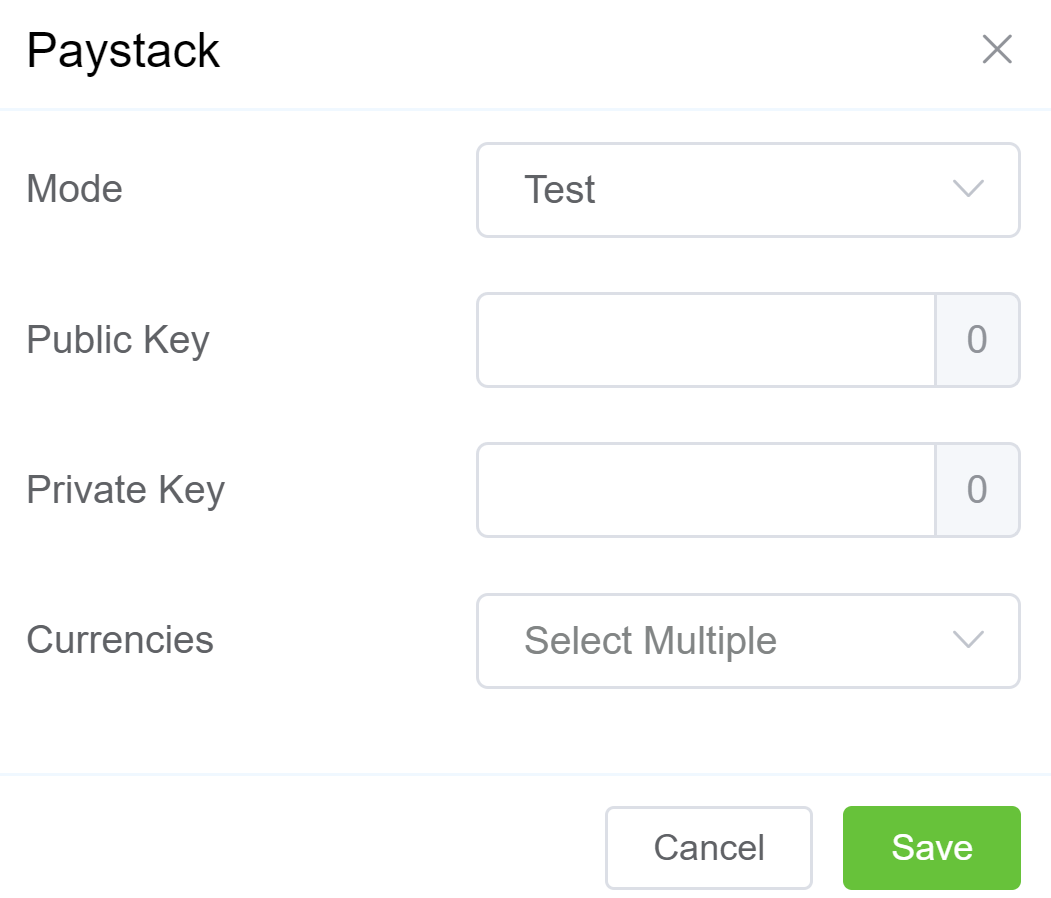
Paystack Integration
Configure the Paystack Payment settings in ConnexCS:
- Click
Integrateunder the Paystack option. A window will appear prompting you to complete the various fields. - Mode: Use Test for testing connections or Live for an active account.
- Public Key (Publishable) and Private Key (Secret): Access the Paystack Support Link to access the Test keys and Live keys.
- Currencies: Select one or more currencies that you will accept.
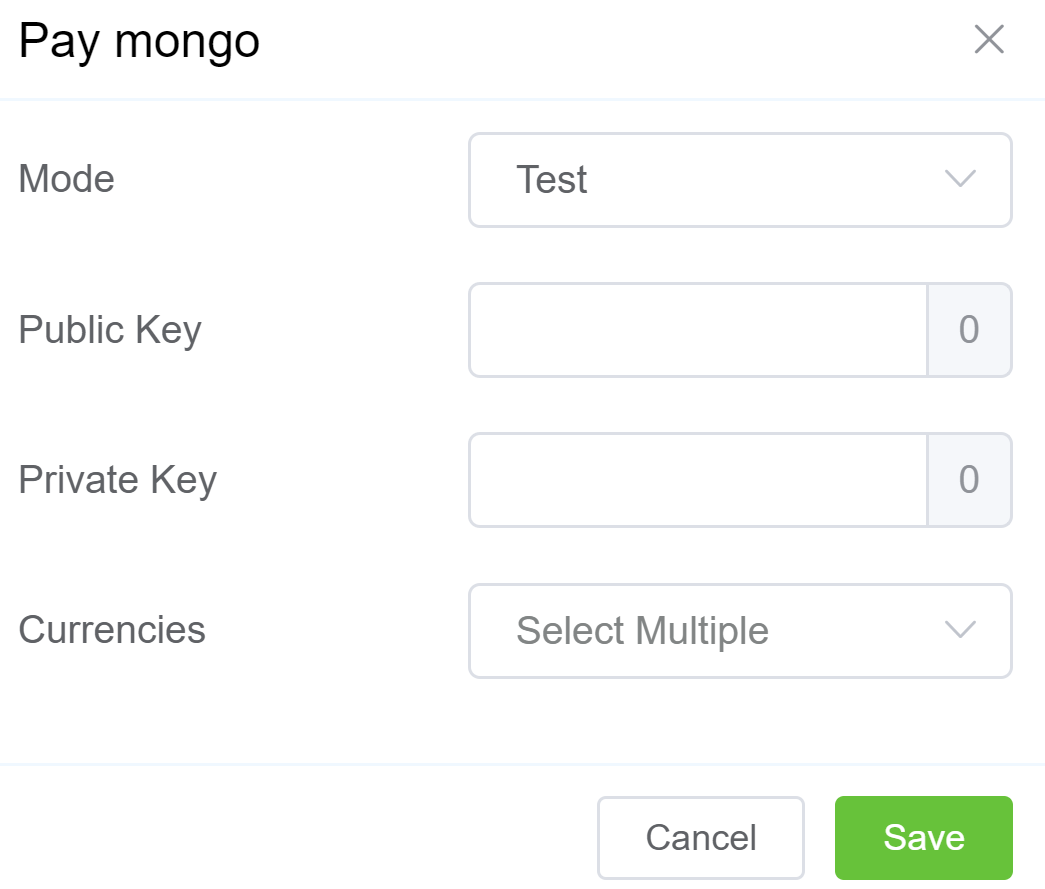
PayMongo Integration
Configure the PayMongo Payment settings in ConnexCS:
- Click
Integrateunder the PayMongo option. A window will appear prompting you to complete the various fields. - Mode: Use Test for testing connections or Live for an active account.
- Public Key (Publishable) and Private Key (Secret): Access the PayMongo API Reference Guide to retrieve the Secret keys.
- Currencies: Select PHP (Philippine Peso) as the currency.
NOWPayments Integration
Configure the NOWPayments settings in ConnexCS:
- Click
Integrateunder the NOWPayments option. A window will appear prompting you to complete the various fields. - Mode: Use Test for testing connections or Live for an active account.
- API Key: Access the NOWPAyments API Reference Guide to retrieve the Secret keys.
- IPN Key: Access the IPN Key guide.
- Currencies: You have several curriencies to choose from.

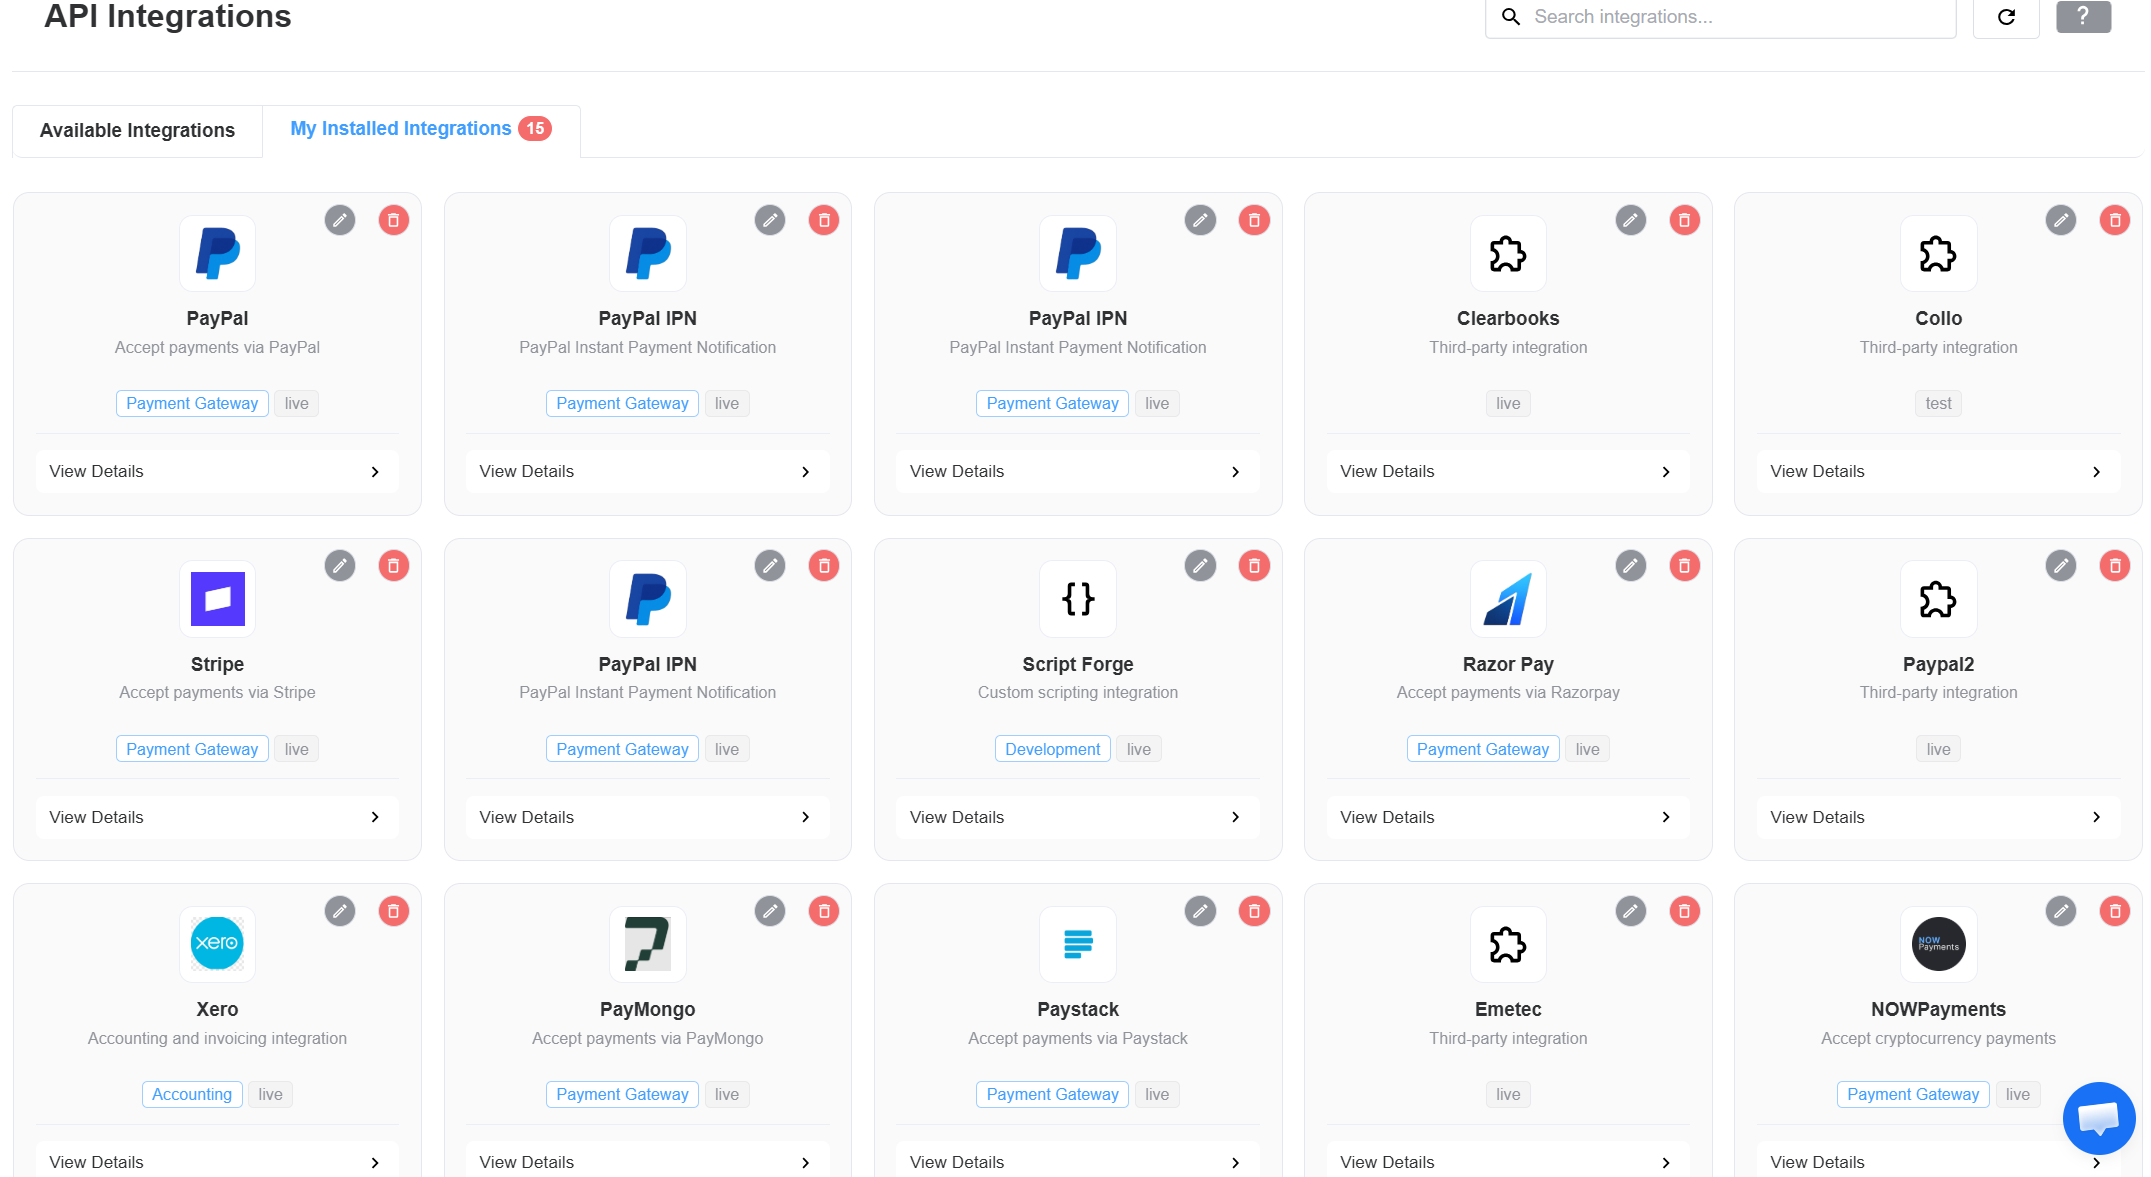
Installed Integrations
The Integrated APIs can be seen under the My Installed Integrations tab.