Call Center
Document Metadata
Category: Class 5 Services / Call-Center Queuing & Agent Management
Audience: Administrators, Engineers, Support Team
Difficulty: Intermediate
Time Required: Approximately 45–90 minutes
Prerequisites: Active ConnexCS account with Class 5 module access; familiarity with call-queue concepts, agent grouping, and telephony queuing logic
Related Topics: Class 5 Apps & Workflow Builder, Class 5 Conference Bridge Setup
Next Steps: Navigate to
Class 5 → Call-Center, define queue parameters (name, server, time-base scoring, tiers), assign customers and agents, set maximum wait times and abandoned-call handling; test with live calls and monitor queue behaviour and agent metricsClass 5 Call-Center
This feature is presently in Alpha Version. We're working on it. Please contact us for any queries. At present this feature is non-configurable.
Introduction
Utilizing a variety of scenarios and criteria, the Call-Center feature distributes calls to agents. It distributes incoming calls according to a score-based approach. Every second a caller waits raises his score by 1.
You can either remove the wait time from a queue or add a basic score to help callers jump to the front of it.
The call center program features a tiered approach for establishing various agent "priorities" as required.
It utilizes the first-in, first-out (FIFO) queuing system. The mod_fifo makes managing incoming call queues much easier.
Steps to Create a Call-Center
-
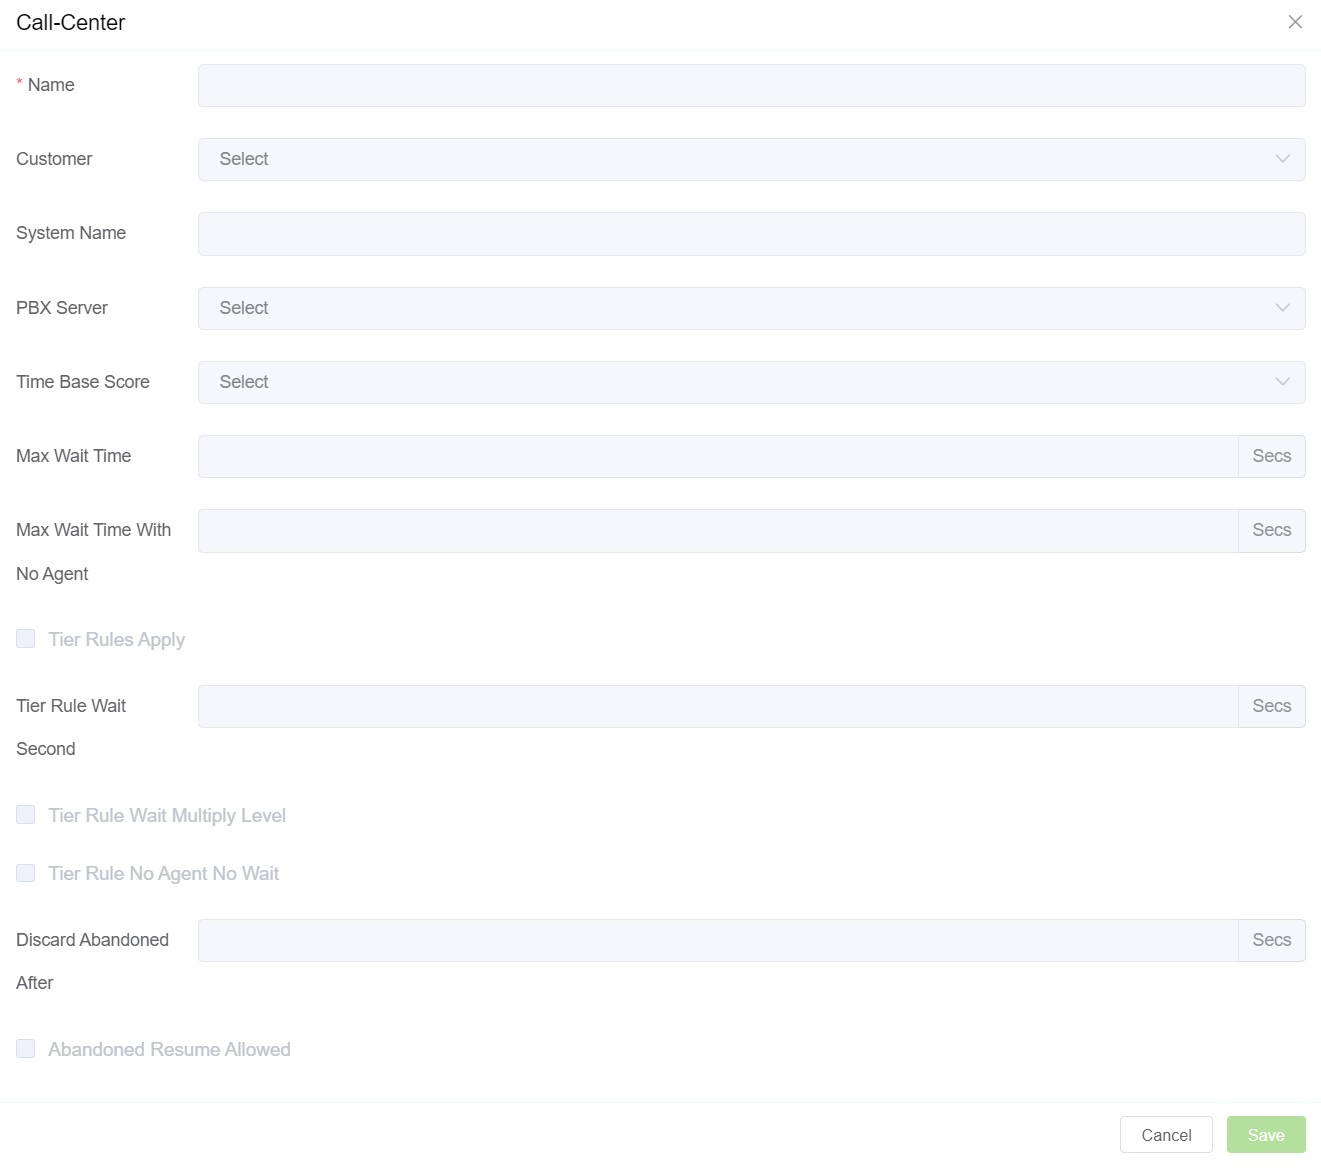
Go to Class 5 Call-Center and you will see a window with various fields as shown in the figure below.
-
Configure the Call-Center by filling in the fields
- Name: Enter the name you want for the cal-center.
- Customer: You can enter one or more customers who wish to use this feature.
- System Name: It has a list of servers dedicated to the customers. Once a server is dedicated to the customer, the PBX Server will be handling that call.
- PBX Server: Select the PBX Server for the call. The Distributed (Default) server will assign you a server near your location.
- Time base Score: When a caller enters a queue, the total number of seconds they have been in the system can be added to the base value. This score enables a specific customer to move forward with respect to other customers. The time base score parameter in a queue can be set as a queue when the base score counts only the time the caller is in this queue or as the system when the base score accounts for the total time of the call.
- Max Wait Time: It's defined as a delay in seconds before we quit the call center application if the member hasn't been answering the calls by the agent. It can also be used to send calls to a voicemail if the wait time is too long.
- Max Wait Time with No Agent: It defines the amount of time (in seconds) when the queue has to be empty without logged-in agents irrespective of whether they're on calls or not before all customers are disconnected. This feature helps protect the members from their removal if all the agents are logged off.
- Tier Rules Apply: You can choose this option to be either True or False. It defines if we should apply the following tier rules when a caller advances through a queue's tiers. If it's selected to be false, they will use all tiers with no wait.
- Tier Rule Wait Second: It's defined as the time (in seconds) the caller has to wait before moving to a new tier. It can be used with options:
- Tier Rule Wait Multiply Level: It can be selected as either True or False. If you choose True, then the tier level will be multiplied by the Tier Rule Wait Second and the caller also has to wait on every tier Tier Rule Wait Second before moving to the next tier. If you choose False, then after the Tier Rule wait second (time) has passed, all the tiers are open to calls in the order of their level or position.
- Tier Rule no Agent no Wait: You can choose from True or False. If you choose True, callers will skip tiers that don't have agents available. If you select False, they're required to wait before moving to the next tier. Agents must be logged off to be considered unavailable.
- Discard Abandoned After: If you choose this option it will remove the abandoned member from the queue after the prescribed time (in seconds). This can be used with the following option:
- Abandoned Resume Allowed: You can choose it to be either True or False. If you choose True, a caller who has abandoned the queue can re-enter and resume their previous position in that queue. To maintain their position in the queue, the member shouldn't have been abandoned for longer than the number of seconds defined in Discard Abandoned After.
-
Click on Save to complete the Call Center configuration.
⚠️ Note: This is a basic PBX queueing feature. For advanced contact center capabilities (campaigns, scripts, leadsets), refer to the Contact Center (Apps Platform).