Customer
Document Metadata
Category: Customer Account Management
Audience: Administrators, Engineers, Support Team
Difficulty: Intermediate
Time Required: Approximately 45–90 minutes
Prerequisites: Active ConnexCS account with appropriate “Customer” module access in the Control Panel
Related Topics: Customer Dashboard, Contacts, Portal Access, Documents / KYC
Next Steps: Create & Configure Customer, Bulk Customer Upload & Edit
Management Customer
Platform Intelligence
Before setting up your customers, let's take a moment to understand the powerful intelligence built into the ConnexCS platform.
ConnexCS stands out as an intelligent platform in the telecommunications domain through the integration of several sophisticated features.
At the core lies ASR+, a technology that continuously analyzes call data to identify and filter out known bad numbers. By learning from real-time call outcomes, ASR+ proactively prevents calls to unreachable destinations, minimizing wasted resources and significantly improving call success rates.
ConnexCS AnyEdge acts as a high-performance load balancer and traffic dispatcher. This intelligent component distributes traffic seamlessly across multiple SIP servers, ensuring optimal resource utilization and minimizing latency. AnyEdge also offers customizable call distribution rules, allowing businesses to prioritize critical calls and optimize routing for specific customer segments.
ConnexCS incorporates Spam Scout Scoring. By providing options to block calls based on spam score. Spam Scout effectively reduces the impact of spam calls on network resources and enhances the user experience.
Complementing Spam Scout is IPQS. It also blocks the calls based on the spam score. The spam score is provided by a third party IPQS.
By proactively managing traffic, enhancing call quality, and improving network security, ConnexCS empowers businesses to optimize their telecommunications operations, reduce costs, and deliver a superior customer experience.
The combination of intelligent capabilities positions ConnexCS as a leading-edge solution in the telecommunications industry, providing businesses with a competitive advantage in today's dynamic market.
Customer Functions
Customer
The Customer section allows you to add new customers to your account. It provides options to configure customer settings, manage KYC, handle billing, and perform various account management operations
You can organize ConnexCS Customers through customer cards.
How many customers can I add?
You can add unlimited customers, and we won't charge per customer, only on their individual usage.
Customer Dashboard
Before creating a new customer, let's review the elements available on the Customer Dashboard.
+: By clicking on + button we can add customer (see Create Customers below for details.)
Refresh: Refreshing the page, helpful when making edits or looking at real-time changes. This page is built as a web app, so some information will update automatically.
SQL: The SQL Query option allows you to run a query.
Bulk Upload: Upload several Customers at the same time, by importing a spreadsheet file (.csv file) into ConnexCS.
- Click
Bulk Upload, thenUpload, find your customer file, and then clickOpen. - Right-click on the second row and select Start Row to show the first line of data (the first row is typically column headers).
- Right-click on each column to Map Columns to appropriate fields.
- Once you have filled out all the required fields, click Upload to Server.
Note
-
Before uploading the .csv file, please ensure that it doesn't contain any exponential or scientific notations. The inclusion of the notations will result in errors.
-
You must include the Customer name and Currency as necessary columns in the.csv file for bulk uploading.
Bulk Edit: Select several customers, then click Bulk Edit to revise fields such as Channels, Status, Flow Speed (CPS), Portal Access, and Country.
Delete: Delete several customers at a time.
?: Link to the documentation of the current page.
Send: ConnexCS includes email and SMS support for your customers. Also send ConnexCS Referrals.
- Select several customers using the tick-box selector on the left side of each row. (Customers aren't visible to each other in the sent message.)
- Click on "Send" at the top right then choose email or SMS.
- Fill in the Subject line and body details and send.
- Emails sent FROM the email address gets populated in Setup > Settings, and TO every email address listed in Contacts for each customer.
- Each contact receives an SMS to their Mobile number.
- Refer ConnexCS: This feature allows you to send simple ConnexCS Referrals to you customers.
- You can send referrals to multiple Customers.
- You can select the Template from the drop-down list.
- Enter the Subject.
- Write the Body of the referral.
- Click on
Send.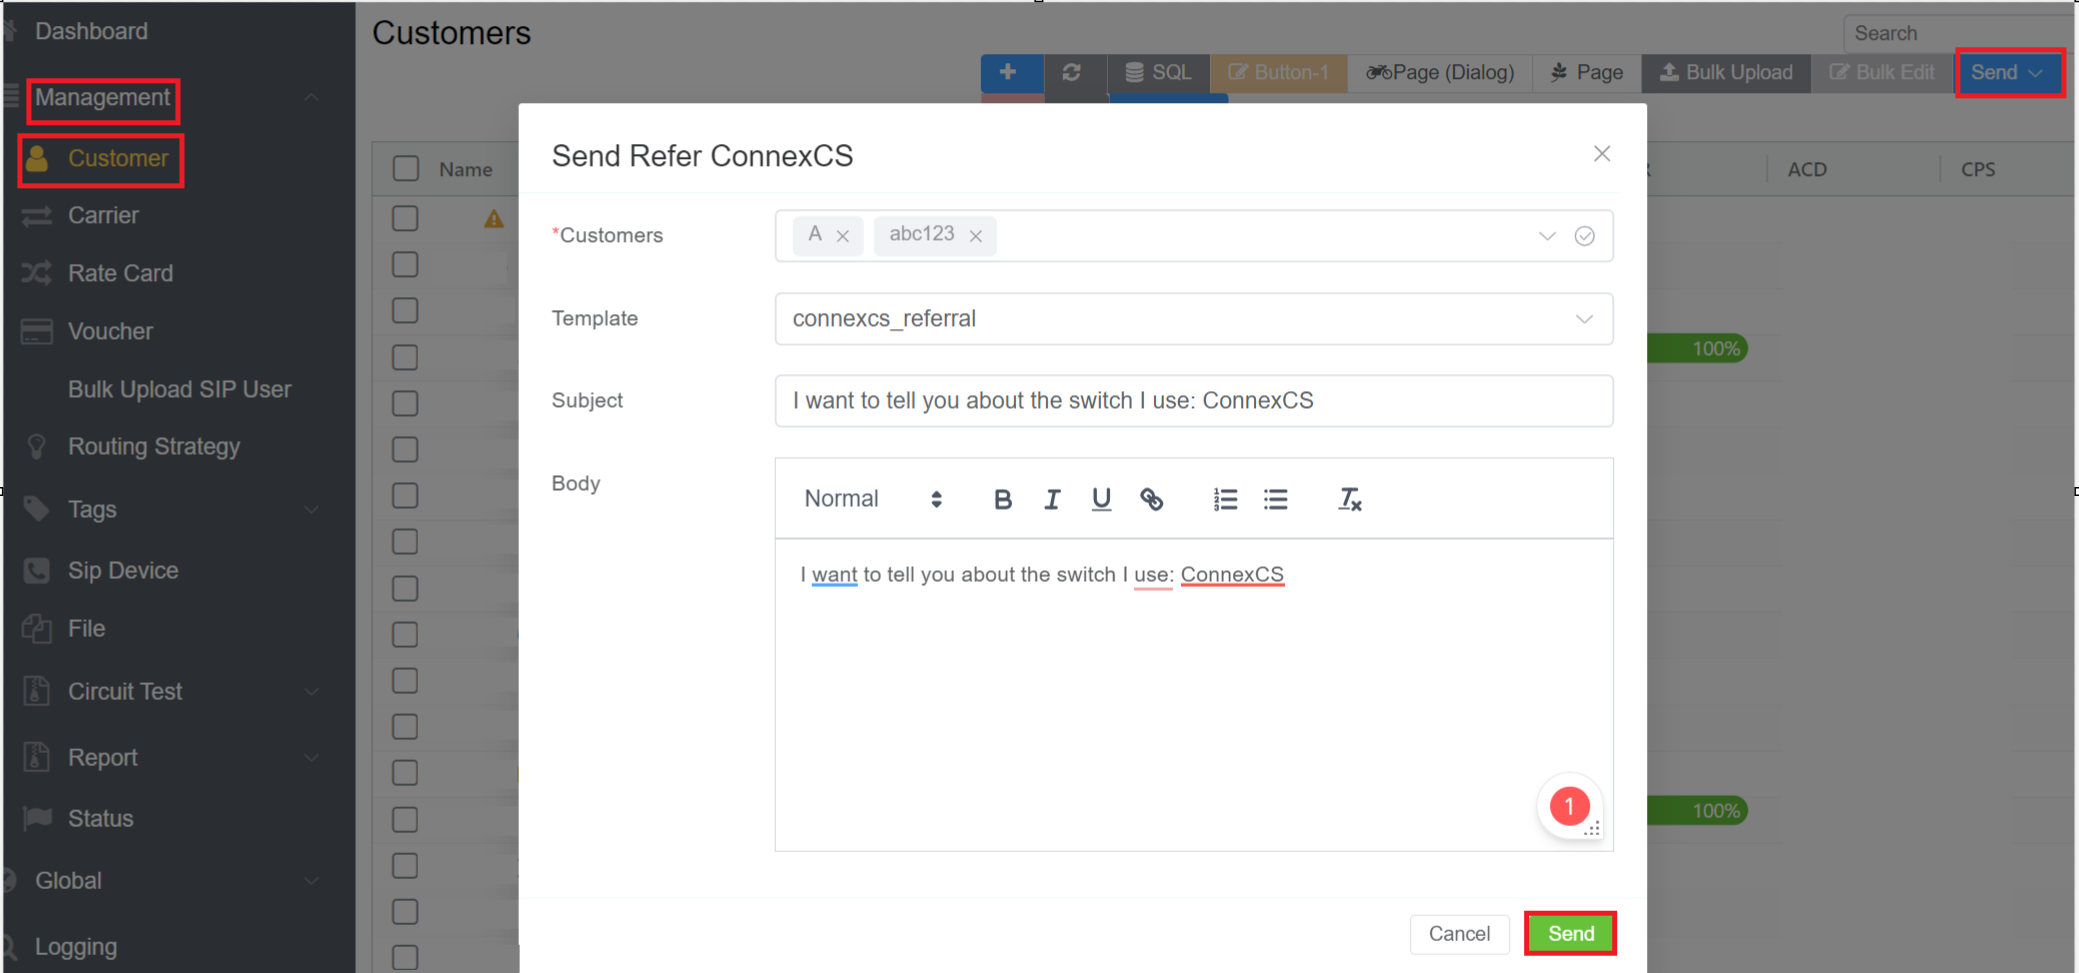
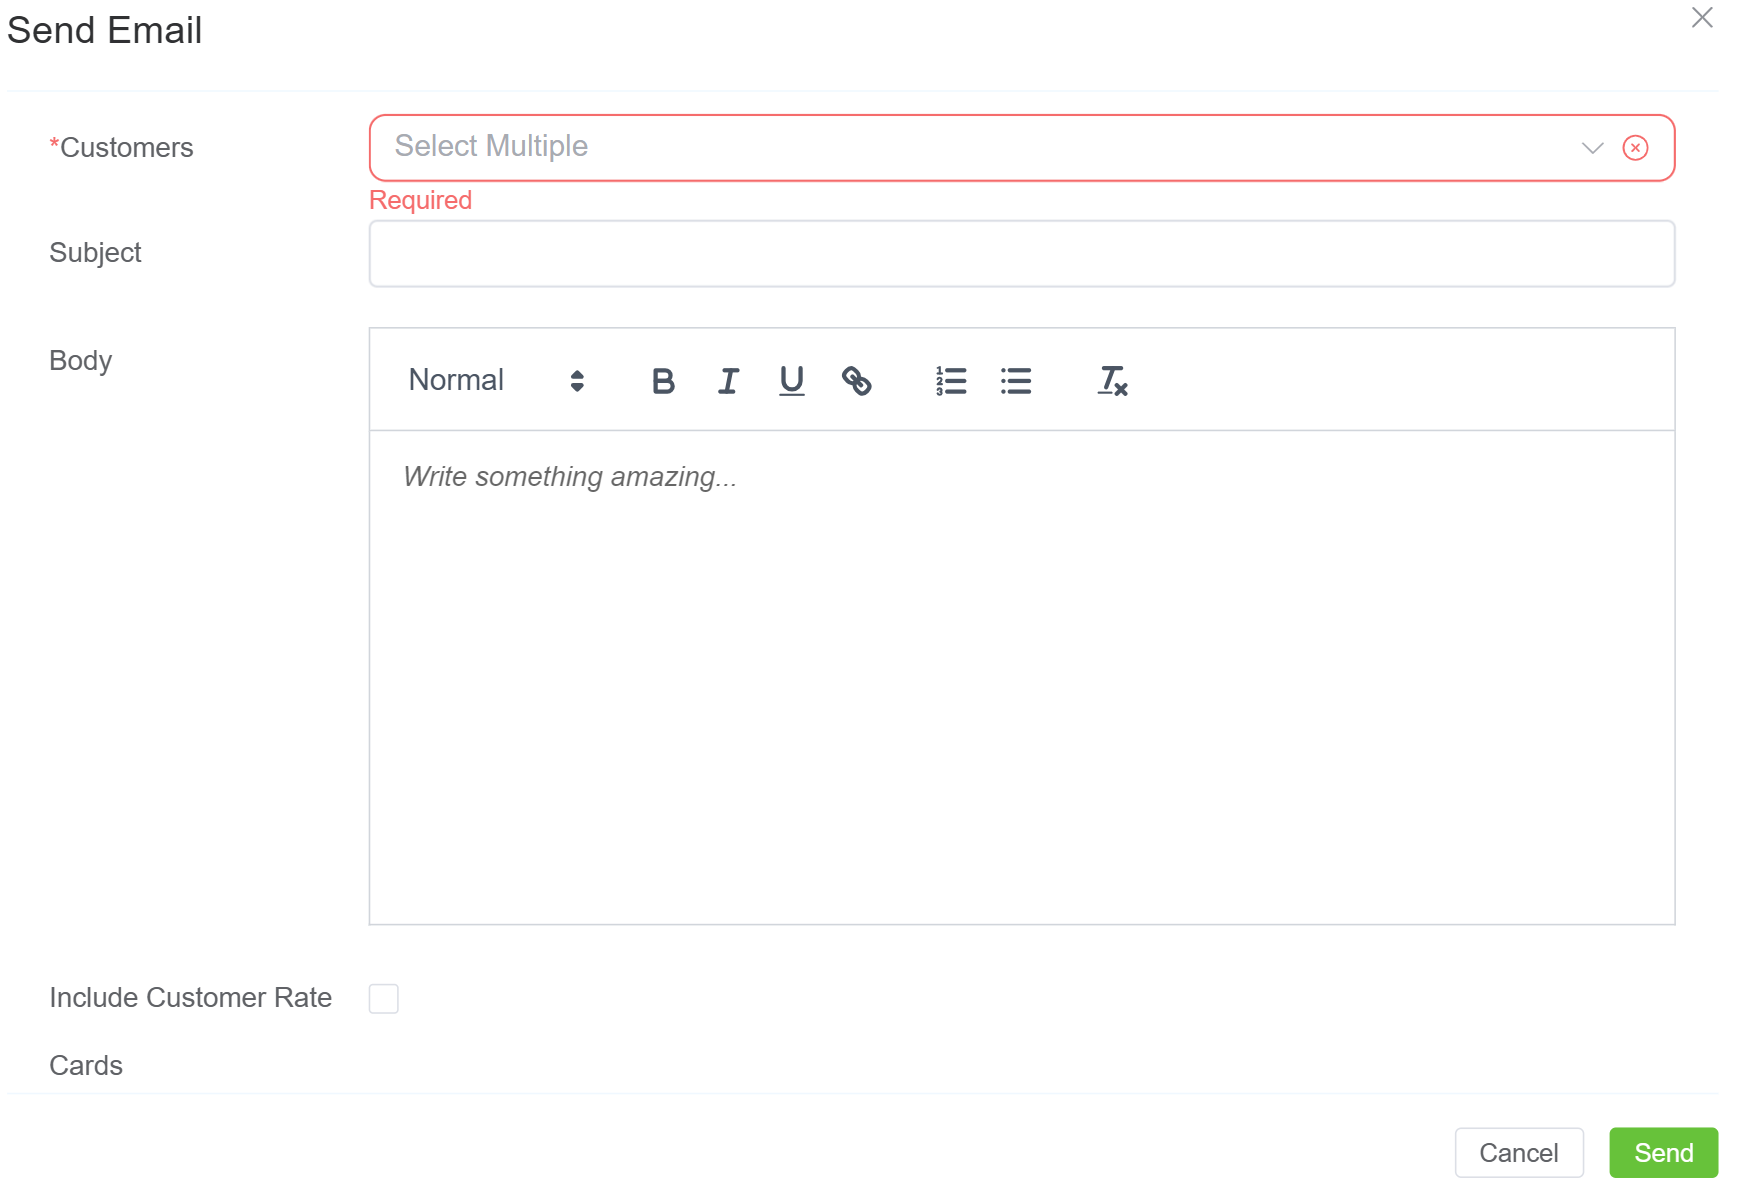
- Email: The Send Email interface allows to compose and send emails directly to one or multiple customers from within the platform. It also allows Customer Rate Cards (only) to be emailed to the customers (also in bulk to multiple customers).
- Customers (Required): This field lets you select one or more customers to whom the email will be sent. The
Select Multipleoption enables bulk selection. - Subject: Defines the subject line of the email.
- Body: A rich text editor where you can compose the email content, format text (bold, italics, lists), and include links.
- Include Customer Rate Cards: When selected, this option attaches the customer’s rate information to the email.
- Customers (Required): This field lets you select one or more customers to whom the email will be sent. The
Custom Email Servers
Change the outbound Email Server and SMS origination number in Setup Settings.
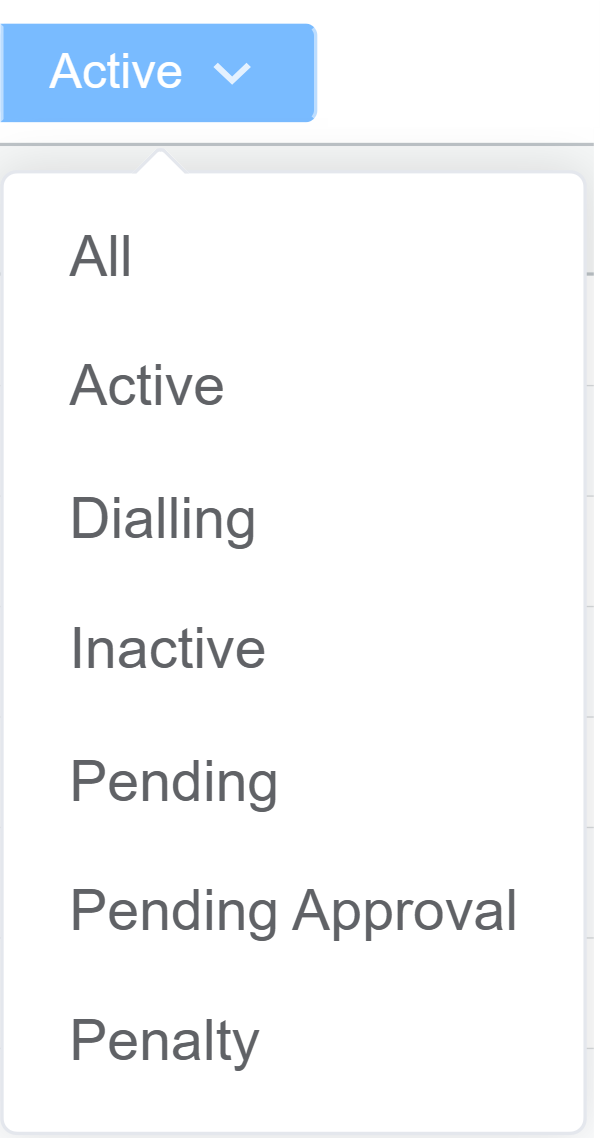
Active: Filter customer(s) based on account status. Results on the page will automatically arrange themselves according to the filter.
Customer View Modification
- Columns pop out on the right and allows you to add / remove options, and change column order, for some cases you can create row groups and total values for pivot functionality.
- Filters pop out on the right and allows you to filter your customers.
- Adjust Column ordering
Create Customer
The following sections will appear when you click on the blue + sign.
Click each tab for field explanations:
- Name: A name or unique identifier for each customer.
- Channels: Set the maximum number of channels (essentially a channel is a live call).
- Flow Speed: Set the CPS (Calls Per Second) for the customer.
- Status: Defines the customer's account status as follows:
- Active: The customer is able to send and receive calls.
- Inactive: When the customer's account is unused or non-functional.
- Penalty: When the customer's account is penalised due to balance or any other reason. The customer's account gets blocked and cannot use any of the services.
- Pending Approval: If a customer has asked for any service and it requires some approval before using it, you can set the status as pending approval.
- Debit Limit: How much negative balance is allowed, typically only relevant for post-pay customers. See Credit Control for details.
- Minimum Payment: Set the minimum payment a customer can add to recharge the account (required for account top-ups).
- Restrict Topup Currencies: Enables you to restrict or define the specific currency types that customers can use to add funds to their wallet or account.
- Tax: Tax is added as a percentage that is charged on top of costs. (UK = VAT; US = Sales Tax)
- Currency: Select the currency from the drop-down menu.
- PayPal Email: The email address associated with the customer's PayPal account. (This is relevant when using the IPN API which lets customers make payments directly through PayPal instead of using the Customer Portal). See our API documentation for details on PayPal IPN. It enables mass payments without requiring customer login.
- Website: Add the customer's official website.
-
P-Asserted-ID: Consider a network level identifier, you can select how calls to the provider is handled based on the PA-ID:
Default: Call passed to the provider (no manipulation).Remove: Strips PA-ID before passing the call to the provider.If Available: It will add PA-ID if one has been provided, otherwise the call will still be allowed.Required: Call won't be delivered to the provider without the PA-ID. -
Portal Access: It allows you to Show and Hide parameters like Balance, CDR, Breakout etc on your customer portal.
- Tags: Use this to add meta-data identifiers to a customer. If a customer routing is created using a template from Global Routing, this will be the tag configured in the template. Used to apply global routing rules to customers.
- VarsTOML: This is a data storage mechanism for configuration, similar to INI files. It allows you to create advanced customization to set values, etc, for Script Forge to reference later.
- Reseller: Associate the customer to a preset Reseller Group (see Create Groups for more details.)
- Account Manager: Designating the control of this account to a specific user.
- Invoice Schedule: Specify frequency for invoice generation like Daily, Weekly or Monthly.
- Flags:
- Select the Create Invoice on Payment flag, and if the payment is made, an invoice will be generated automatically.
- Allow inbound calls with zero balance: When enabled, inbound calls will be allowed even if the customer’s balance is insufficient to make calls.
- Invoice Due Days: Set the allowed number of days past the due date that the invoice can go unpaid.
- Invoice Template: Select from a list of existing Templates found in Setup Config Templates
- Ext.Accounting ID: This is used to fill in work an external accounting field to correlate between Connexcs and the external accountancy system.
- RTP Firewall: It will bypass the media Firewall.
To let the customer strictly use the existing RTP firewall under Locked and its flexibility to use RTP Firewall under Unlocked. - Call Recording Retention Days: How long the customer wants to keep the recorded calls.
- Domain: You can select the domain you wish wish to access from the drop-down menu. A customer can sign into the various domains available in the system.Each domain can have different price points, support levels, features, etc.
- Daily Spend Limit: The maximum limit for a customer for making calls in their chosen currency. Once the limit is reached it won't allow any new calls to connect.
- Default STIR Shaken Attestation: The attestation level you select here is the same attestation level that will be applied to the CLIs that your customer adds from customer portal.
| Setting | Description | Example |
|---|---|---|
| First Reply Timeout | Maximum time to wait for the first SIP response from the destination after sending an INVITE | If set to 3 seconds and no SIP response (e.g., 100 Trying, 180 Ringing) is received within 3 seconds, the call attempt is considered failed and routing can move to the next destination |
| PDD Timeout | Maximum allowed Post-Dial Delay (PDD) before the call starts ringing or is answered | If set to 8 seconds and the destination does not return ringing or answer within 8 seconds, ConnexCS can terminate the attempt and try another route |
| Ring Timeout | Maximum time the call is allowed to ring before timing out | If set to 120 seconds, the call will continue ringing for up to 2 minutes before being treated as unanswered and moving to the next routing action |
- Address: Complete the customer's physical address.
- Approved CLI's Only: Allows the customer to add numbers in the Customer Portal CLI section. This generates a test call with a code that the customer must enter in the portal. Once complete, their CLI will be added to the system. It basically restricts calls to pre-approved caller IDs.
- Email Verification and/or Mobile Verification: Used to force the customer to go to the portal for verification. (This is important to select when you create a customer manually.) If the customer doesn't verify these, they won't be able to dial.
Attention
Mobile messages are sent globally, but there are some reports of issues with SMS being delivered to numbers in India. These messages are sent on the Twilio network, so ConnexCS can only deliver what they deliver.
These are arbitrary notes that can be entered onto an account at your discretion.
Save Options
- Save and Continue: Saves and exits.
- Save and Stay: Saves the customer data but keeps the form open for additional entries (stay on the screen). It's helpful when adding several Customers at a time.
- Delay and Save: Allows scheduling changes (e.g., updating debit limits at a later date).
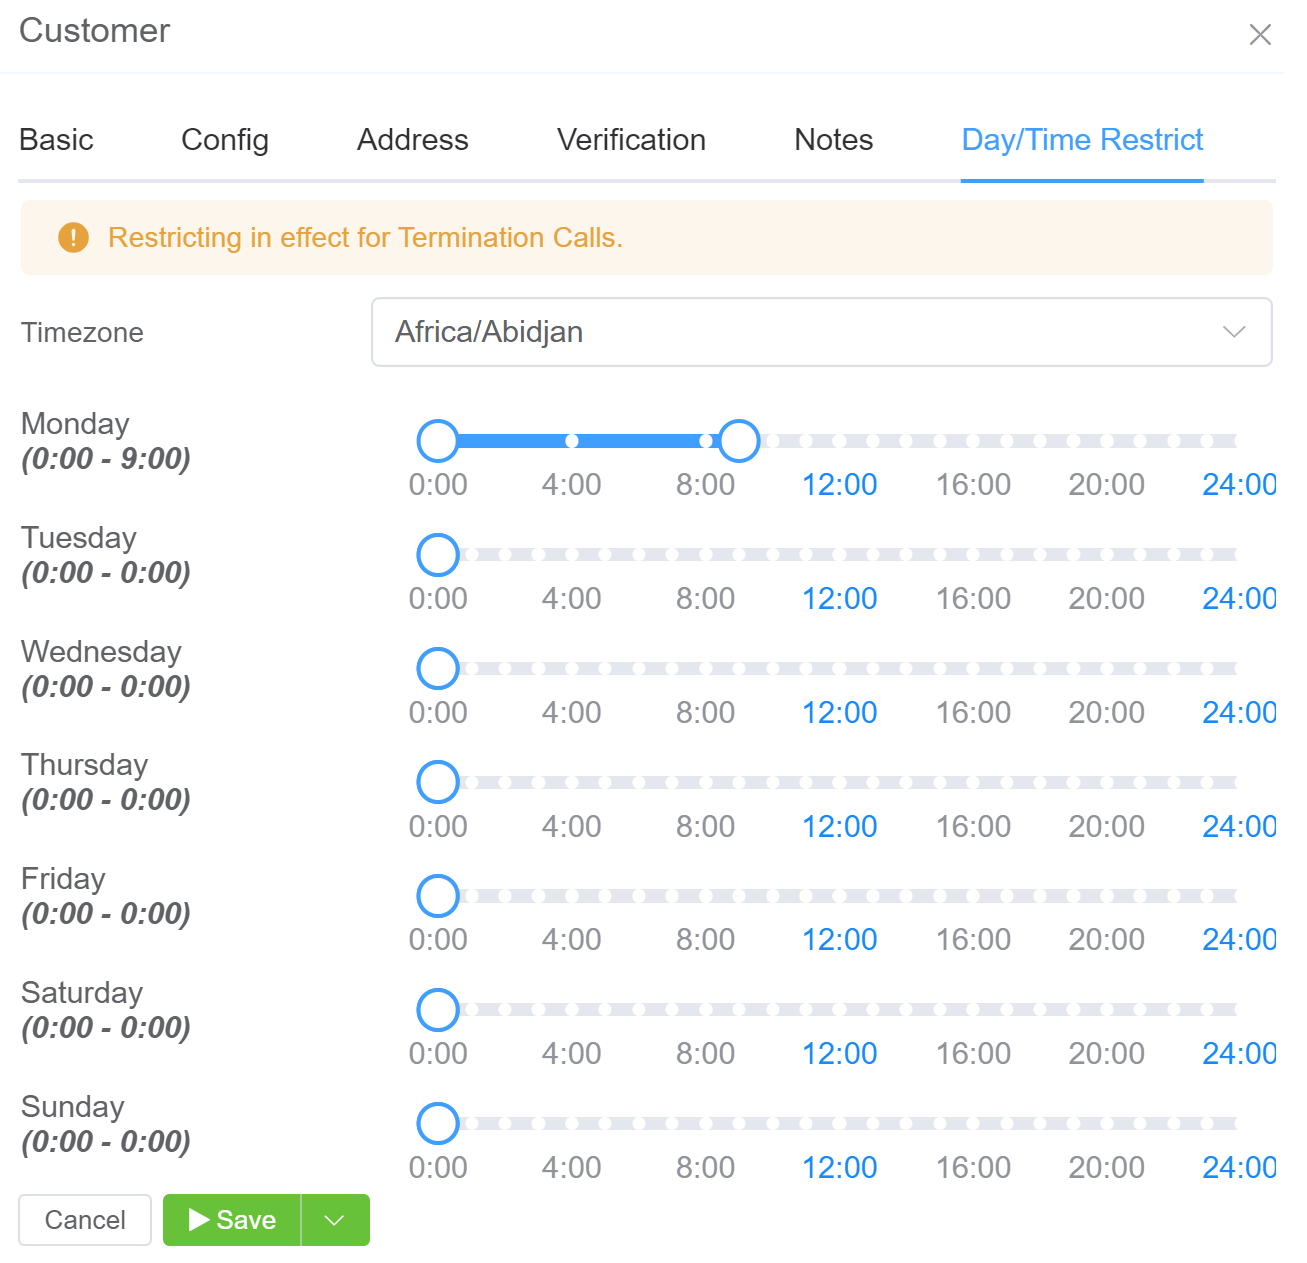
With this feature you can refrain your customers from calling at speficied time slots.
1. Choose the Timezone from the drop-down.
2. Drag the time slider between the time-slots you wish to aloow your customers to dial.
3. Click Save.
Example
In the image below you can see the time slider starts from 12:00 AM till 8:00 AM, this means your customers are only allowed to dial between 12:00 AM and 8:00 AM. After 8:00 AM your customers won't be able to call. The rest of the slots (grey color) are restricted slots.
Note
The daily spend day is defined from 00:00 UTC to 00:00 UTC.
Note that you won't be able to change the account currency once you create the account.
PAID Configuration
PAID can be set in two places:
- Customer Level: Applied when a call originates from the customer.
- Carrier Level: Applied when a call is forwarded to a carrier.
Configure Customers
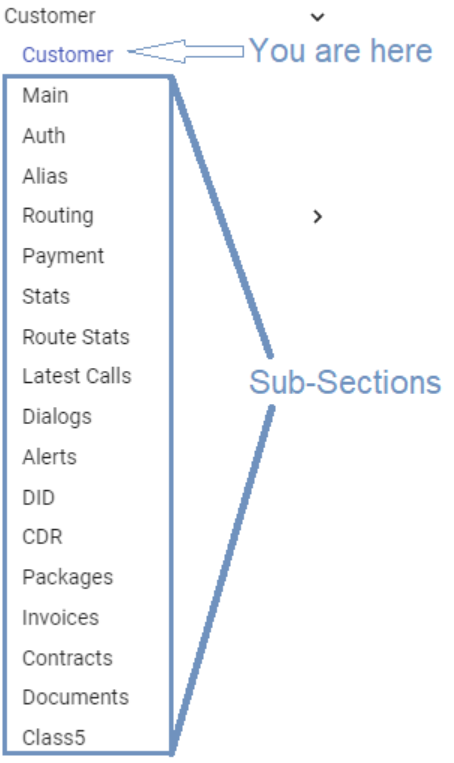
Once you create a customer, click on the customer name to view details and provide additional configuration. For documentation on that configuration, navigate to the sub-section on the left:
Edit Customers
Click an existing customer name from the Customer section, then click Edit. For all field details, see Create Customers above.
How many customers can I add?
You can add unlimited customers, and we won't charge per customer, only on their individual usage.
White-Labeling Solutions
At ConnexCS Pvt. Ltd., we offer comprehensive white-labeling solutions, enabling our partners to re-brand and deliver our cutting-edge services as their own.
With full customization of branding, user interfaces, and features, we ensure a seamless integration into your existing offerings.
Our flexible platform supports easy API integration and scalable infrastructure, allowing you to provide reliable, fully branded services to your customers without the need for in-house development.