Webphone
Warning
We advise users to switch to the new App Platform (WebphoneApp) as this webphone development has been put on hold.
Setup Integrations Web Phone
The ConnexCS Web Phone runs directly from a browser without the need to install anything, allowing customers to make calls via the internet using a softphone.
If the user wishes to install the application, supplementary functionality becomes available.
For example, push notification capabilities while closing the app.
With application cross-platform functionality (including Windows, Mac, Android, iOS, etc.), this makes it ideal in call centres and other similar deployments.
Technical Details
Application
ConnexCS Web Phone is a PWA-based WebRTC application.
WebRTC (Real-Time Communications) is a browser protocol that runs on top of an HTTPS connection.
ConnexCS Web Phone uses WebRTC (HTTPS port 443) for SIP Signaling and WebSockets (random UDP ports) for the Media.
BitDefender and WebSockets
BitDefender blocks WebSockets unless the phone and WebRTC domains get whitelisted.
A PWA (Progressive Web Application) is an application written inside the web browser, and it uses a modern API.
State-level firewalls
WebRTC is effective for bypassing state-level firewalls by:
- Running Signaling over a widely unblocked port (443).
- Sending all Data (Signaling and Media) over an encrypted connection.
Security and Encryption
ConnexCS Web Phone encrypts all information (Signaling & Media) between the browser and the ConnexCS platform.
You can achieve this by leveraging TLS (Transport Layer Security) protocol support on the underlying browsers. Presently, all modern browsers support TLS 1.0, 1.1, 1.2 & 1.3.
MITM (Man-in-the-Middle) attacks actively intercept traffic between endpoints, while still operating within a TLS framework. This kind of attack counteracts with PKI (Public Key Infrastructure), a native HTTPS feature.
PKI ensures end-point integrity, so you can be confident that the endpoint you connect with is the one you expect, without any intermediaries.
Debugging SIP Messages
If you need to debug Web Phone and see the SIP messages, you can enter *#0*# into the dial pad, this will switch on debugging mode in the browser console.
Navigation
Navigate using the following sections in the footer menu at the bottom of Web Phone (see Menu tab under Config Options below to change how these get displayed):
- Agent: Preview dialer
- History: Previous dialed numbers and extensions
- Dialpad: Dialpad for making and answering calls
- Contacts: This is the same Contacts database configured in Class5 Phonebook
- Settings: View the Display Name, SIP information, and WS URL.
Enable Web Phone
Setup Domains
ConnexCS Web Phone needs the following two domains to function efficiently:
- Web Server (Domain A): This location hosts the phone, and the customers receives the URL. Create a CNAME on your domain, such as
webphone.yourdomain.com, and point it to our web server atwebphone.connexcs.com(responsible for web services, and yes, this is the same as the customer portal). - SIP Switch (Domain B): Create the WebRTC domain and it's CNAME should point towards the DNS you create.
2.1 Navigate to Setup Settings DNS to create your DNS.
2.2 Enter the domain (ex: test1), then select the checkbox for the A record for the IP of the server you want to use.
This is the SIP signaling domain (WebRTC) and attached to your server. Navigate to Setup Settings DNS . Enter the domain (ex: test1), then select the checkbox for the A record for the IP of the server you want to use.
It's recommended to setup a DNS (Domain Name System) record within ConnexCS, then point a CNAME on your domain to the ConnexCS setup domain.
Create Certificates
After you configure the domains, verify the certificates in Setup Information Certificates:
- If the domain isn't listed, click on
Add Certificateand provide your domain name. - If the certificates get listed but they don't have an issue or expiry date, click on "Refresh Certificates." This may take up to 10 minutes to complete.
Add WebRTC to server
To setup WebRTC on a server:
- Ensure Domain (B) (signaling domain from above) points ONLY to the server where you enable WebRTC.
- Navigate to Setup Settings Servers select the server, then Edit.
- Update the FQDN (Fully Qualified Domain Name) to the server.
- Ensure that you enable both TLS and WebRTC.
- Run
Install Serverif any settings gets changed.
AnyEdge and WebRTC
If you are using AnyEdge, you can enable WebRTC automatically by adding a domain name to your AnyEdge Domain.
Setup Web Phone Domain
Once domains, certificates, and server settings get updated, we can add the Web Phone domain.
- Go to Setup Integrations Web Phone
- For Domain, enter Domain (A)
- Set WebRTC Host as Domain (B)
- Click
Save
Your Web Phone should now be available.
Configure Web Phone
Click each tab to view the configuration details.
- Domain - The URL where the Web Phone is accessed (Domain A from the initial Web Phone setup).
- Brand Name - This is what will display in the Web Phone; it won't display your Account name.
- WebRTC Host - The primary end point (server address) that you will connect to (Domain B from the initial Setup Domains above). This is always a domain name and can be pointed directly to a server or to AnyEdge.
- Template Customer - A pre-configured customer on your account which is used to hold the default values for independently created customers. Available values for this template customer are:
- Customer [Fields in the customer itself, such as debit limit]
- Routes
- Payments
- Alerts
- Packages
- Contracts
- Register Success HTML - Customize a message to display to customers once they have completed their signup process.

Template Customer Example
You want to give all your customers $5.00 credit. Create an account in Management Customer. In Payments for that account, add $5.00. When a new customer creates an account from the Customer Portal, they will see a payment created for $5.00 at the same the time account was created.
Configure the Web Phone footer menu:
- Title - The label used for this page.
- Icon - The Icon displayed in this position. (Web Phone uses Material Design. If you wish to change an icon, you can find a list here.
- Position - Determine Icon position, starting with 1 on the far left. Select Disabled if you don't wish to show this item.
- Template - A Custom page can be used to display custom static & dynamic content. These are pre-built in Setup Config Template.

Frameless iframe
We have implemented an edge case. If you wish for the custom page to be an iframe, you can use the following code to ensure that it fills up all the available space (replace www.connexcs.com with the page you wish to display):
<!-- NO-CONTAINER -->
<iframe src="https://www.connexcs.com" style="border: 0px; width: 100%;height: 100%"></iframe>
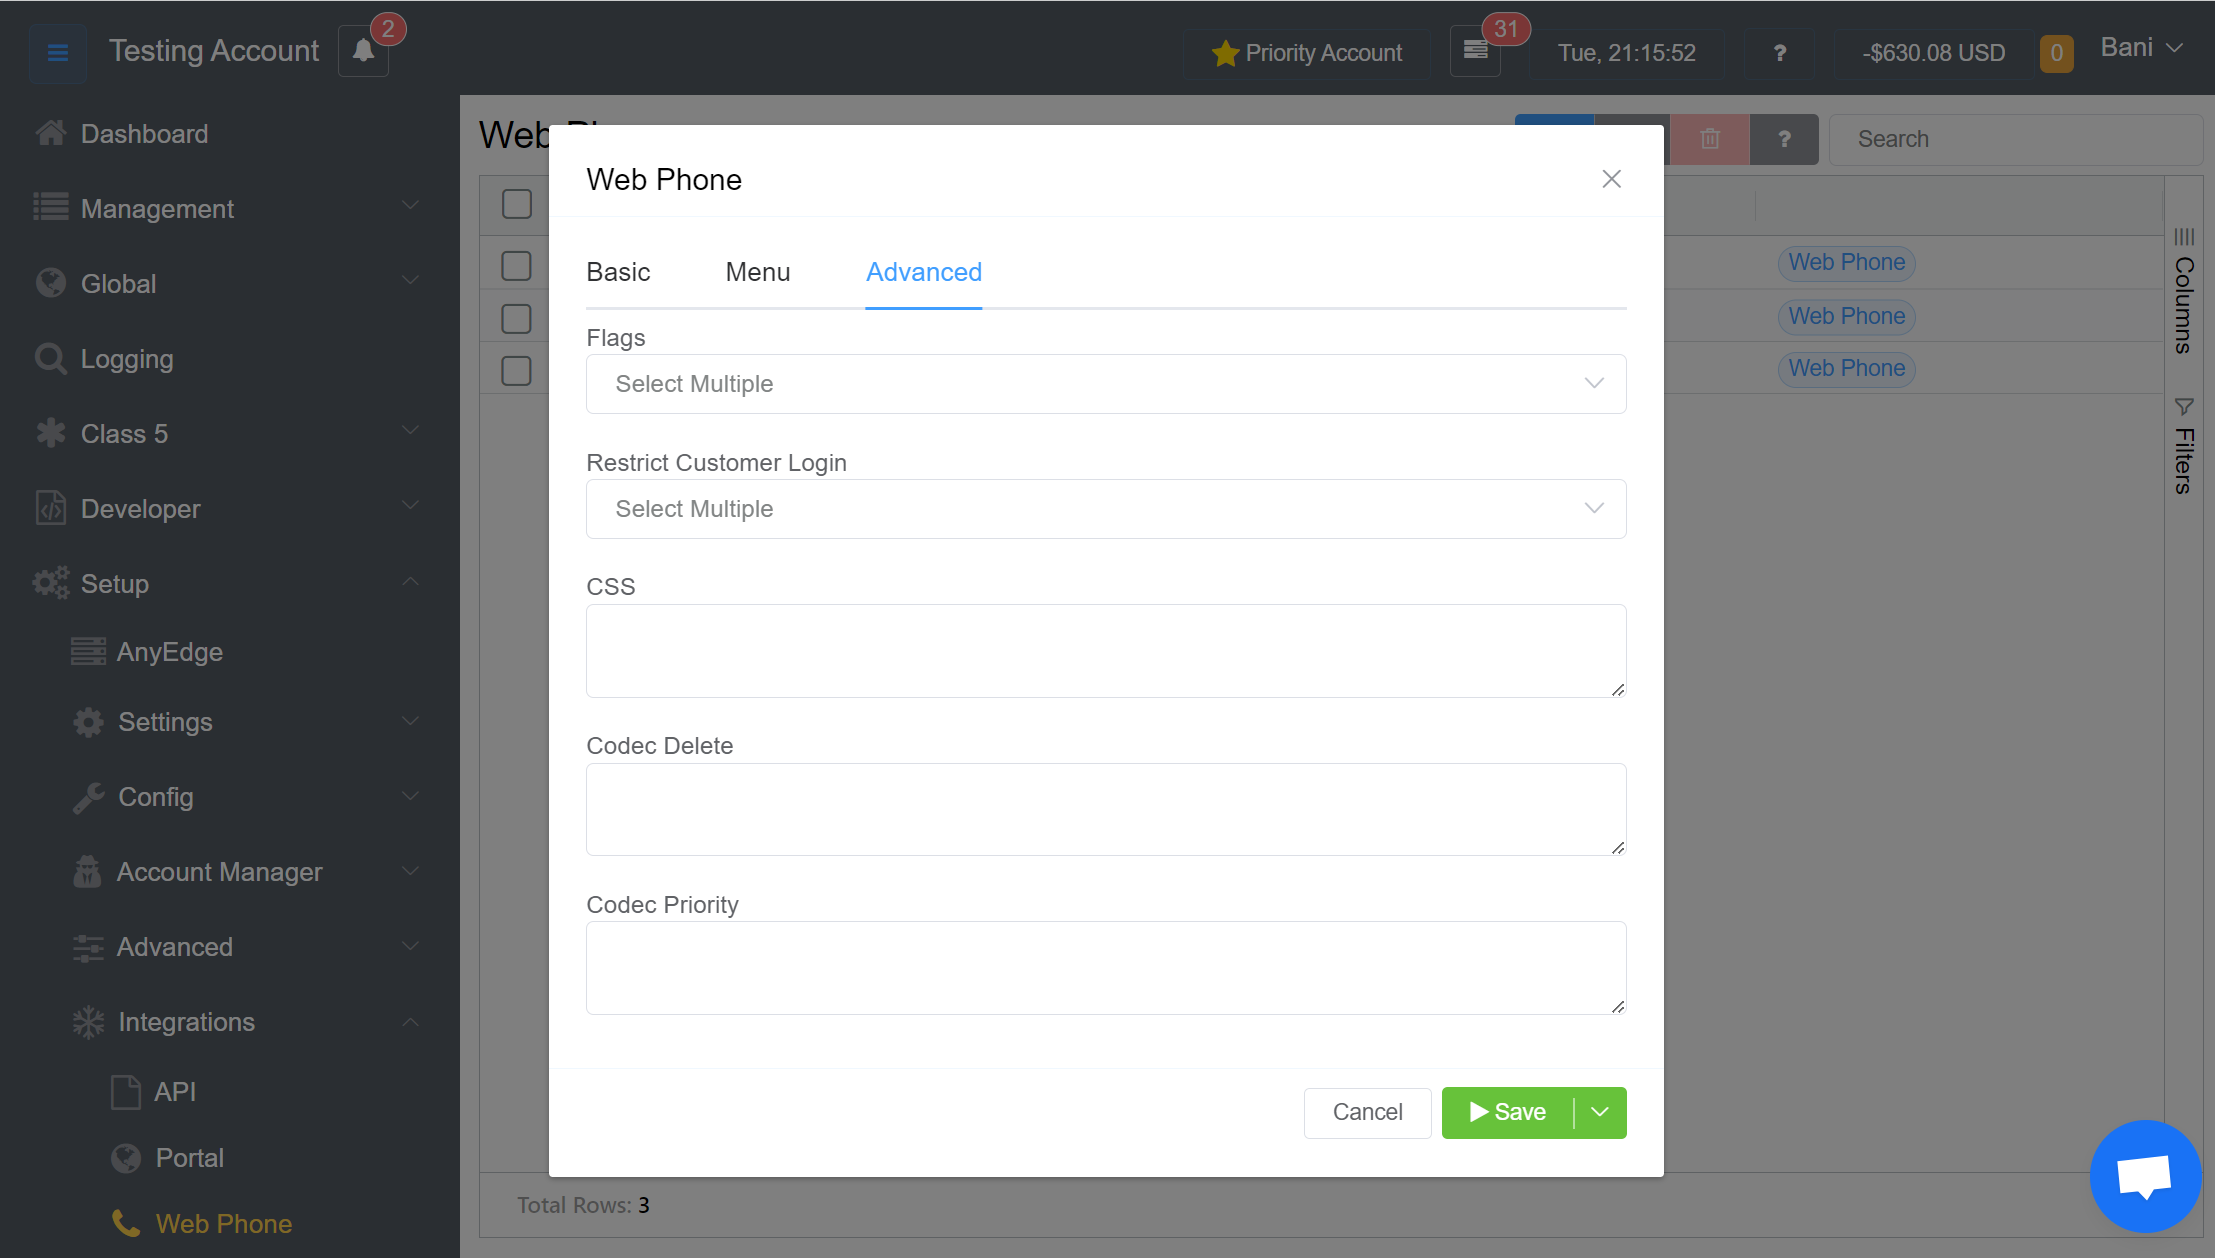
- Flags- Select display options for WebPhone
Hide UUID: UUID is a unique deploy & version identifier, this is what you should ask your end user for if you need to report a problem to us. It's displayed in the side menu.Menu Right: Change the left menu into a right menu.Display Balance: Show the balance of the account.Edit Settings: As standard settings are non-editable, if you wish to allow a user to change settings, you can change this.Register: Allow registration of new accounts, or only existing SIP Username / Passwords can login.Username as Title: Change the title of the page to the username logged in.Accept Payment: Accept payments, same as on the customer portal.Auto Answer: Automatically answer an incoming call.
- Restrict Customer Login: Select existing Companies from the dropdown to allow them access to WebPhone. If no companies are on the list, then all will have access.
- CSS: You can add CSS (Cascading Style Sheets) style to your Webphone.
- Codec Delete: You can delete the Codec which you don't require in your Webphone. You can check the Codec list from Management > Carrier > Select a Carrier > Auth > blue
+button > under Codecs tab.
Note
Please try to use a Regex Pattern when to wish to delete a codec e.g., PC.*, if you want to remove all the codecs starting with PC else you always have the option to write the name of the codec.
Danger
The Opus codec can't be deleted as its a default codec in WebRTC.
- Codec Priority: You can set the priority of the Codecs which you use in your system.
Web Phone Software Developer Kit
The Web Phone SDK (Software Developer Kit) allows developers to integrate WebPhone into your own custom projects. This is available as part of the ConnexCS deployment at no extra charge.
The Web Phone SDK Connector provides the developer documentation required to place a call.
You will need to provide the full URL (for example, http://domain.connexcs.com) and credentials to access Web Phone from within the connector.
Dynamic Buttons
Getting Started
This documentation focuses on the dynamic actions that you can perform on the Softphone's or Agent's page using dynamic buttons. You can create these buttons using the button builder, while you can create forms by Pages.
How does it work?
You can chain the Dynamic actions by creating a series of actions. Only dynamic buttons can start an action. The process goes as follows:
- You can create a button the button builder, i.e an action gets configured and assigned a placement of 'Agent' so that it's displayed on the Softphone's or the Agent's page.
- The action is run on the Softphone's or the Agent's page.
- The action can be to run ScriptForge and act on its response, run a local function in the browser, or both.
- When you run the ScriptForge, the response gets displayed according to its type, or it can start (chain) another action.
- If the action was to open a form, then the button's ScriptForge response (if any) uses to manipulate the form for display purposes. 5.1 When the form gets submitted, it will run ScriptForge and return a response. 5.2 This form's ScriptForge response gets treated as in stage 4.
Initiating and Chaining Actions
Only a button can start a series of actions; however, forms can also start an action that chains to the one started by the button. This behavior allows for a chain of actions and, sophisticated logic.
Two sources of action exist. One is a button response, and the other is a ScriptForge response.
Dynamic button or Dynamic Form can request a ScriptForge response. Fortunately, they both obey the same actions API documented in the "ScriptForge response" section below.
Button Response
The action to run is dependent on the following configurations. Button Builder can set each of these configurations. To display a button on the Softphone's or Agent's page, the placement has to be set to Agent.
Note
The following is a sample of the response you can expect from the button API endpoint GET /api/softphone/button/button_id - replace button_id is the button's id property.
Dynamic Button API - Button Builder
 * API ENDPOINTS
 * =============
 * Get /api/softphone/button/button_id
 *
 * INTRO
 * =====
 * This object contains configurations that dictate how an action should be initiated.
 * We will only focus on values that matter to the actions.
 */
{
    "id": 45,
    "account_id": 1093,
    /* The button label, for display. */
    "label": "Agent Populate Form",
    /* The button icon, these are font-awesome supported icons. */
    "icon": "copy",
    /* The tooltip to display when the button is hovered. This tooltip takes the color of type. */
    "tooltip": "Red tootltip",
    /* The button color / theme. */
    "type": "danger",
    /* The location where the button should be generated and displayed. */
    "placement": "agent",
    "min_select": 10,
    "max_select": 20,
    /* The ID of the ScriptForge script to be run. */
    "sandbox_id": 2160,
    /*
     * The action to run. Actions are passed as functions e.g actionName(param_1, param_2 [, param_4]).
     * The action name and parameters are not case sensitive. The parameters can also be written with or without
     * quotation mark.
     */
    "fn": "main",
    /* The ID of the form associated with this button. This is the form to open.  */
    "form_id": 203,
    "sort_order": 50
}
Script-Forge Response
Below is the Actions Namespace that describes how actions should run. YOu can use it to start an action or respond to one. This object follows the same rules whether returned by a button or a form.
Note
The following is a sample of the response you can expect from the button and form ScriptForge API endpoints POST /api/softphone/button/button_id and POST /api/softphone/form/form_id - replace the button_id and form_id with the appropriate id properties.
ScriptForge API Response - Actions Namespace
 * API ENDPOINTS
 * =============
 * POST /api/softphone/button/button_id
 * OR
 * POST /api/softphone/form/form_id
 */
{
  /* This is the Actions NameSpace, represented by two underscores: '__' */
  __: {
    /*
     * For now, only one action is permitted to run at a time, the full list
     * of permitted actions can be found in the section below.
     */
    "action": {
      /* The name of the action to run. Actions are run as functions and that's what the next property is for. */
      "name": "redirect",
      /* The parameters supported by the named action. */
      "params": ["https://www.example.com", "_blank"]
    },
    /*
     * This property is only used to manipulate an EXISTING form and has NO capability to create a new one.
     * It follows the same rules as the formSchema. However, in this case, it is used to manipulate the schema of
     * existing forms.
     *
     * Each item in the list represents a form field. If it already exists in the form, then its new settings update the existing ones.
     * However, if it doesn't exist, then a new field is created with the provided settings.
     *
     * Three example use-cases are shown below.
     */
    "formSchema": [
      /* Set the value of the first name field. */
      {
        "name": "first_name",
         "defaultValue": "New Updated name"
      },
      /* Make the last name field required. */
      {
        "name": "last_name",
        "required": true
      },
      /* Create a well-configured field called 'Country' and append it to the form. */
      {
         "type": "text", // The field type
         "name": "country", // The field identifier
         "label": "Country", // The name of the field to display
         "select_enable": false,
         "required": false, // Whether or not the field is required
         "disabled": false, // Whether or not the field is disabled
         "hidden": false, // Whether or not the field is hidden from the display screen
         "multiline": false, // Whether or not the text field can span multiple lines
         "defaultValue": "newly inserted field", // The value of the field. This is the value populated in the field when it is initially displayed.
         "validation": "", // What validation rules should be used for it's data
         "regex": "", // The regex to use for regex validation
         "collapse": true,
         "scriptforge_change": false,
         "width": 12 // The width of the field
        }
    ],
    /* Data to be loaded to the form to be opened. This property can populate existing form fields. */
    "formData": {
        "name": "Jonathan"
    },

    /*
      Not Implemented
    */

    /* This defines the NEXT form to be shown. */
    "formId": 123,

    /* This will execute javascript on the browser */
    "eval": function() {}
  }
}
Actions
| Name | Parameters | Value | Description |
|---|---|---|---|
| answerCall | - | - | Answers a call |
| endCall | - | - | Ends a call |
| makeCall | alt_phone | alt_phone | Make a call using the campaign's alt_phone property. Used exactly as makeCall(alt_phone) |
| phone_code | phone_code | Make a call using the campaign's phone_code property. Used exactly as makeCall(phone_code) | |
| openForm | formName | The name of any existing form created with the form builder | Opens a form with a provided formName, e.g openForm(feedback form) |
| redirect | url | - | Redirects a page to this URL value e.g redirect(https://www.example.com) |
| isExternalLink | Either true or false | Whether a link leads to an external site e.g redirect(www.example.com, true) - Optional | |
| target | _blank | Opens a new page with the provided URL. e.g redirect(https://www.example.com, _blank) - Optional | |
| toggleMic | - | - | Toggles the mic on or off |
| save | Decision | Yes | Save a campaign |
| No | Don't save a campaign | ||
| Unknown | The decision to save a campaign is unknown | ||
| next | - | - | Load the next campaign |
The Procedure
This section takes you through the process of setting up your actions.
Initiating an Action with a Button
As already mentioned, only a button can start the first action in a series of actions. The process for selecting which action to run is as follows:
-
If the fn property is set, then action has gets set too. Here, the action is written as a function, for example, openForm('Feedback Form') , translated as, { action: { name: 'openForm', params: ['Feedback Form'] }}
1.1 If the action openForm has been set and the form_id property has also been set by selecting a form in the button builder, then the form_id property takes priority. 1.2 Then the action runs.
-
If the openForm action (through fn or form_id) and the sandbox_id (ScriptForge) properties are set, then data from ScriptForge manipulates the form to get opened. 2.1 Otherwise, only ScriptForge will run, and the response will start the action. 2.2 The data used to manipulate the form is present in __.formSchema. Check the documentation above under SCRIPT-FORGE RESPONSE.
Initiating an Action with a Form
This describes how to use the form ScriptForge response to chain an action. Only one action can run at a time. The process for selecting which action to run is as follows:
- If the __.action object has its properties set, then that's the action that will run.
Phone Book/Sync Directory
This is an interesting feature, that sync's the contacts which you add in the Control Panel to the Webphone.
- Login to the Control Panel.
- Navigate to Management Customer Customer [Name] Class 5 Phonebook.
- Click on the blue
+button on the right top.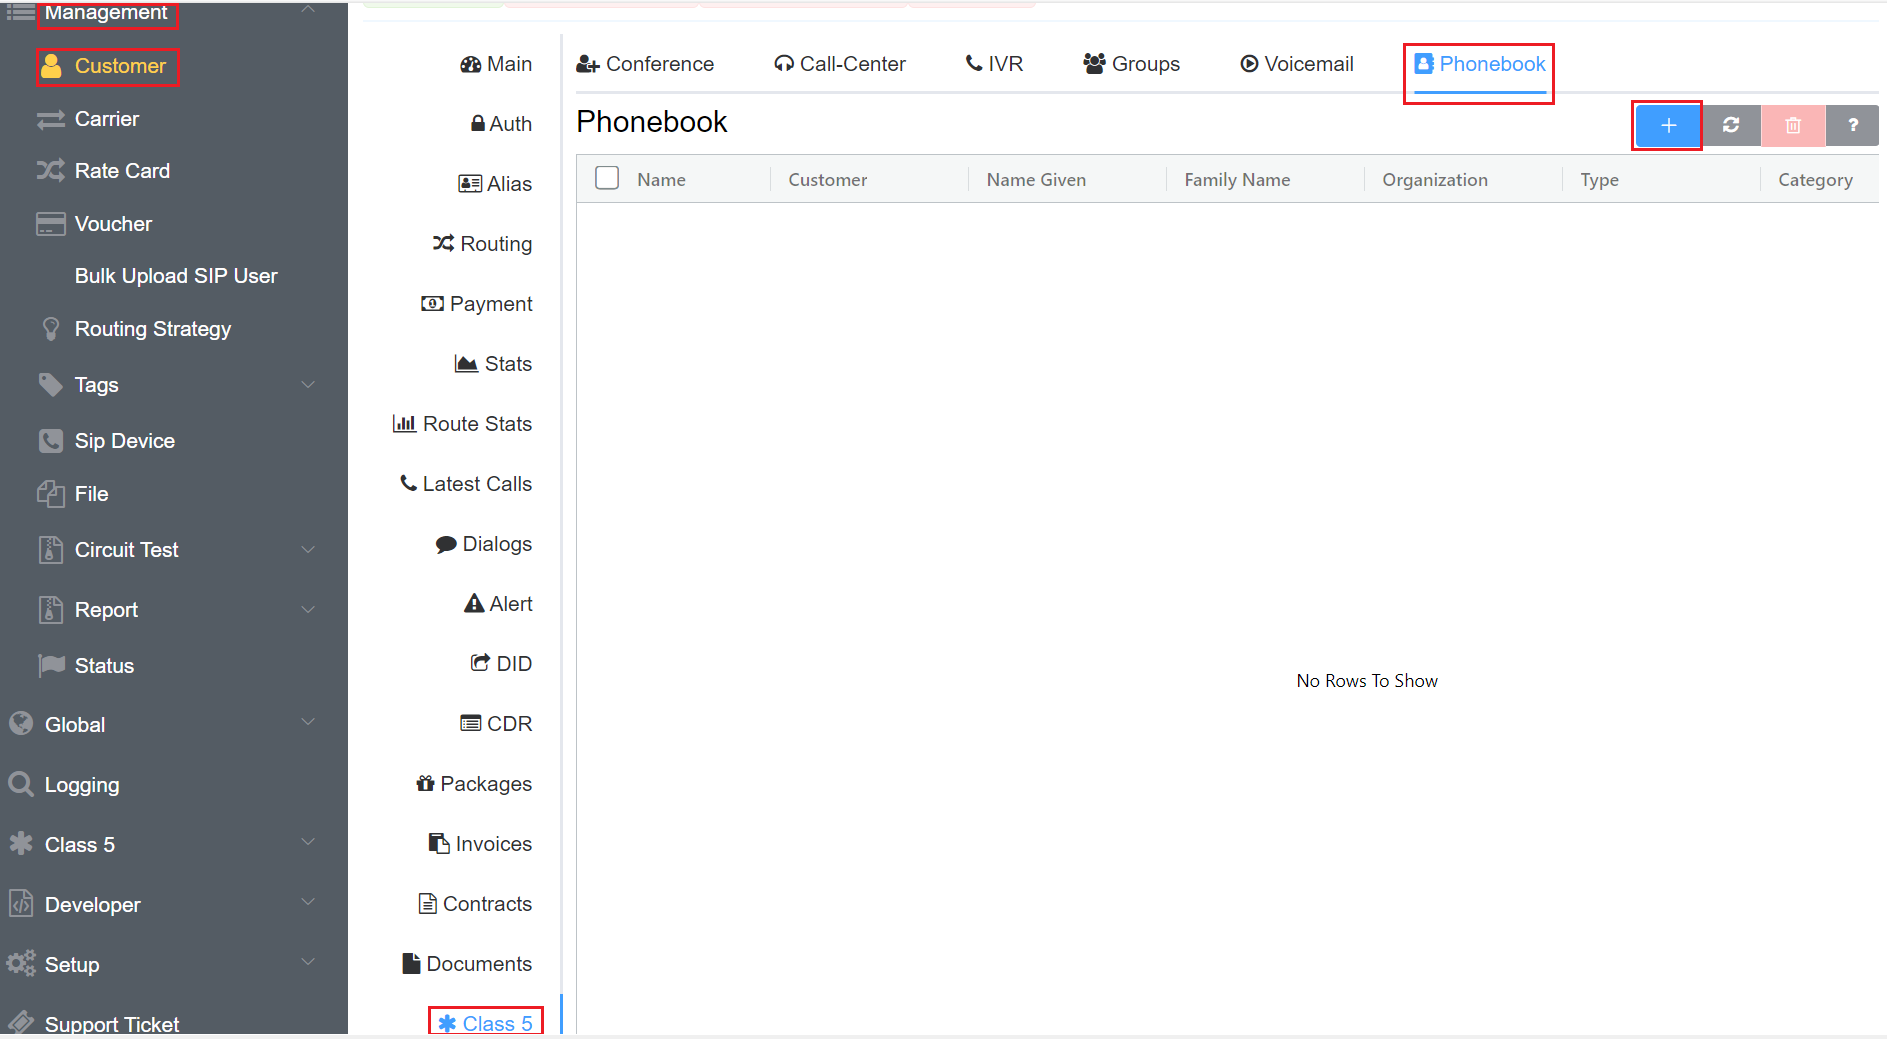
- Enter the Customer's Name which is required field, remaining fields are optional.
- Click
Save.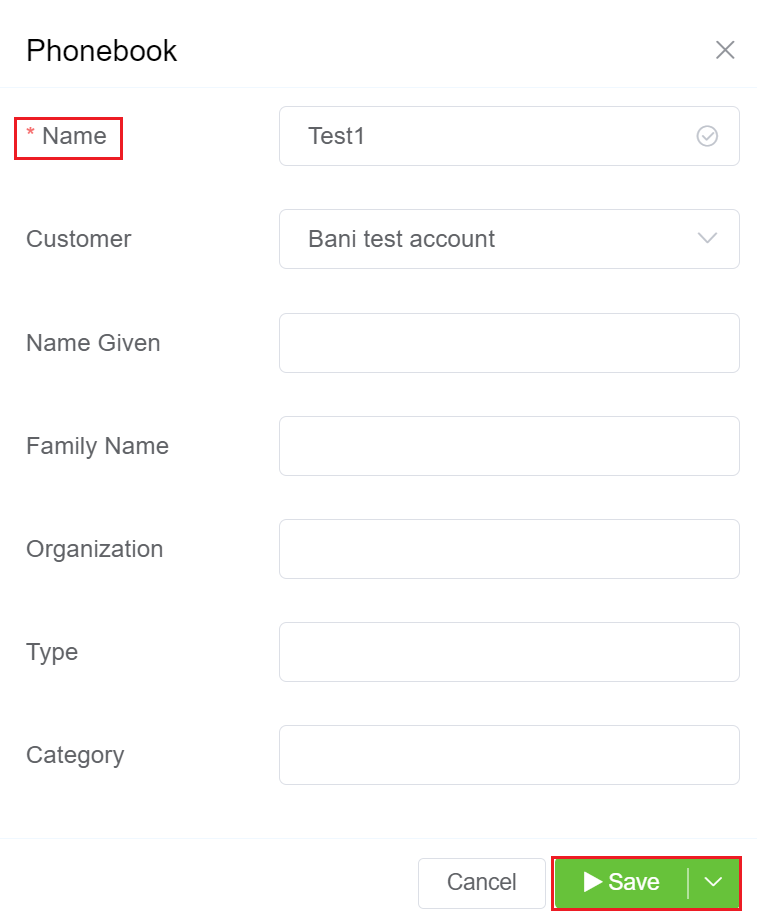
- Click on the Phone Numbers on the right-side.

- Click on the blue
+button on the right top of the window. - Enter the Name and Number which are mandatory fields. You may also add the extension.
- Click
Save.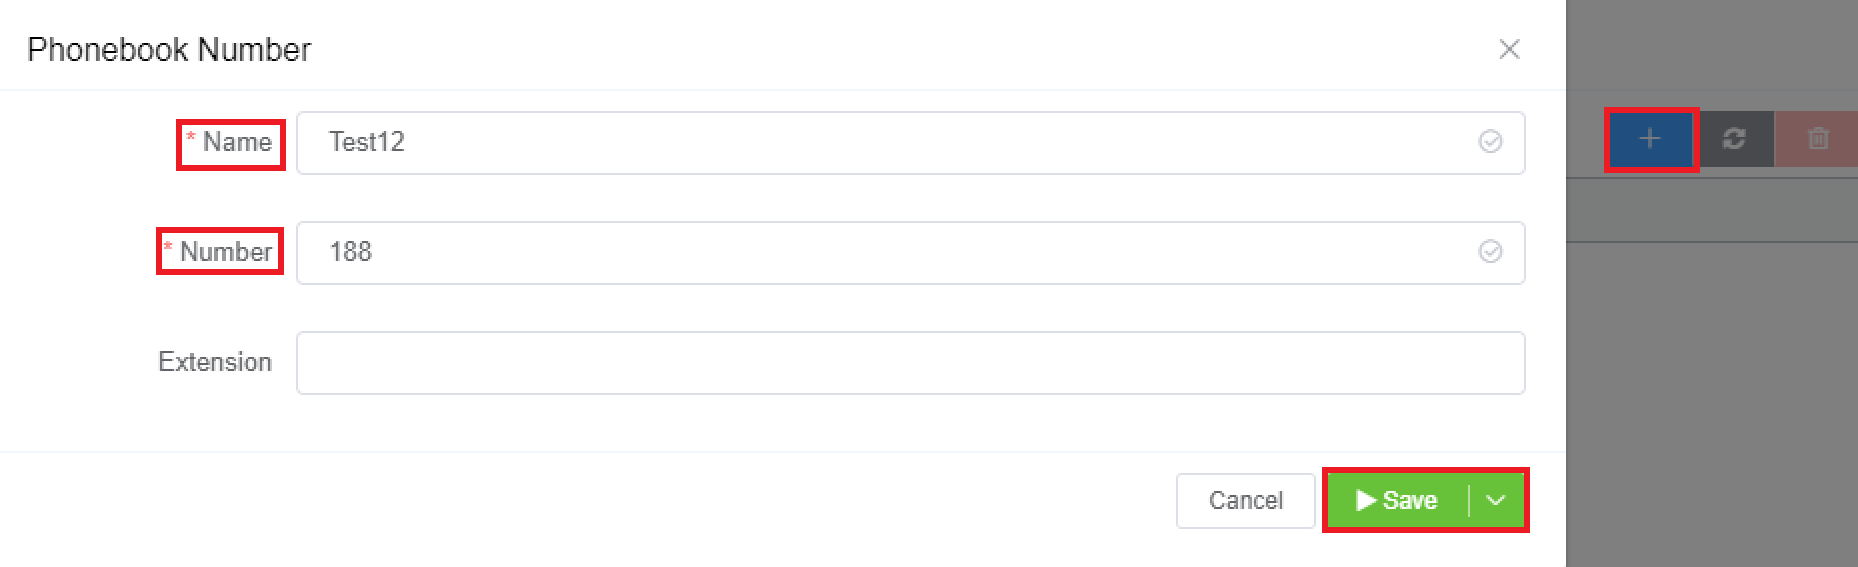
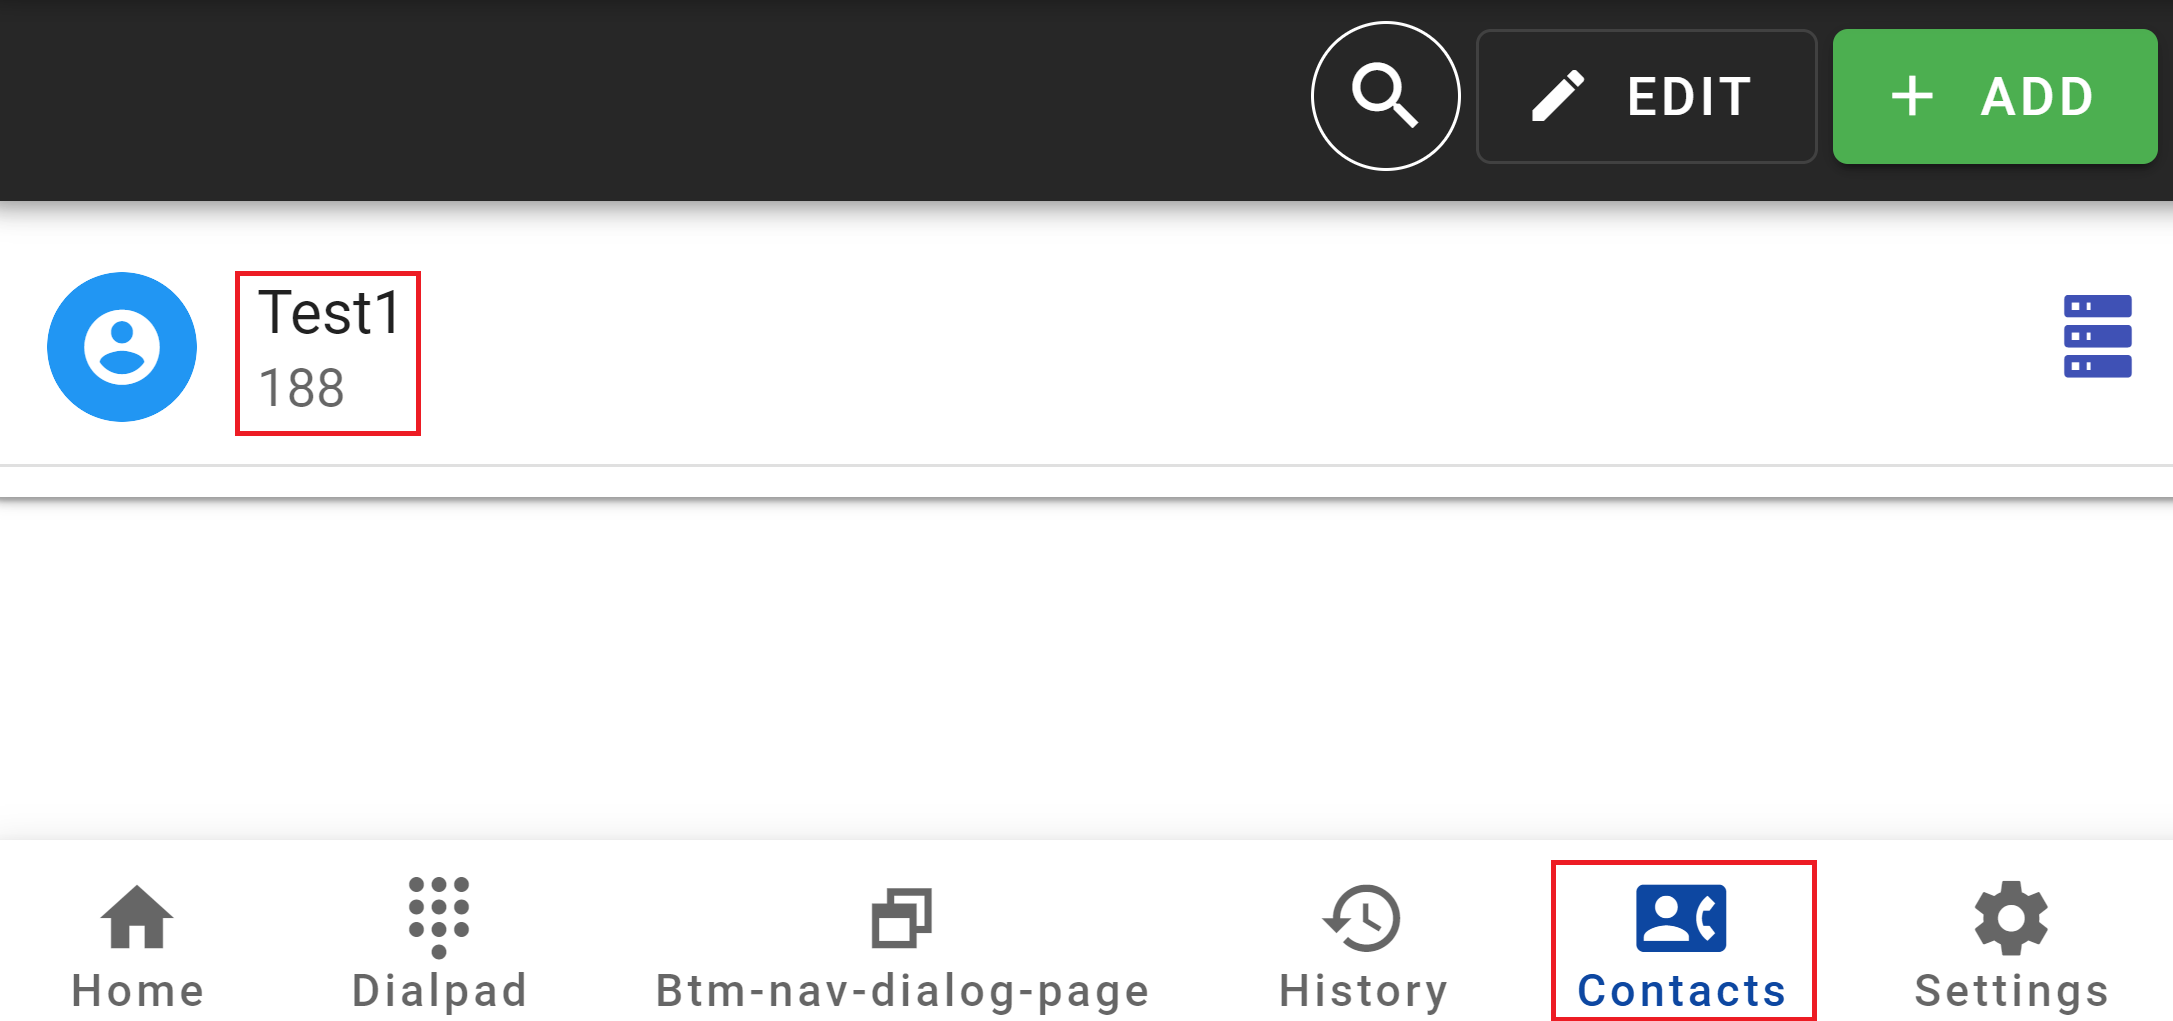
- Login to your Webphone.
- Click on Contacts, and you will see the contact you added is now available on the Webphone.
Visual Voicemail
Visual Voicemail is an interesting feature that allows you to view the voicemail in Webphone.
Various fields include the Caller, Call-ID, Duration of the call, Call Date and Time. You can listen to the call and download it as well.

Summary
Thus dynamic buttons, in conjunction with dynamic forms, give users the ability to run chained actions that can achieve sophisticated tasks. This improves an agent's productivity and improves the user's experience due to the improved and rich interaction. It's also important to note that only a button can start a chain of actions; a form can only respond to an initial action or chain action that's already in progress.