AI Agent
Document Metadata
Category: Class 5 Services / AI Agent
Audience: Administrators, Engineers, Support Team
Difficulty: Intermediate
Time Required: Approximately 30–45 minutes
Prerequisites: Active ConnexCS account with Carrier-module access; familiarity with traffic metrics such as Channels, CPS, ASR, ACD, and SIP signalling
Related Topics: Carrier Main Configuration, Customer Stats
Next Steps: Navigate to the Stats tab for a carrier, review key performance graphs (e.g., Channels, ACD, ASR), filter by time period, identify under-performing routes or carriers, then generate alerts or take corrective actions as required
Class 5 AI Agent
Overview
Traditional human call center agents are effective in handling inquiries but are constrained by availability, response time, and operational costs.
In contrast, ConnexCS AI Call Center Agents deliver instant, 24/7 support with zero downtime. They automate repetitive interactions, and ensure highly scalable, latency-free communication, reducing reliance on human intervention while maintaining service accuracy and efficiency.
With AI-driven automation, businesses can enhance customer experience while significantly lowering operational overhead.
Use Cases
- AI Receptionist:
- Front Desk Automation
- Appointment Scheduling
- Customer Query Handling
- After hours support
- Conversational Data Collection
- Scheduling call back
Benefits
- 24/7 Availability
- Reduced Operational Costs
- Faster Query Resolution
- Improved Appointment Management
- Automatic collection and updation of records
Steps to create AI Agent
- Login to your account.
- Navigate to Class 5 AI Agent.
- Click on the blue
+icon.
- A window will open up where you can create your customizable AI Agent for your customers.
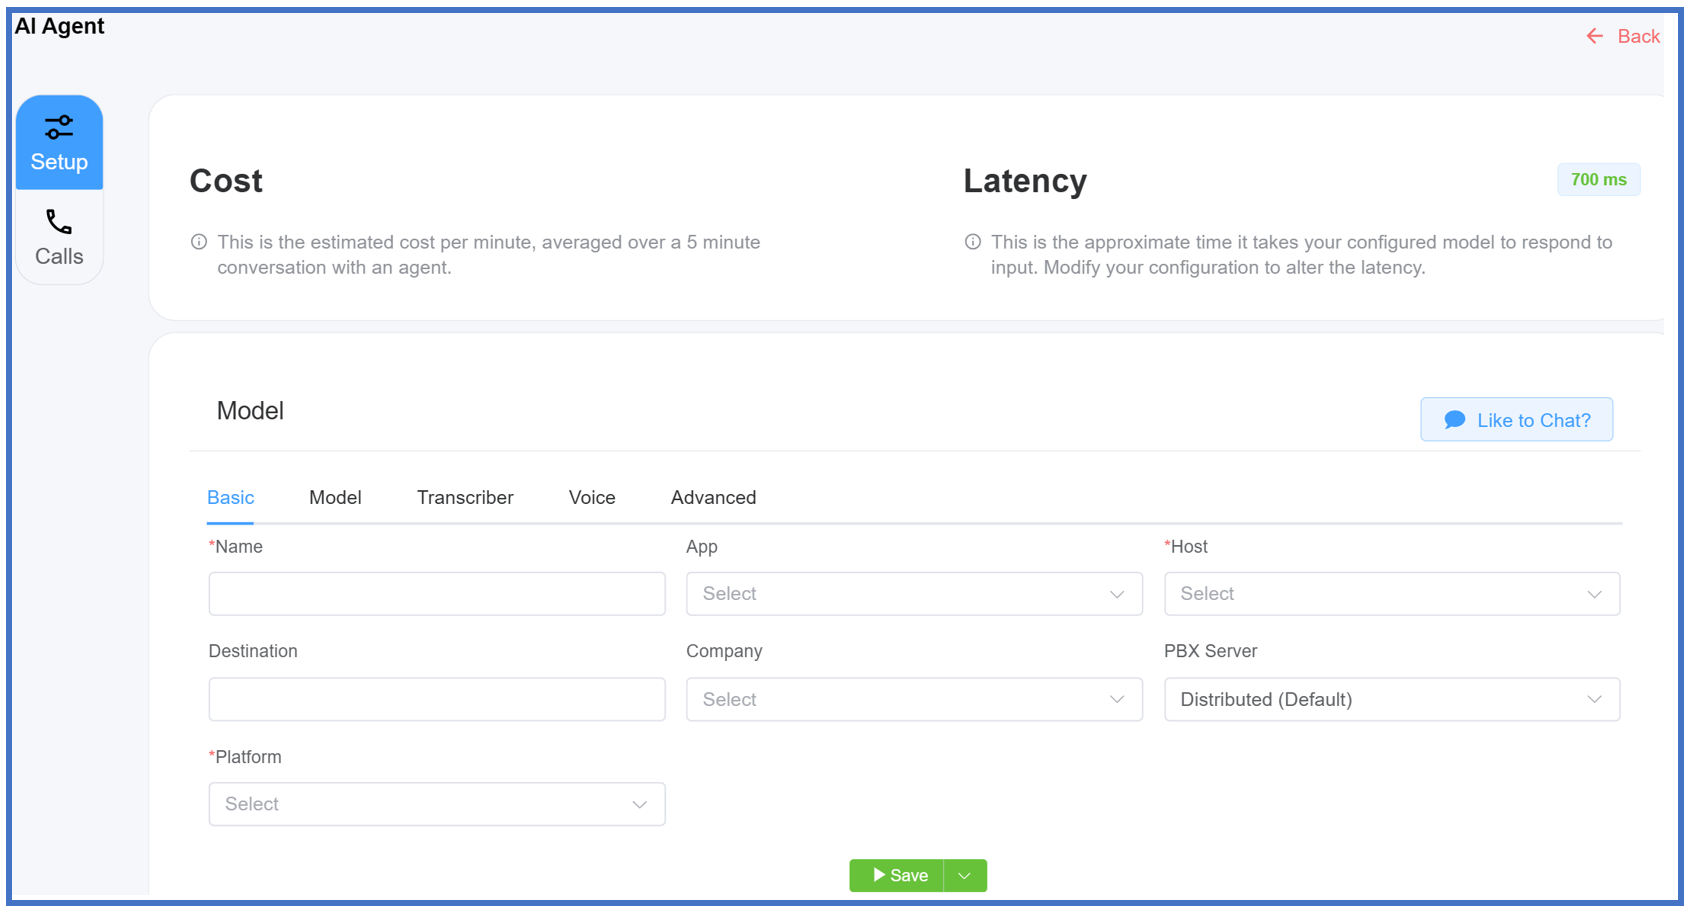
- Fill in the following fields to setup your AI Agent:
- Name: Give a name to your AI Agent.
- Destination: Enter the Extension for the callers to call (essentially, the dial-in number).
- Company: Associate the AI Agent with a customer.
- App: Associate the AI Agent with the Application that you have created in the IDE.
- PBX Server: Select the PBX Server from the drop-down.
- Host: It's the hosting server where your AI Agent runs and processes interactions.
- Click
Save.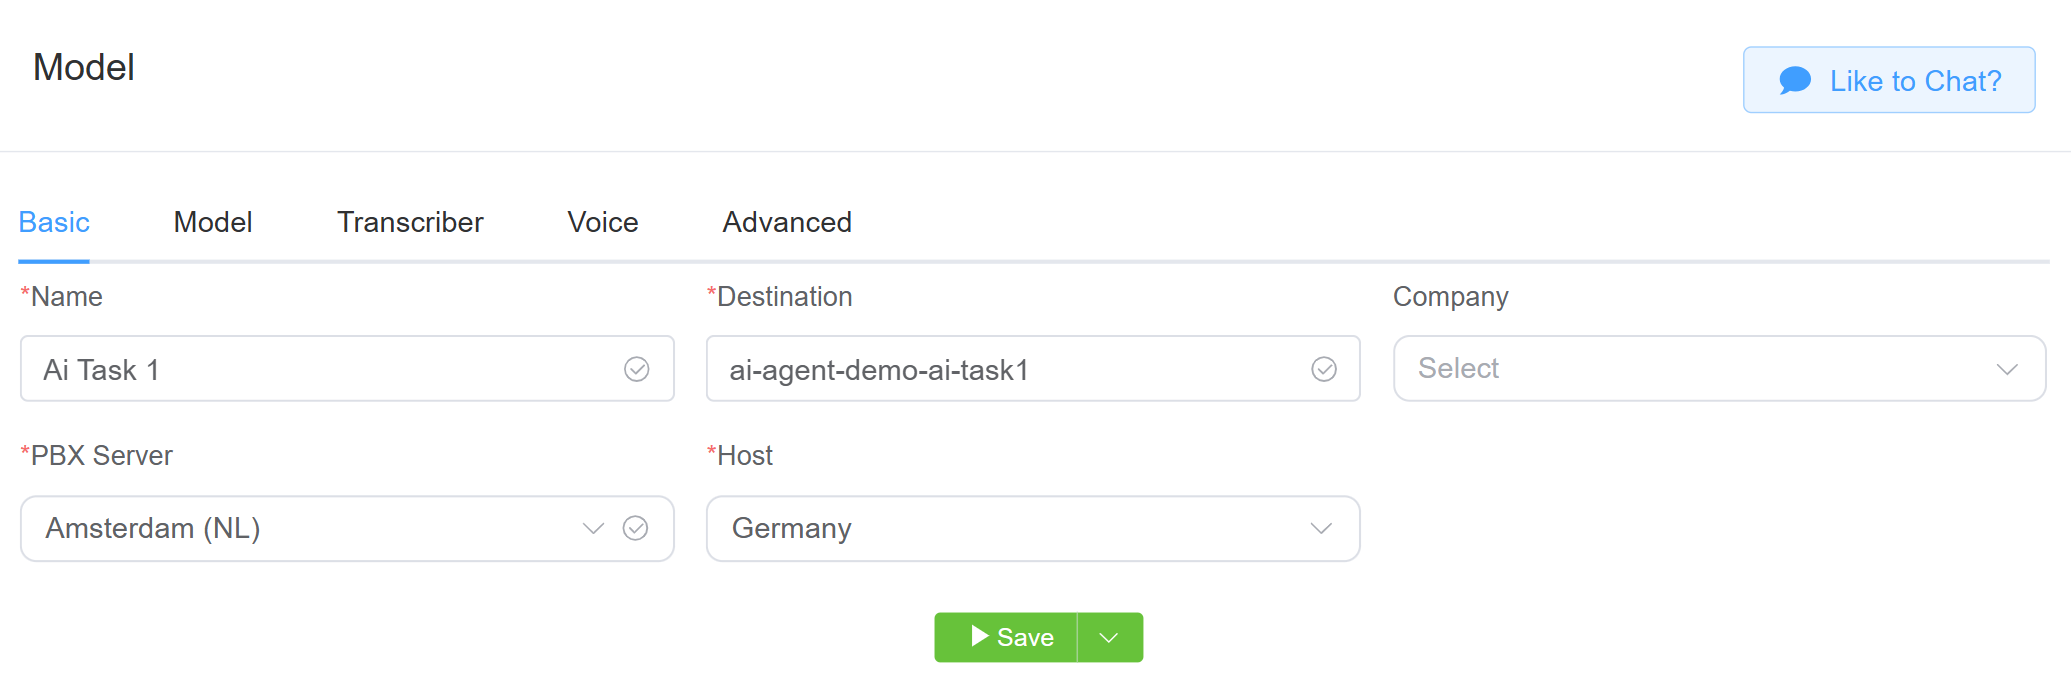
-
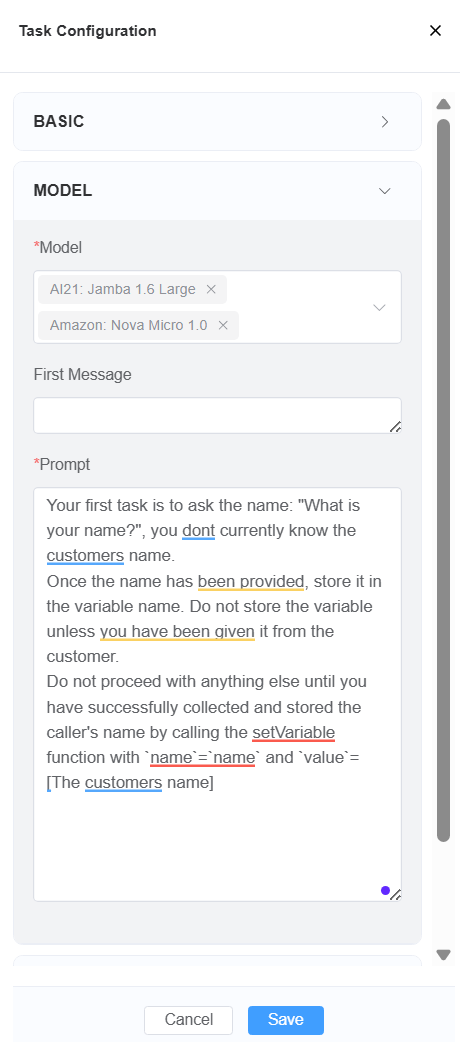
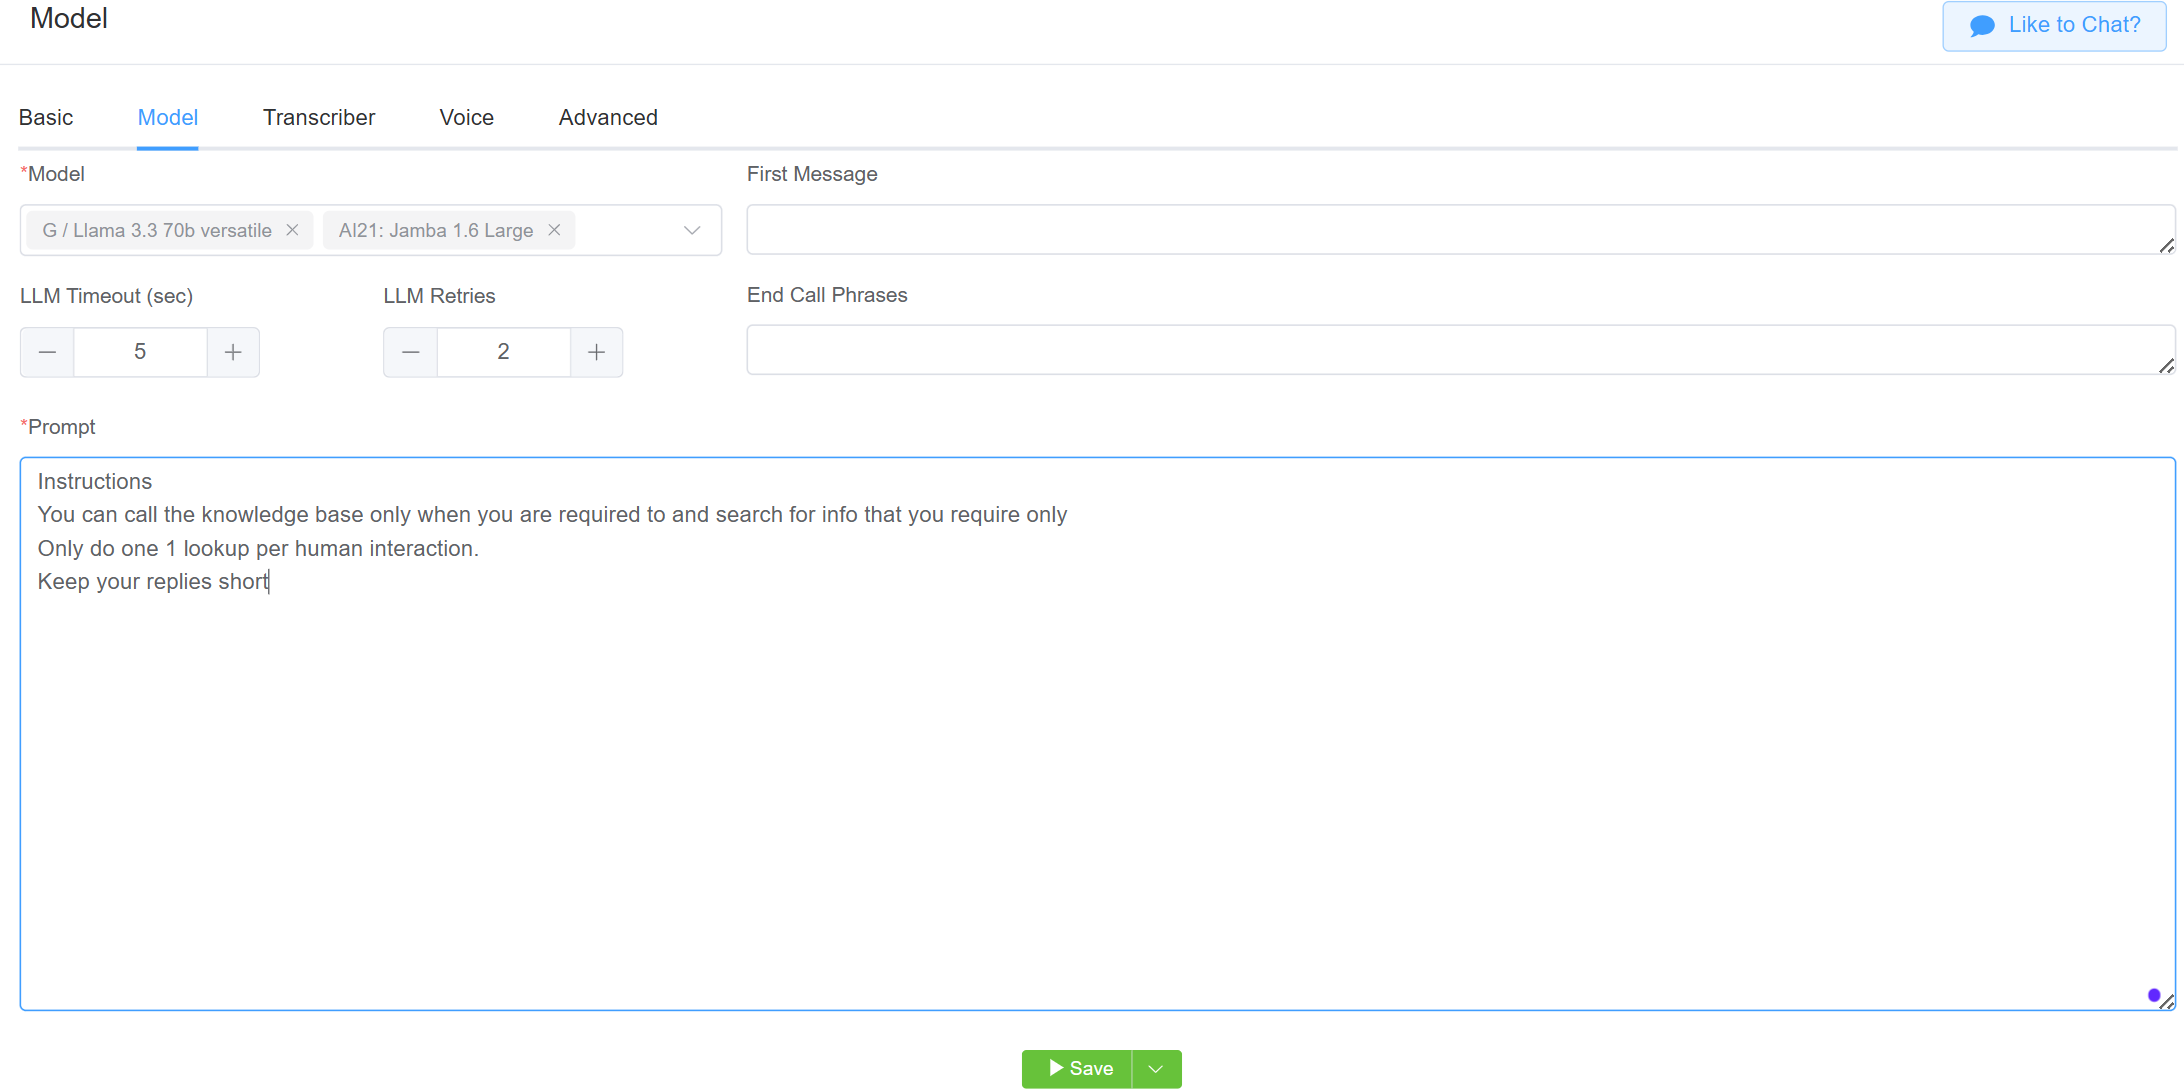
Model: Select a model for the selected platform. A model is a specific version or configuration of an AI system to perform tasks like text generation, real-time interactions etc.
Info
Different Platforms offer specific Models suited to their capabilities.
-
First Message: The initial message spoken by the agent. For example, when the agent begins the conversation.
- LLM Timeout (sec): Refers to the predefined time-frame during which an LLM is granted permission to process a request.
- LLM Retries: Number of attempts the LLM makes in performing back-end tasks.
- End Call Phrases: Phrases or messages used to conclude a call or interaction with a customer.
- Prompt: The prompt field allows you to enter the set of instructions to guide the AI Agent to perform certain tasks. It provides as the foundation for the AI to comprehend the context, interpret the user's purpose, and generate relevant results.
- Click
Save.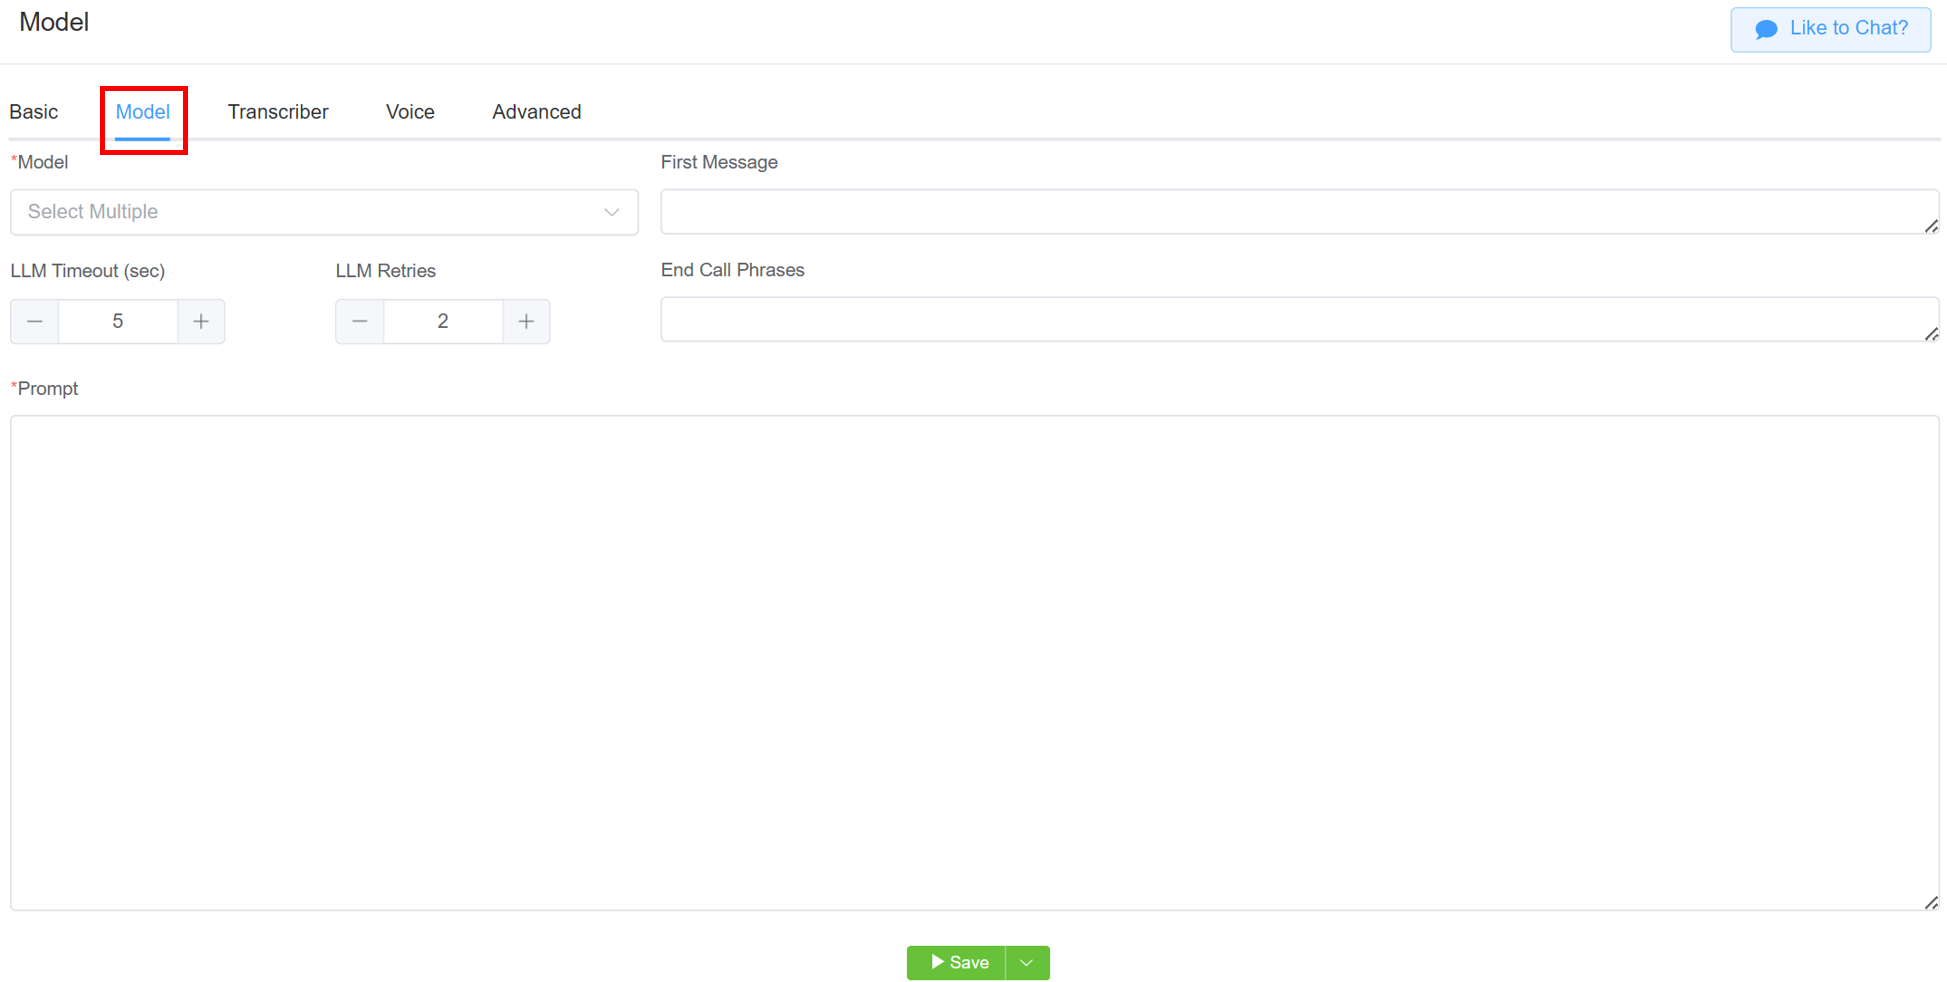
- Transcriber: Select single or multiple transcriber for converting audio to text. You can select the transcriber depending on the selected platform.
- Answer Machine Detection Keywords: If the AI Agent detects a phrase (any phrase entered by the user) like "Please leave a message" at the start of the call, it will automatically disconnect. Enter multiple keywords, each on a new line (use
Enterto separate). - Transcriber Language: The spoken language the AI Agent listens for when converting speech into text.
- Transcriber Timeout: It defines the maximum time the system waits for a response during speech-to-text transcription before terminating the process. If no speech is detected within this period, the transcriber stops listening and times out. On timeout
<SILENT_TIMEOUT>will be sent to the LLM. -
Transcriber Silence Threshold (sec): Defines the maximum duration (in seconds) the system will wait for a response from the ASR (Automatic Speech Recognition) engine. If no transcription is received within this threshold, the transcriber will stop waiting and proceed accordingly.
-
End Turn Threshold: A sidecar classifier that detects the probability the user has finished speaking.
- When the classifier gives a low value, it means the system thinks the person is still speaking — maybe just taking a short pause.
- A high value means the system thinks the person has finished talking.
| Value | Description |
|---|---|
| 0 | Will never evaluate, will always assume end of speech |
| 0.1 | Mainly assume that the speech has ended |
| 0.9 | main assume that the speech will continue |
| 1 | Always Assume that there is more speech to come |
- Click
Save.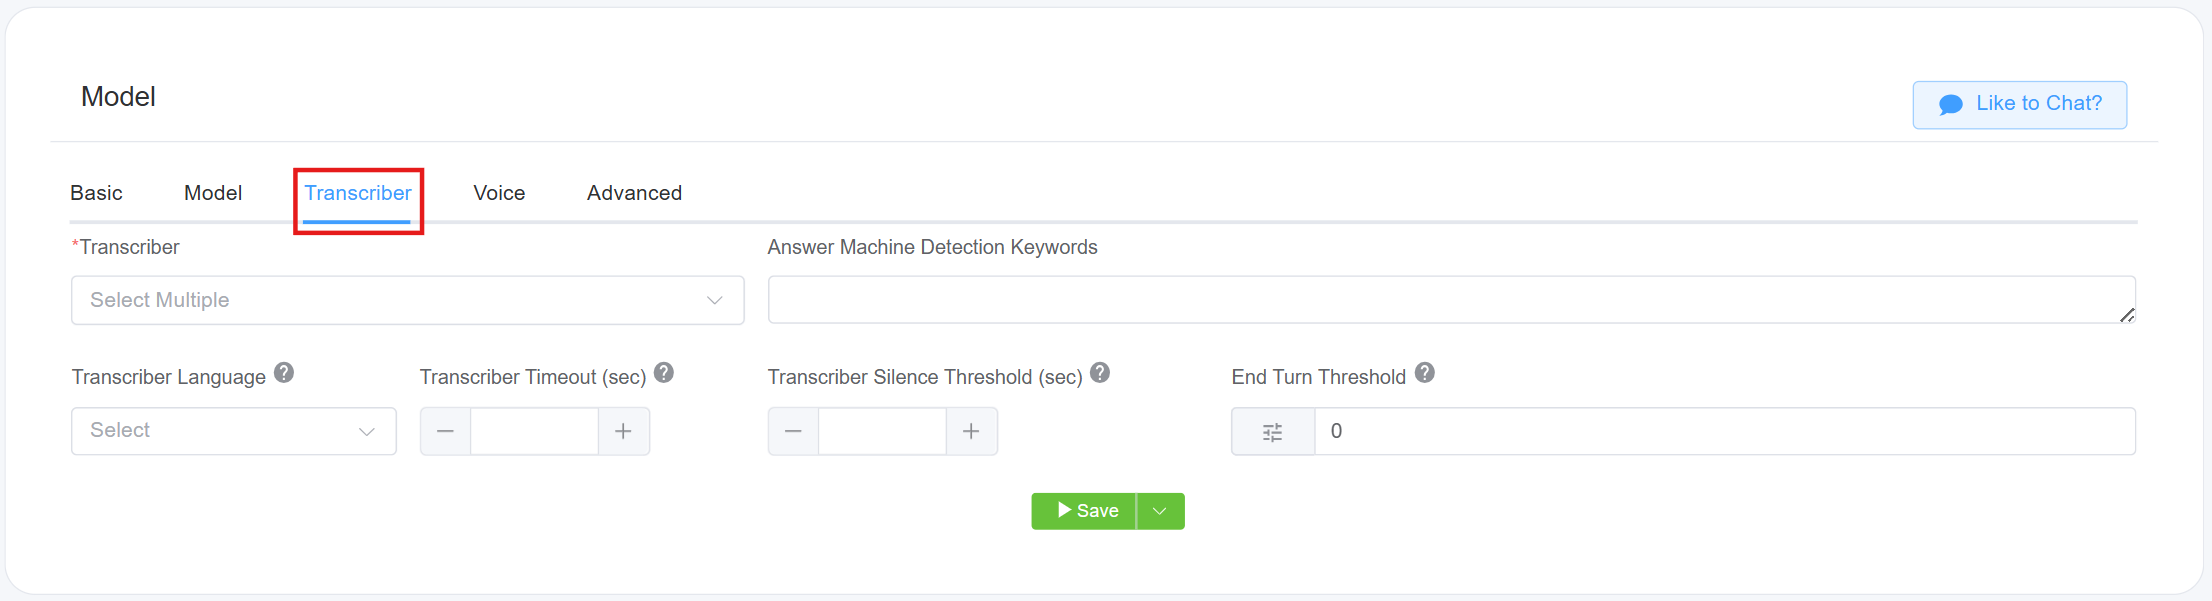
- Text To Speech(TTS): Select from various TTS models to convert your text into audio. You can select the transcriber depending on the selected platform.
- Filler Words: These are extra words people say in conversations that don’t add meaning but give them time to think. Examples include "um," "uh," "like," "you know," and "well." Select multiple filler words.
- Voice: Select the voice for the text-to-speech service.
- Min Filler Word Delay (sec): If the AI Agent fails to respond within the predefined time frame, the system will insert the selected filler words to maintain engagement with the customer.
- Interrupt Delay (sec): Refers to the time taken by the AI Agent to pause its current operation or response generation when interrupted by a user.
- Click
Save.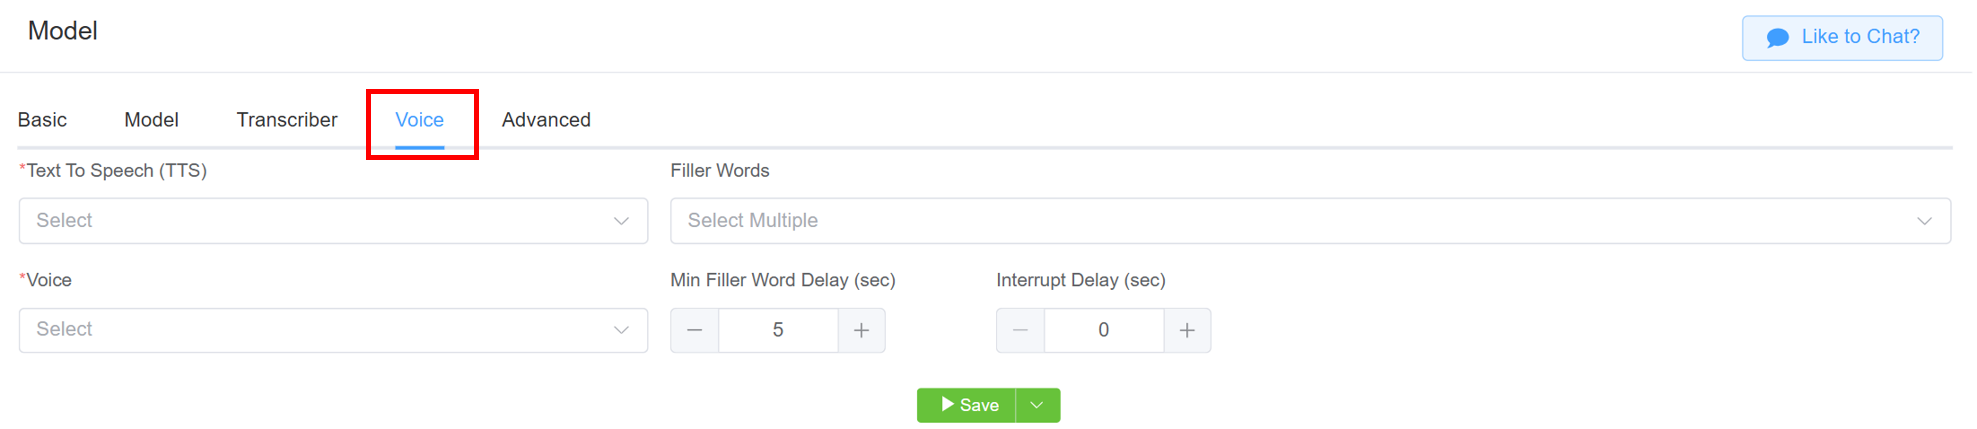
- App: Select the created app from the drop-down menu.
- Built-in Functions:
- Hangup: Use this flag to terminate the call. You can include a prompt such as, "When call ended, hangup.
- Set Variable: Set variables locally. For example, in a prompt, you could ask, "What's your name?" and save the response to the variable
name. - Transfer: Allows transfering calls to another agent.
- Search Knowledge Base: Allows the AI to query indexed documents in the Knowledge Base and return relevant information in response to a user's question.
- Tool Call Allow List: Select from a list of
functionsavailable in Apps in IDE. - Guard Rails: Choose from multiple Guard Rails options to define constraints for your AI Agent.
-
Flags: Select from various flags:
- Async Guard Rails: Currently not in use. Implements safeguards against prompt injection, mitigates hallucination risks, and enforces output validation for system integrity.
- Local Voice Activity Detection: It optimizes VoIP performance by identifying speech in real-time at the user’s device.
- Disable ScriptForge: Disables Scriptforge completely. Enabling this flag will deactivate the Tool Call Support functionality.
- Listen First: Enabling this flag ensures the LLM prioritizes listening to the user before responding.
- Vad Start Interrupt: A VAD Start Interrupt is triggered when the system detects the onset of voice activity, indicating that speech has begun.
- Complete Word on Interrupt: If the AI is interrupted, it will complete the current word before stopping execution.
- Async First Greeting: When
enabled, only the first message of the main prompt will be executed before proceeding directly to the first task. Whendisabled, the system will follow the default behavior and execute the entire main prompt sequence.
-
Precache Phrases are predefined phrases that the system processes in advance to enable faster and more efficient playback or response when required.
-
Office Background Volume: This feature enables the playback of background office sounds.
-
Temperature: Refers to a parameter that controls the creativity of the model's output.
- Low temperature (close to 0) makes the model's responses more predictable by selecting the most probable words.
- High temperature (closer to 1 or above) increases randomness, leading to more diverse and creative but potentially less coherent responses.
-
First Task: Select the list of pre-created tasks, so that your AI will perform this task as the first task and rest prompts after this task. Click here to know more about tasks.
-
Knowledge Base: Allows you to select which indexed documents an AI Agent can reference when answering user queries.
-
VarsTOML: Select the variables you want pass into the ScriptForge script.
-
Click
Save.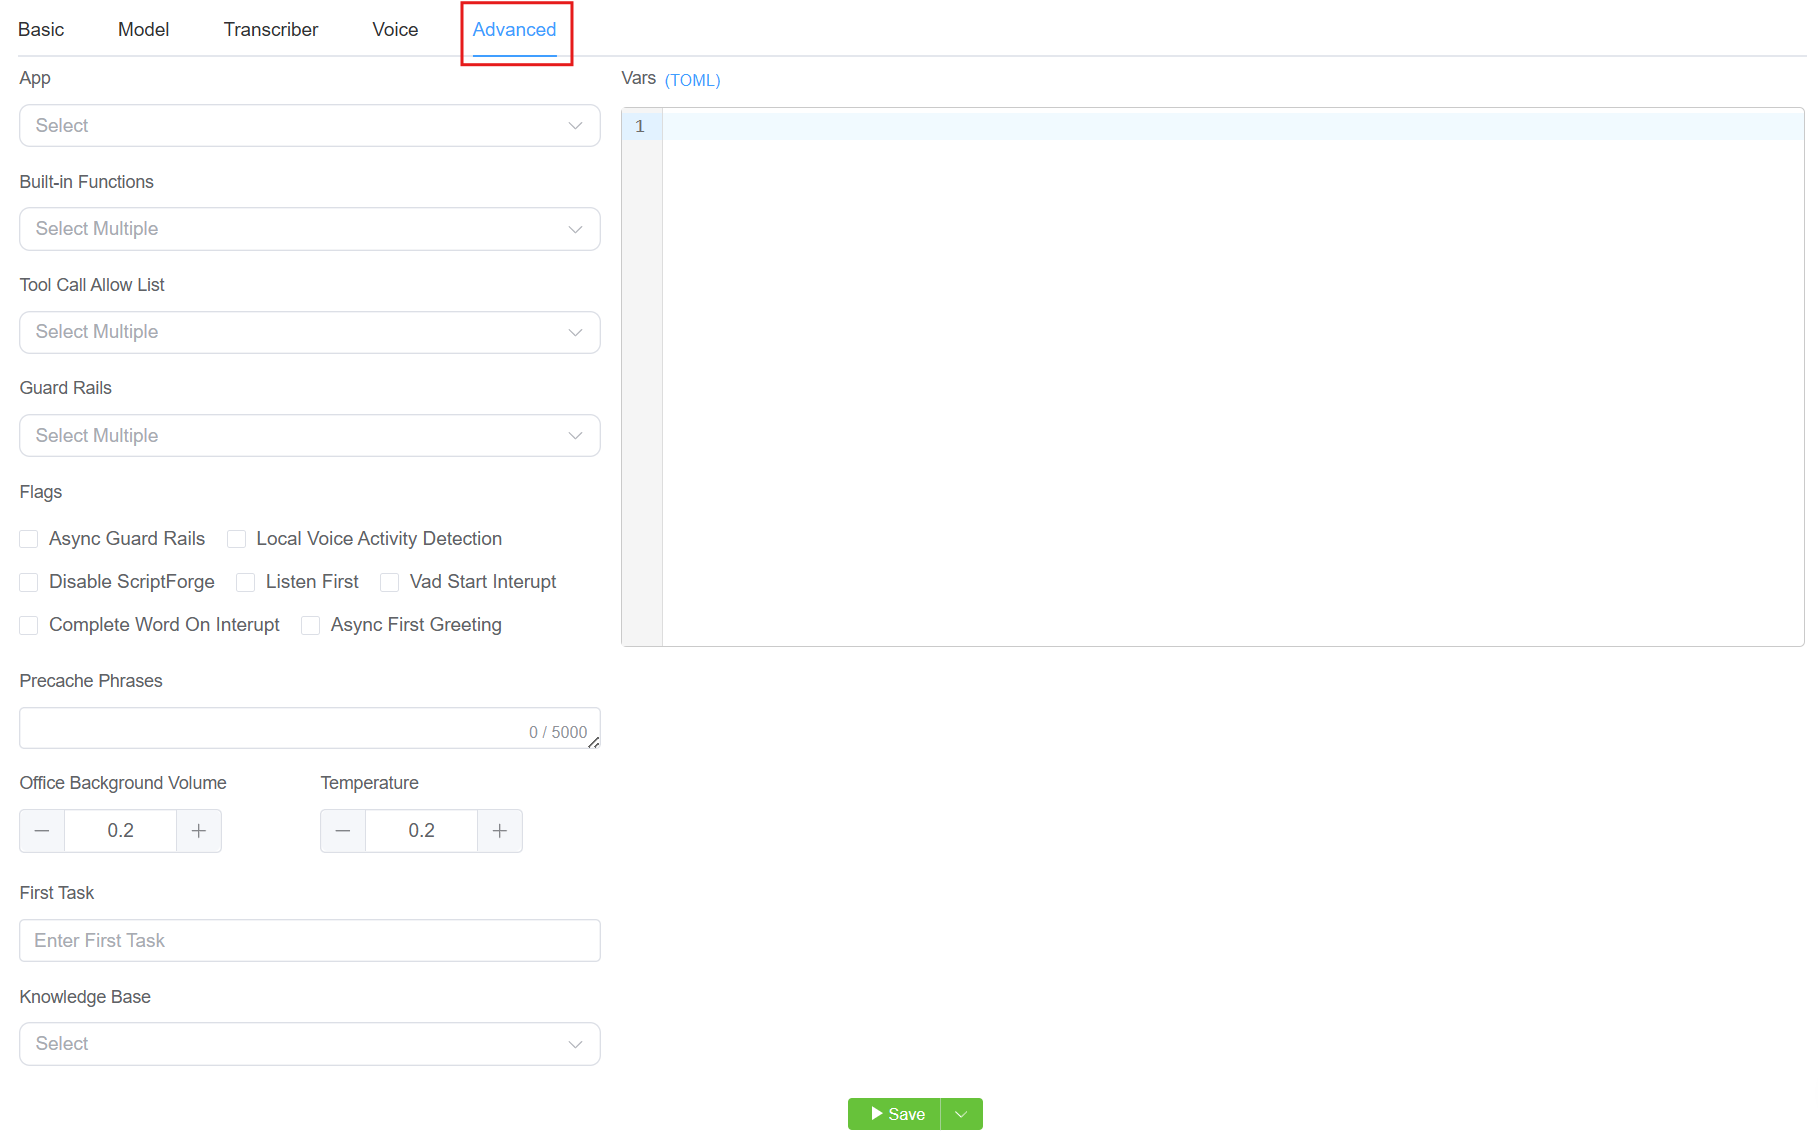
Example Prompt
Introduction:
Hello! I’m your AI assistant from ConnexCS, a leader in VoIP and cloud communication solutions. I'm here to assist you with product details, services, and billing inquiries.
Ask the Customer:
Would you like to learn about our VoIP solutions like Class 4 SIP Cloud Switch, WebRTC as a Service, or STIR/SHAKEN compliance, or do you need details on billing and pricing?
Products & Services:
Class 4 SIP Cloud Switch – Scalable VoIP carrier solution.
Class 5 PBX – Multi-tenant business communication platform.
Anycast SIP Load Balancers – High-availability SIP routing.
WebRTC as a Service – Seamless SIP-to-WebRTC integration.
STIR/SHAKEN Compliance – Secure, authenticated VoIP calls.
Carrier-Grade SIP Switching – High-volume global VoIP.
Call Recording & Transcription – Compliance & insights.
Anycast Load Balancing – Prevents service disruptions.
Billing Plans:
Per Channel: $1per channel/month
Per Minute: $0.0003/min (usage-based allocation)
Server Cost: $20 per server
AnyEdge: $20 per server
Guidelines:
- Adapt to technical & non-technical users.
- Keep responses clear, professional, and concise.
- Provide pricing & additional details as needed.
- Avoid abbreviations and ensure clarity.
Note: You have NOT YET collected any customer information, ignore any pre-set variables
Add this in the prompt to tell your LLM that no customer information has been gathered so far, and any variables or configurations that might have been pre-set should be disregarded at this stage. This ensures that the process begins with a clean slate, without relying on or being influenced by previously defined or assumed data.
Task
A Task refers to a specific goal or objective that the agent is designed to accomplish.
It usually involves processing inputs, making decisions, and taking actions to achieve the desired outcome.
How it works?
flowchart TB
A([📝 Create Initial Task]) --> B([⚙️ Go to Advanced Settings])
B --> C([📌 Set as First Task])
C --> D([🔧 Configure Task Settings])
D --> E([➕ Add Next AI Agent Task])
E --> F{🧠 Is Condition Met?}

F -- ✅ Yes --> G([➡️ Proceed to Next Task])
F -- ❌ No --> H([⏸️ Stop])

G --> I([🔁 Repeat for Next Task])
I --> E

%% Styling
classDef step fill:#E0F7FA,stroke:#00ACC1,stroke-width:2px,color:#004D40;
classDef decision fill:#FFF3E0,stroke:#FB8C00,stroke-width:2px,color:#E65100;
class A,B,C,D,E,G,I,Z step;
class F,H decision;
Steps to Create a Task
- Log in to your account.
- Navigate to Class 5 AI Agent.
- Click on Task.
- Click on the blue
+sign (Add next node). It will update the first task.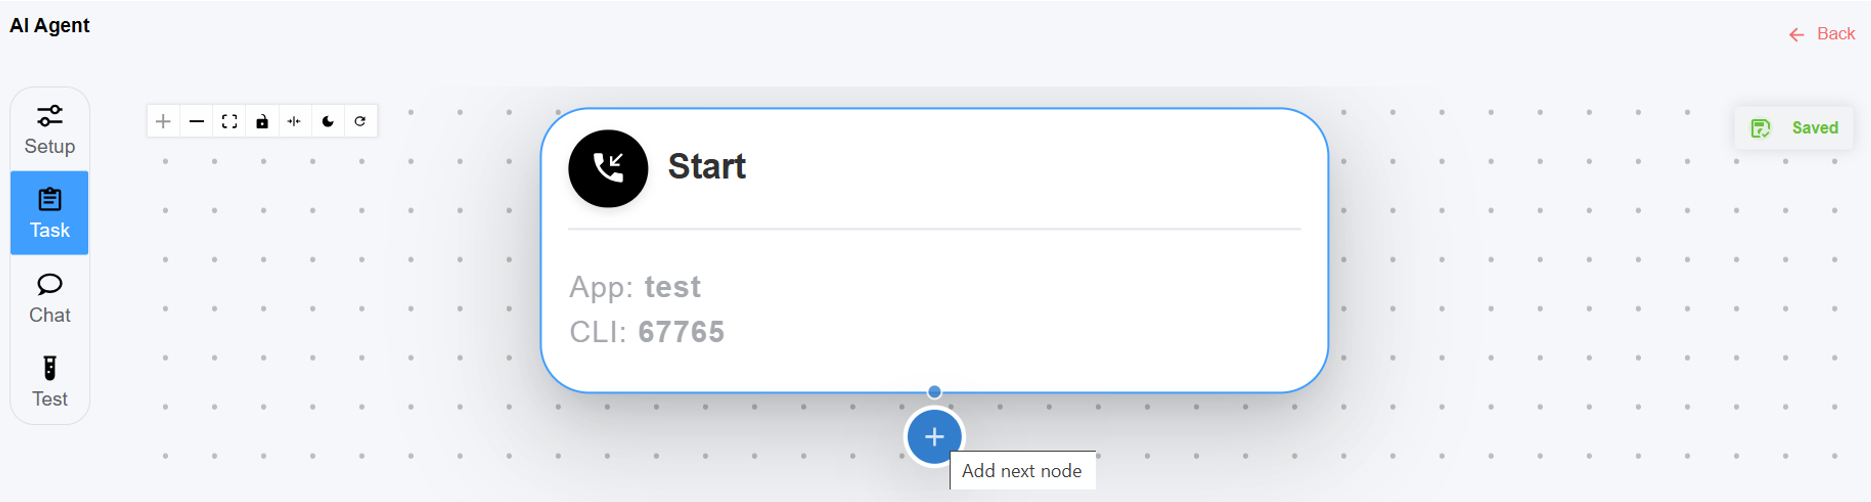
-
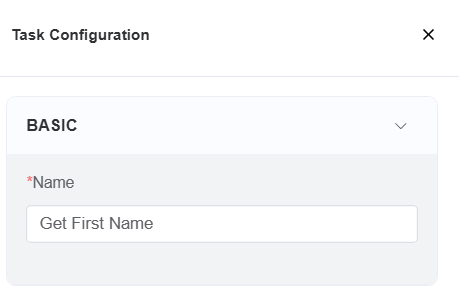
Fill in the following fields to setup the task for your AI Agent:
-
Basic:
-
Name: Enter the name of your task.
-
-
Model:
-
Model: Select a model for the selected platform. A model is a specific version or configuration of an AI system to perform tasks like text generation, real-time interactions, etc.
Info
Different platforms offer specific models suited to their capabilities.
-
First Message: The initial message spoken by the agent. For example, when the agent begins the conversation.
-
Prompt: The prompt field allows you to enter a set of instructions to guide the AI Agent to perform certain tasks. It provides the foundation for the AI to comprehend the context, interpret the user's purpose, and generate relevant results.
-
-
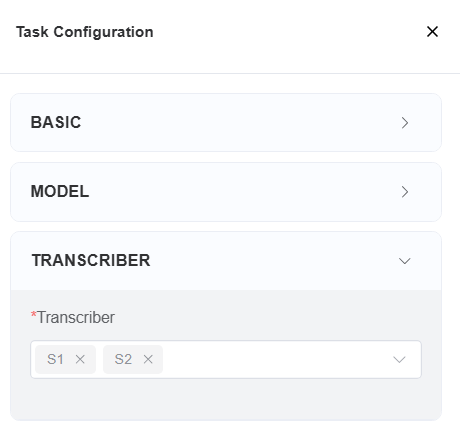
Transcriber
-
Transcriber: Select a single or multiple transcribers for converting audio to text. You can select the transcriber depending on the selected platform.
-
-
Advanced
- Built-in Functions:
- Hangup: Use this flag to terminate the call. You can include a prompt such as, "When call ended, hangup.".
- Set Variable: Set variables locally. Set variables locally. For example, in a prompt, you could ask, "What's your name?" and save the response to the variable
name. - Transfer: Allows transferring calls to another agent.
-
Tool Call Allow List: Select from a list of
functionsavailable in Apps in IDE. -
Guard Rails: Choose from multiple Guard Rails options to define constraints for your AI Agent.
-
Flags: Select from various flags:
- Async Guard Rails: Currently not in use.
- Local Voice Activity Detection: Optimizes VoIP performance by identifying speech in real time at the user’s device.
- Disable ScriptForge: Disables ScriptForge completely. Enabling this flag will deactivate the Tool Call Support functionality.
- Listen First: Enabling this flag ensures the LLM prioritizes listening to the user before responding.
- Vad Start Interrupt: A VAD Start Interrupt is triggered when the system detects the onset of voice activity, indicating that speech has begun.
- Complete Word on Interrupt: If the AI is interrupted, it will complete the current word before stopping execution.
- Async First Greeting: When enabled, only the first message of the main prompt will be executed before proceeding directly to the first task. When disabled, the system will follow the default behavior and execute the entire main prompt sequence.
- Include Primary Chat History: Includes the full conversation history from the primary session, allowing the AI to access prior interactions for better context and continuity.
- Include Primary Prompt: Appends the initial prompt from the primary task to the current session, ensuring the AI has visibility into the original instruction or objective.
- Sync Primary Chat History: Enables real-time synchronization with the primary chat session, so updates and responses are reflected across both the original and current contexts.
- Summarize History on Exit: Generates a concise summary of the conversation when the task concludes.
- Bill Task Separately: Marks this task to be billed independently from the rest of the session
-
Office Background Volume: This feature enables the playback of background office sounds.
-
Temperature: Refers to a parameter that controls the creativity of the model's output.
- Low temperature (close to 0) makes the model's responses more predictable by selecting the most probable words.
-
High temperature (closer to 1 or above) increases randomness, leading to more diverse and creative but potentially less coherent responses.
-
VarsTOML: Select the variables you want pass into the ScriptForge script.
- Built-in Functions:
-
Click
Save.
-
To use this created task select it under Advanced First Task.
Note
- If
Include Primary Chat Historyischecked,Include Primary Promptwill be ticked automatically. - If
Sync Primary Chat Historyischecked,Include Primary Chat HistoryandInclude Primary Promptwill be ticked automatically.
-
AI Agent Task Conditions
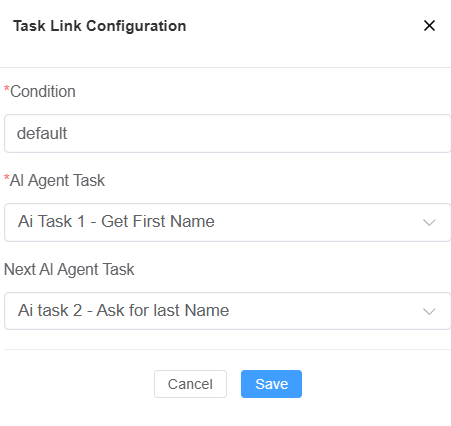
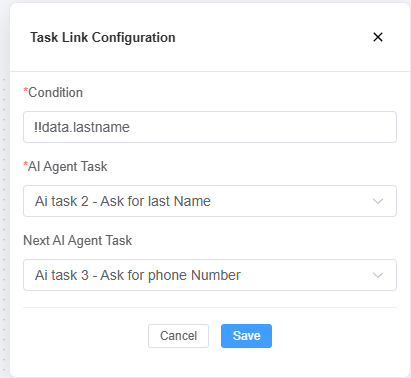
In the AI Agent Task configuration, the Condition field defines the rule that determines when a specific task should be executed.
It allows you to control the flow of conversation by linking one task to another based on user input, recognized entities, or system logic.
-
Field Description
-
Condition: The logic that triggers an AI Agent Task. If the condition evaluates as true, the defined task will run.
-
AI Agent Task: Its the current task.
-
Next AI Agent Task: This task will be executed if the condition is met.
-
-
Types of Conditions
-
Default: Executes when no other specific condition is met.
-
Example: If the caller has not given a recognizable input, the AI Agent moves forward with the default task.
-
-
Custom Conditions: Allows branching based on input or context.
-
Common use cases:
-
User Input: If the caller says “yes” or “no.”
-
Entity Recognition: If the system has captured an email address, phone number, or name.
-
System Variables: If a variable (e.g., customerID) exists or matches a value.
-
-
Benefits of Using Conditions
-
Enables dynamic branching in AI conversations.
-
Improves user experience by adapting responses to input.
-
Provides greater control over workflow design.
-
You can pass variables using JSON in the prompt section to configure or initialize them.
Make sure you select SetVariable under Advanced Built-in Functions Set Variable
Example Use Case
Store the caller's name by calling the setVariable function with name=name and value=[The customers name].
AI Platforms, Models, Voices, TTS, Transcribers
| Platform | Model | Transcriber | Text To Speech (TTS) | Voice |
|---|---|---|---|---|
| ConnexCS Converse Direct | Select from the multiple options | ConnexCS Internal | Google, PlayHT |
While accessing the ConnexCS Converse Direct Platform, you will notice that models in the drop-down menu are labeled with "(Tools)". Selecting a model without the (Tools) designation will prevent you from accessing ScriptForge and performing behind-the-scenes tasks.
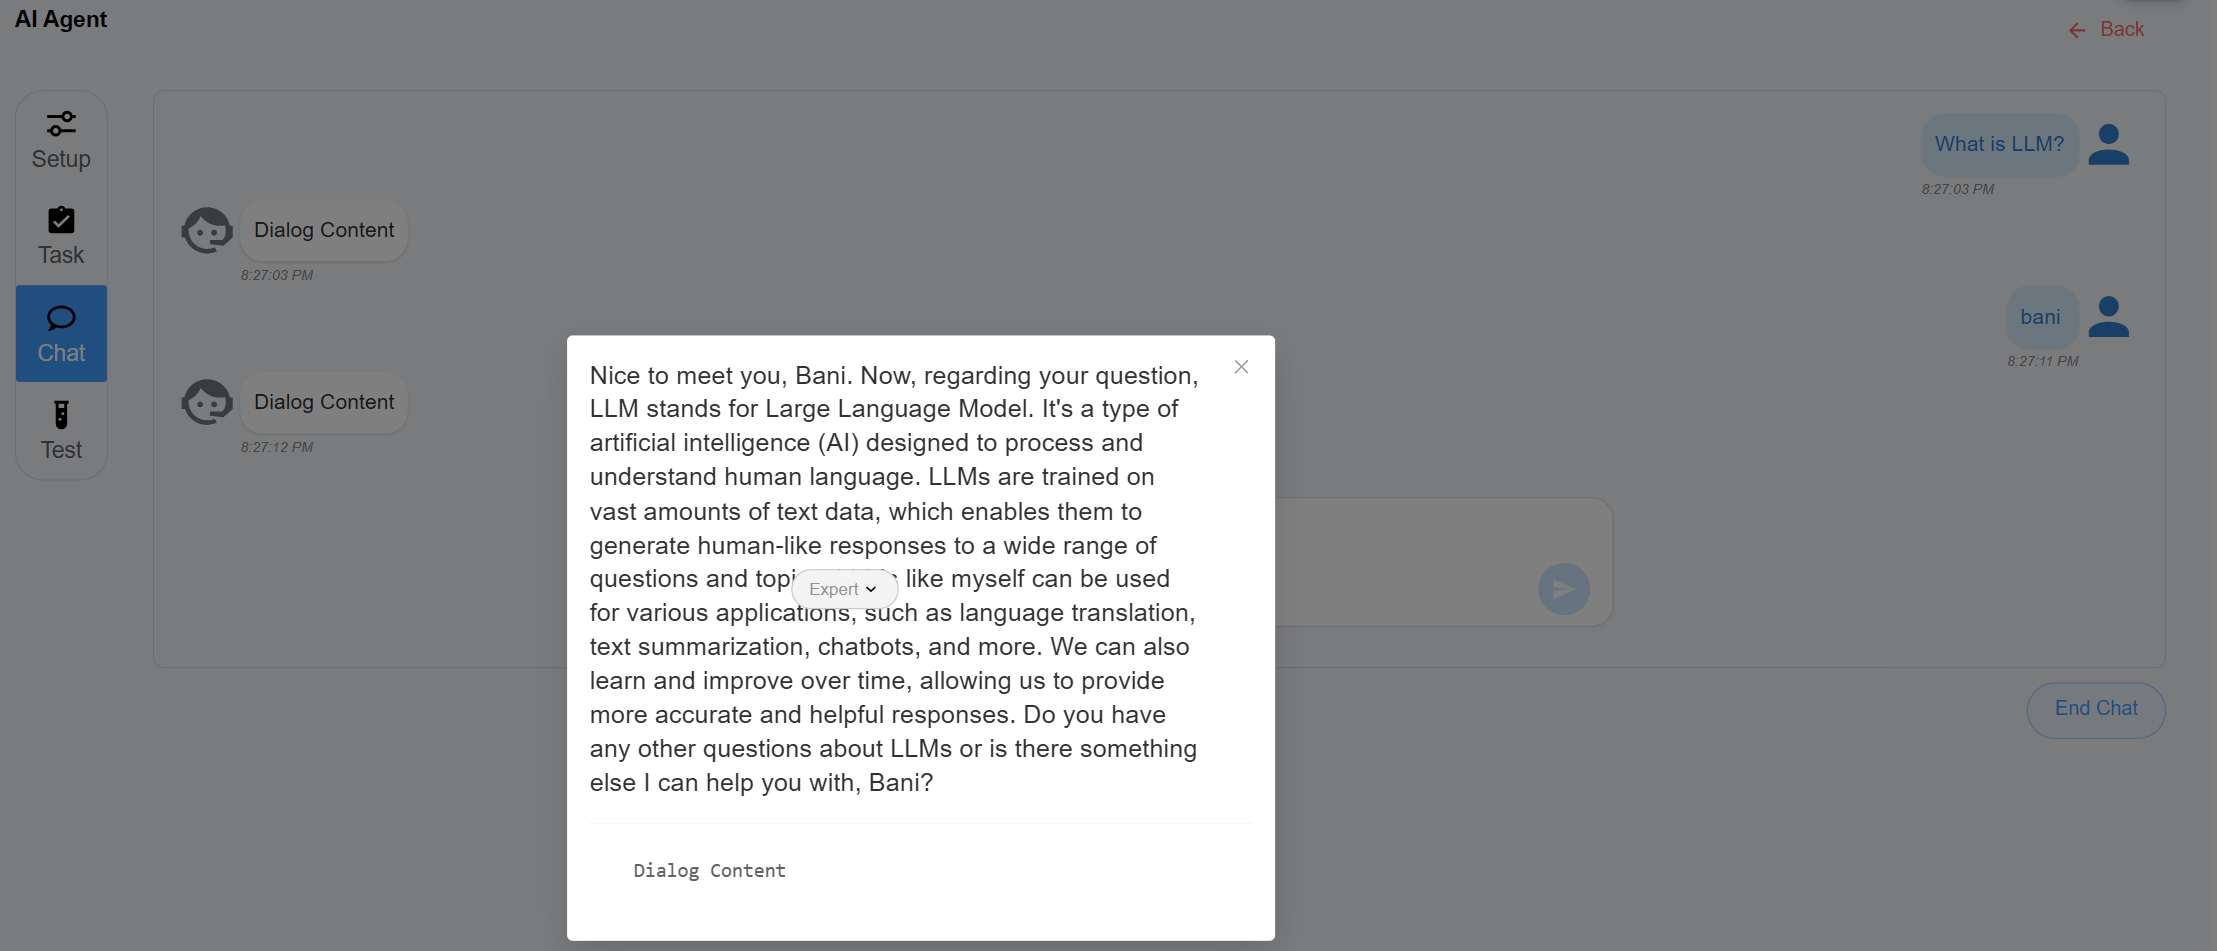
Chat
The Chat interface will provide responses based on the prompts you submit. Each reply will be tailored specifically to the content and context of your input, ensuring relevant and accurate information is delivered efficiently.
To improve the relevance and accuracy of the AI's replies, you can use the Add Context feature.
Before starting, choose a model mode—Standard for fast results (default) or Expert for deeper reasoning with longer response times
How to access the Chat feature?
- Login to your account.
- Navigate to Class 5 AI Agent.
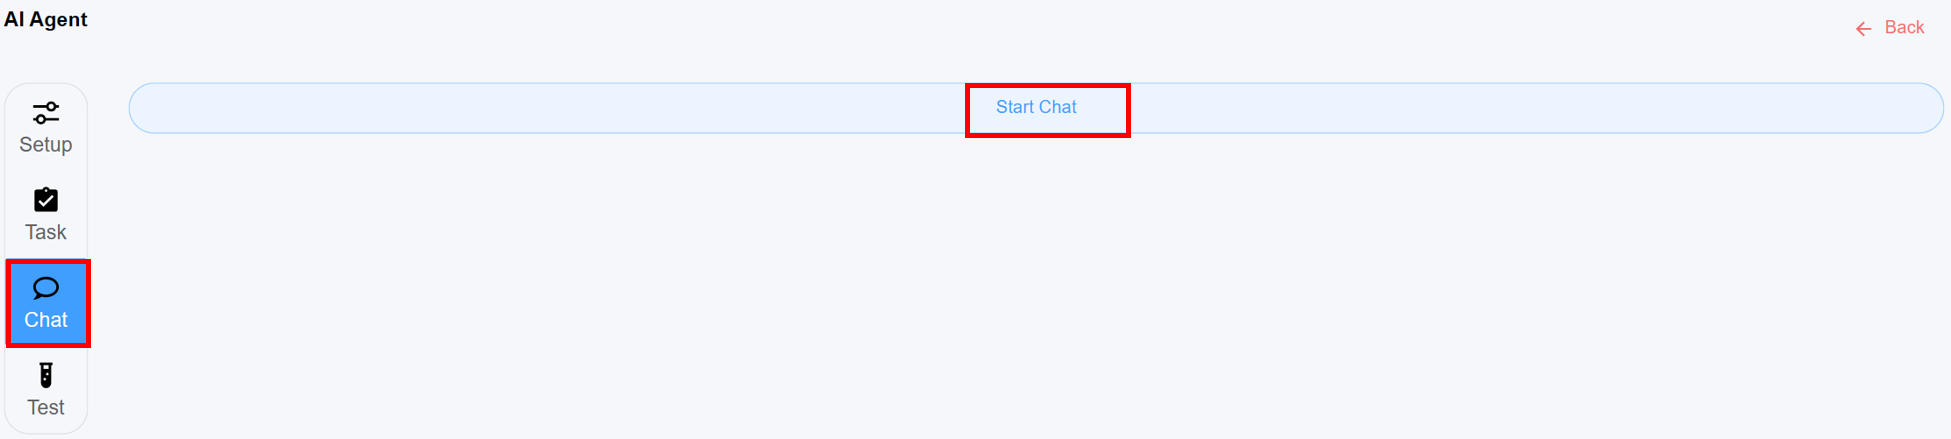
- Click on Chat.
-
Click on Start Chat.
-
Before initiating interaction with the AI chatbot, you must configure a few initial settings:

-
Add Context(optional field): Allows you to provide additional information to the AI before or during a conversation so it can give more accurate, relevant, and helpful responses. You can either addText Inputor upload text files usingFile Uploadoption.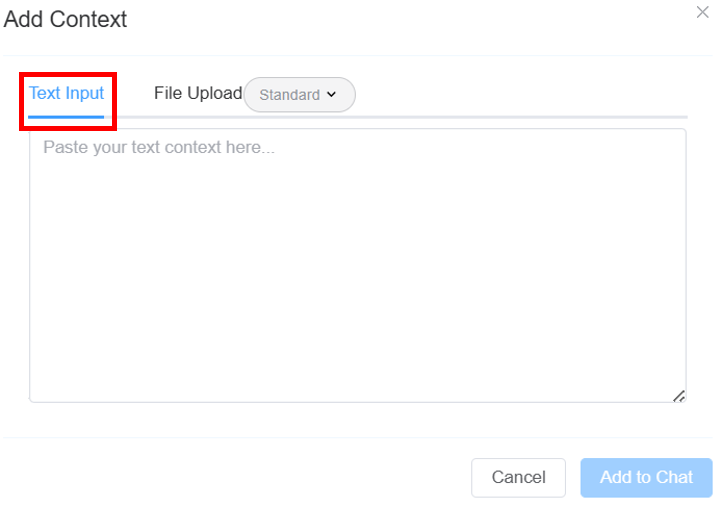
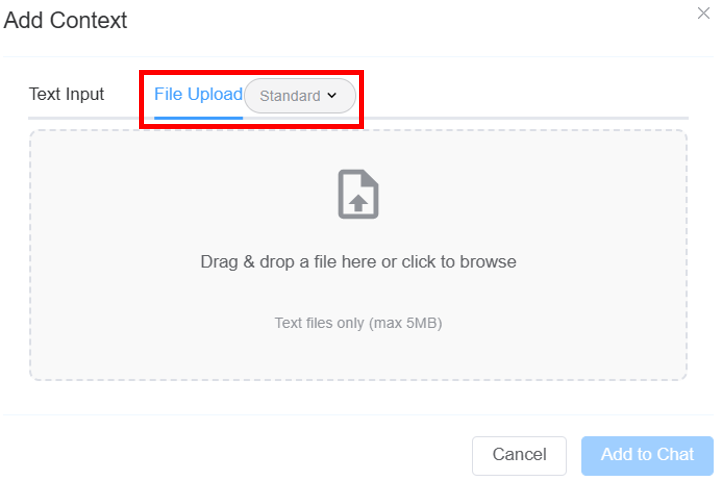 .
.
ClickAdd to Chat. -
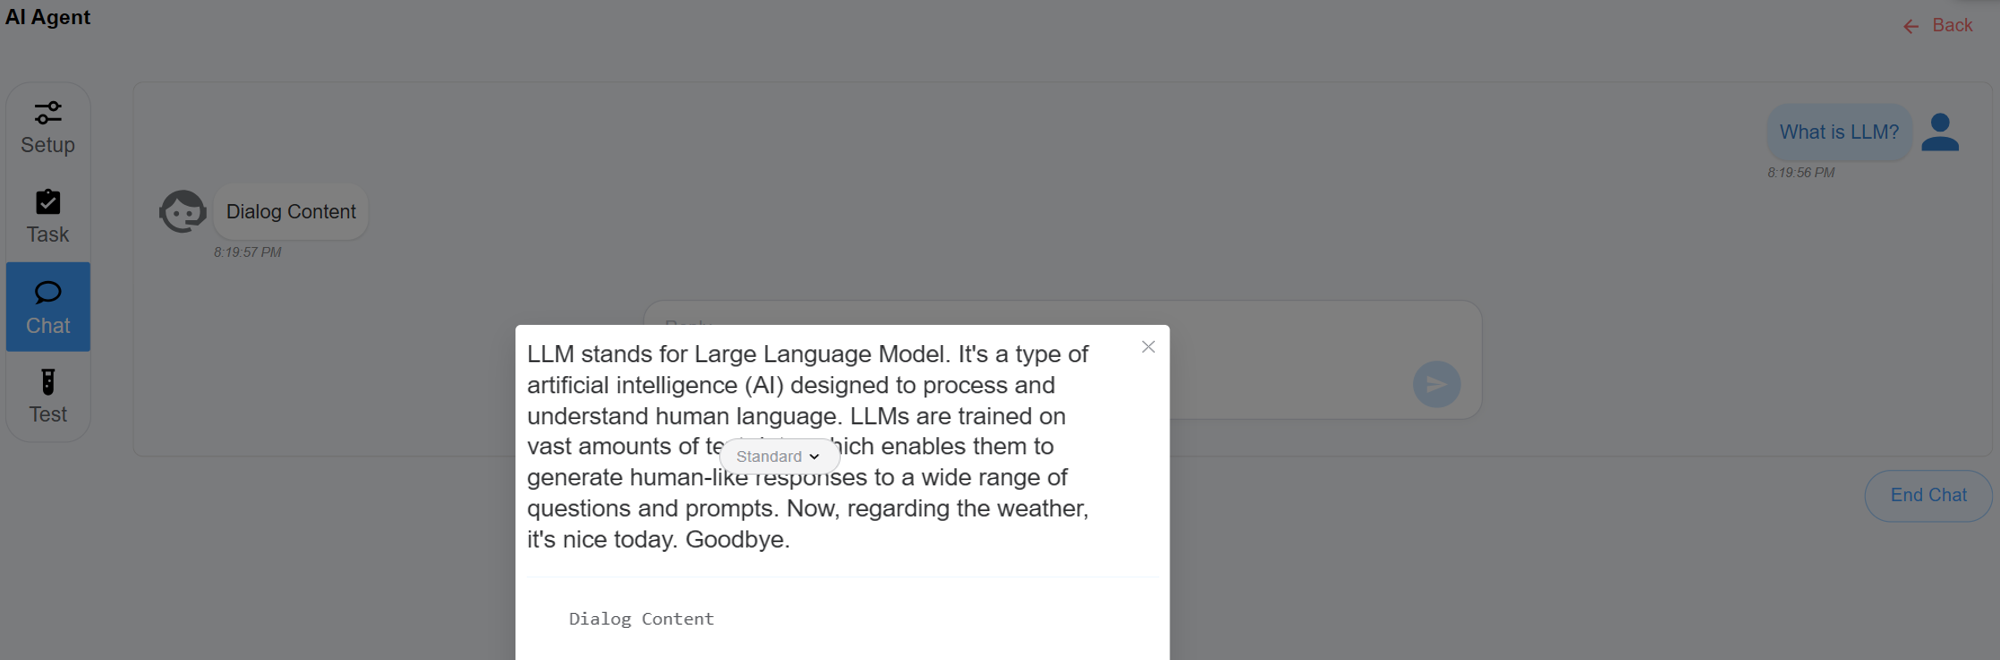
Select the mode of the model:
Standard(default): A fast model focused on quick results.Expert: A reasoning model, takes longer to respond.
Togglefor fullscreen.
Example for Standard Mode
Example for Expert Mode
How to use Functions for the Large Language Models (LLMs)?
To grant access to functions for an AI agent, follow these steps:
-
Create an App from IDE:
- Login to your account
- Navigate to IDE Application.
- Create a new App. Click here to follow the steps.
-
Add a Script Forge: Under the newly created app, add a Script Forge. Click here to know the steps.
-
Define the Function: Within the Script Forge, add the function you want the AI agent to access.
Example Function
1
2
3
4
5
6
7
8
9
/** * Transfer * @param {Object} param - Param Object * @param {string} param.name - The name of the person who you wish to transfer the call to. */ function transfer() { console.log(`We are going to transfer the call`) return { action: 'transfer', destination: '4423456526787365' } } -
Assign the App to the AI Agent:
- Navigate to your AI agent that you have previously created.
- Under the Basic in the App field app, choose the created App.
-
Allow Function Access:
- Navigate to Advanced tab (in AI Agent), then select the created function in the Tool Call Allow List and grant access from the list.
Example Function
1 2 3 4 5 6 7 8 | |
Following these steps ensures that the AI agent has the necessary permissions to interact with the designated function.
Example Script
1 2 3 4 5 6 7 8 9 10 11 12 13 14 15 16 17 18 19 20 21 22 | |
JSDoc Notation
Using JSDoc for optimizing function usage within LLMs:
-
Provides clear descriptions of each function, parameter, and return type, making the purpose and behavior of LLM-related functions easy to understand.
-
Reduces confusion and errors.
-
With multiple developers working on an LLM project, JSDoc serves as a standardized way to share knowledge.
-
LLM will exactly know how to interact with the code (Scriptforge).
The function description must be brief, sharp, and accurate. Expanding it unnecessarily may create significant risks.
Call Transfer Techniques
Calls can be routed to another agent through two different transfer options.
-
Using the built-in
Transferfunction:- Select
Transferfrom the Advanced Built-in Functions tab. - Navigate to the Model tab and insert the given prompt in the Prompt section.
If requested you please call the transfer function with
input phone numberas the parameterdestination.
Security Warning
Implementing this way will give the LLM the capability to transfer to ANY number. If a carefully executed instructions are passed to the LLM via a caller, it MAY be possible to encourage the LLM to dial a DIFFERENT number.
We would recommend against this method outside testing. Furthermore, it's highly advisable that the routing is additionally protected, to all additional layers of security.
See below for a recommended strategy to implement transfers.
- Select
-
Using Transfer function with Script Forge:
- Login to you account.
- Navigate to IDE ScriptForge.
- The script is as follows:
1
2
3
4
5
6
7
8
/** * Transfer * @param {Object} param - Param Object * @param {string} param.name - The name of the person who you wish to transfer the call to. */ function transfer() { return { action: 'transfer', destination: 'input phone number' } } - Navigate to Class 5 AI Agent.
- In the Basic tab select the created transfer application from the dropdown in the App field.
- Navigate to the Advanced tab and select the created
transfer functionin the Tool Call Allow List.
How to Enable Reseller Billing for AI Agent Services?
Our AI Agent comes equipped with robust reseller capabilities. For instance, if you’ve created and assigned a package to a customer, you can associate their company with the AI Agent. Once this connection is in place, charges for using the AI Agent are automatically deducted. With the package already linked to your customer, managing reselling becomes effortless and efficient.
How does it work?
- Create a package under Setup Config Packages. Click on the blue
+sign. - Enter the Name of the package (
Test123in this example). - Enter cost in the Retail field.
- Select the ConnexCS Package like ConnexCS Converse, ConnexCS Converse Direct etc.
- Click
Save.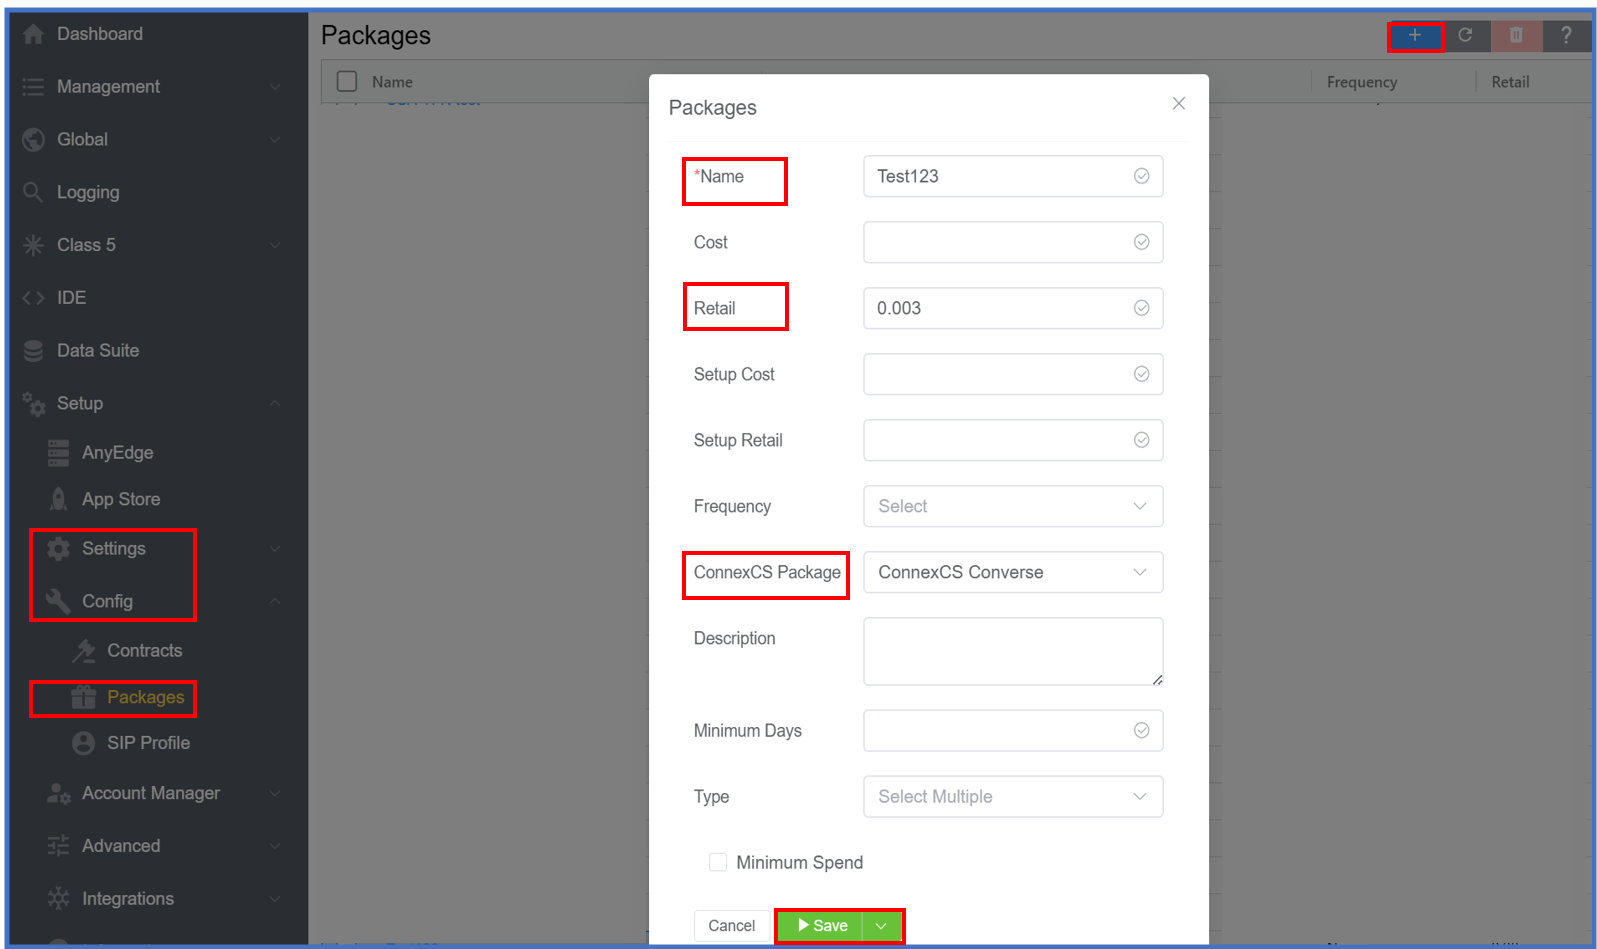
- Then Navigate to Management Customer Customer [Name] Packages. Click on the blue
+sign. - Select the Package (
Test123in this example), Quantity, Start Date, always enable Auto Decrement Credit. - Click
Save.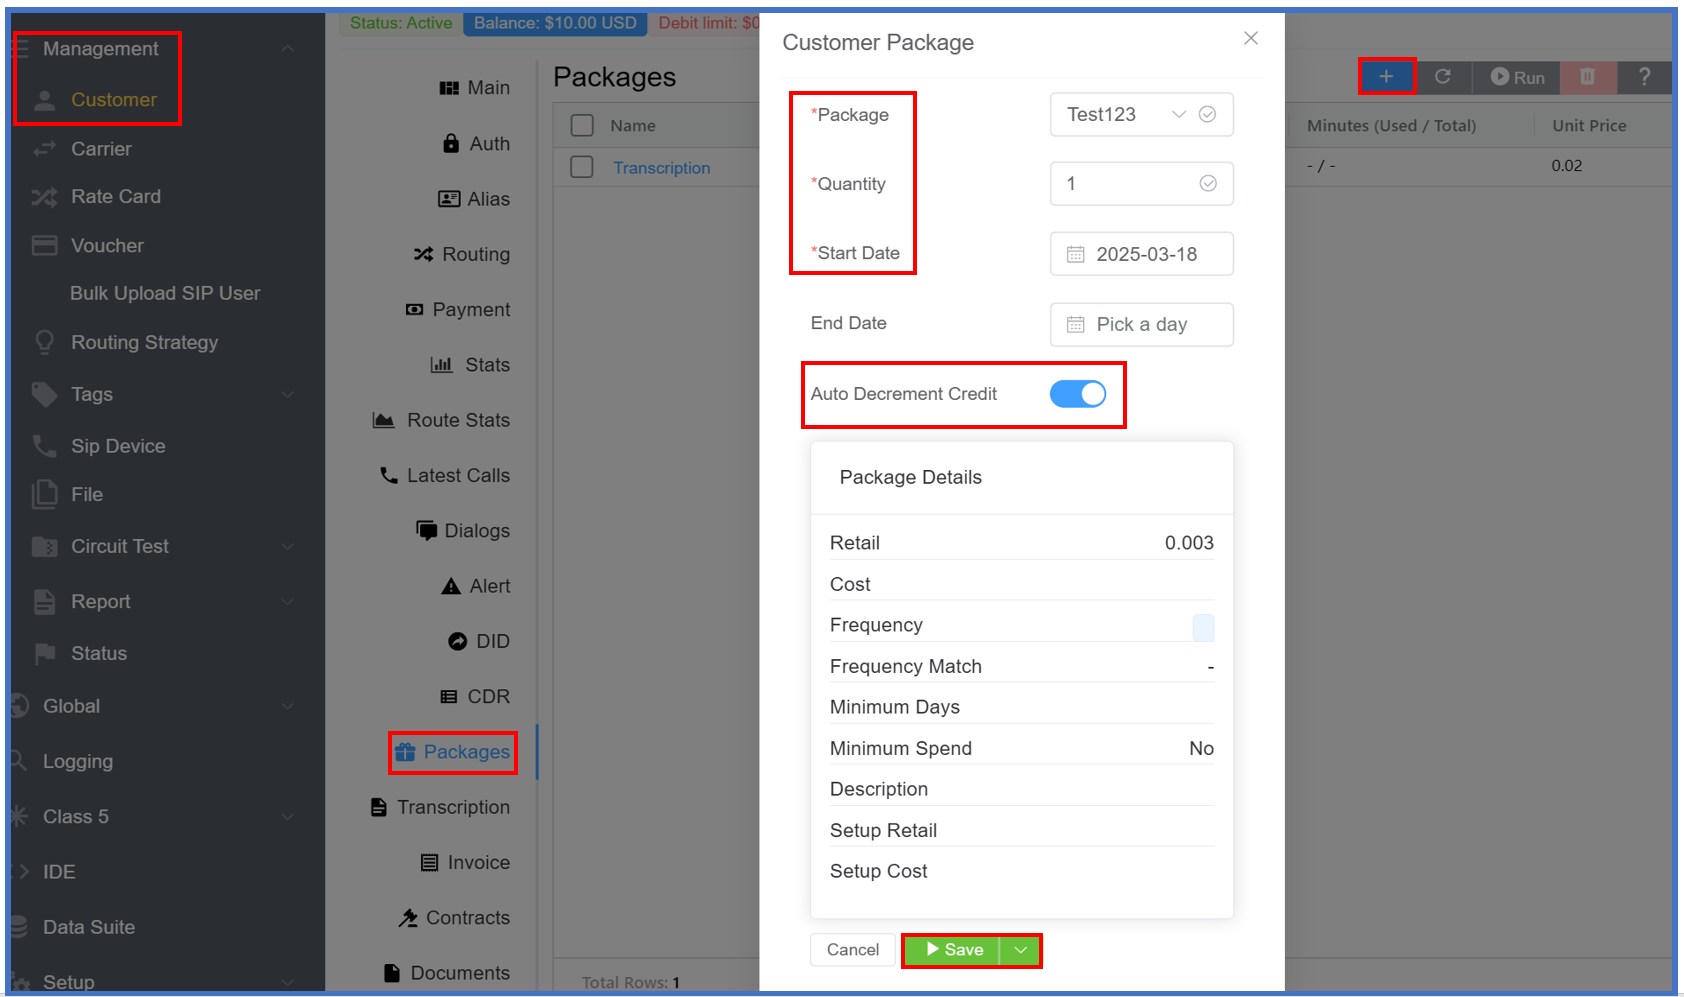
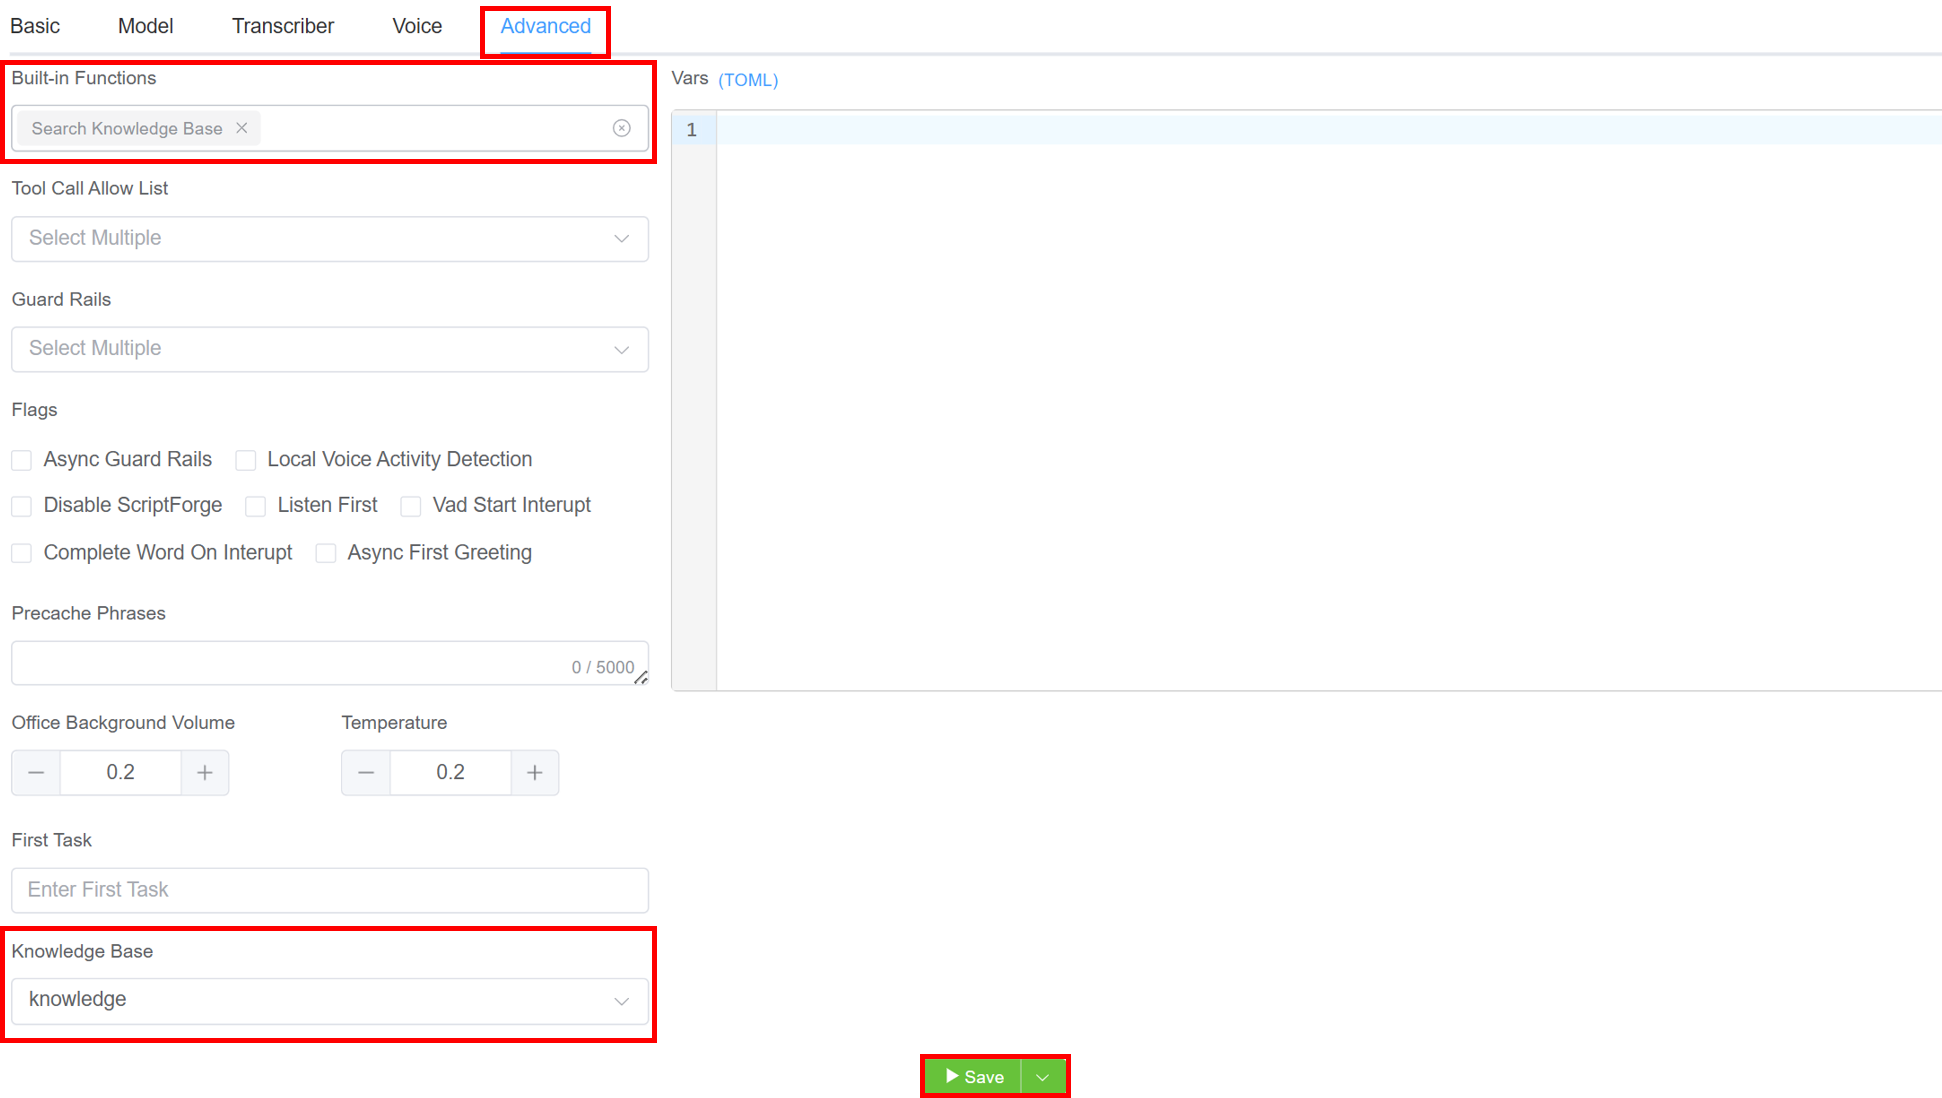
Integrating Knowledge Base into Your AI Agent
- Create your AI Agent.
- A few more adjustments are needed:
- Select
Search Knowledge Basefrom theBuilt-in Functionsoption - Select your
Knowlegde Basefrom theKnowledge Basedrop-down.
- Select
- Click
Save.
Info
For the most accurate and helpful results from the integrated knowledge base, try phrasing your prompt like this:
Instructions
You can call the knowledge base only when you are required to and search for info that you require only
Only do one 1 lookup per human interaction.
Keep your replies short