Getting Started
Document Metadata
Category: Setup & Configuration
Audience: New Users, Administrators
Difficulty: Beginner
Time Required: 2–4 hours
Prerequisites: ConnexCS account created
Related Topics: Dashboard, Carrier Setup, Customer Setup
Next Steps: Carrier Configuration, Rate Card Setup
Welcome to ConnexCS!
We're excited to have you on board. This guide will walk you through the key features and settings you'll need to begin your journey with ConnexCS.
Our platform is designed to streamline your communication and billing processes, making it easier to manage your customers, carriers, and rate cards.
Initial Setup Overview
The initial setup in ConnexCS will configure:
-
A single carrier
-
A single customer
-
A single rate card
This provides you with a base configuration that you can expand as needed. Whether you're managing a few customers or scaling to handle unlimited connections, ConnexCS supports seamless growth with flexible and robust features to meet your business requirements.
Ready to begin? Let's walk through the steps to set up and customize your ConnexCS environment!
Changing the UI language
To change the display language for the UI, click your name in the upper-right corner and select Change Language.
What's my server's IP Address?
IP addresses are deployed after you complete the Getting Started steps.
Need Help?
If you need help, we offer free 1:1 training, which you can book at https://connexcs.youcanbook.me/.
Prerequisites
Before you begin, ensure you have:
- A modern web browser such as Google Chrome, Firefox, Safari, or equivalent
- A basic understanding of telecommunications concepts (customers, providers, and rates)
- A ConnexCS account (register at ConnexCS if you haven't already)
Account Setup and Verification
Upon creating your account, you’ll need to complete a few key steps to ensure everything is properly set up.
Use the Alerts icon at the top left of the screen to view all outstanding items:

Email Verification
You'll receive a verification email after account creation. This is a security measure to prevent unauthorized access to customer accounts and works similarly to standard email verification mechanisms.
To verify your email address:
- Select
Verify Email. The Personal Profile screen will appear. - Click the orange
!icon next to Email. This generates a verification code and sends it to your email address. - Either click the link in the email or copy and paste the code into the Verification Code field in the Verify Email pop-up.
-
Click
Verify.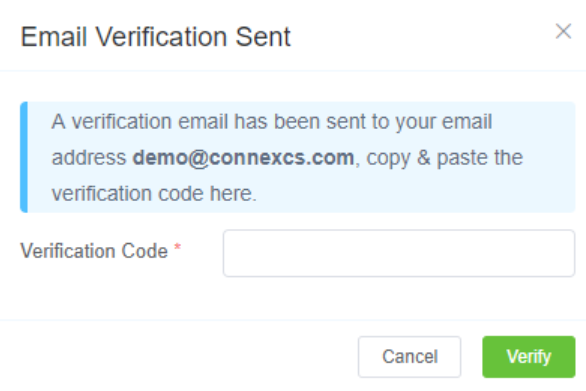
Mobile Verification
Mobile Verification ensures that all mobile phone numbers associated with your account are genuine. This is an extension of email verification and adds an additional security layer.
Before starting, ensure your mobile number information is correct.
Number Format
The number must be in E.164 format: [+] [country code] [subscriber number including area code]. E.164 numbers have a maximum of fifteen digits.
To verify a mobile number:
- Select
Verify Mobile. The Personal Profile screen will appear. - Confirm the number is correct and in E.164 format: [+] [country code] [subscriber number including area code] with a maximum of fifteen digits.
- Click the orange
!icon next to Mobile. This will generate a verification code and send it to your mobile number. - Enter the code into the Verification Code field in the Verify Mobile pop-up.
-
Click
Verify.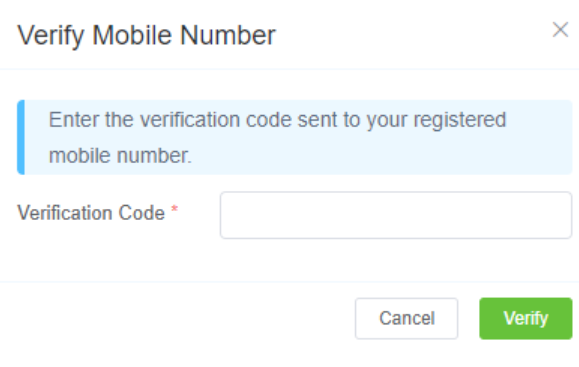
Additional Verification Fields
You may also need to verify the following information:
- Company Registration
- Company Details
- Company Registration ID
- Country
- Address
- VAT Registration ID
- Shareholder Certificate
Customer-Carrier Billing Setup
Follow these steps to set up routing and billing.
Carrier Setup
Carriers are your VoIP route providers. Below are the required fields for basic carrier setup.
For detailed instructions, see Carrier.
- Navigate to Management Carrier.
- Click the
+icon. - Enter the Carrier Name.
- Select the carrier's currency type (for example: USD, GBP, or EUR).
- Click
Save. - Select Auth from the Carrier screen.
- Click
+under IP Authentication. - Enter the termination IP address.
-
Click
Save.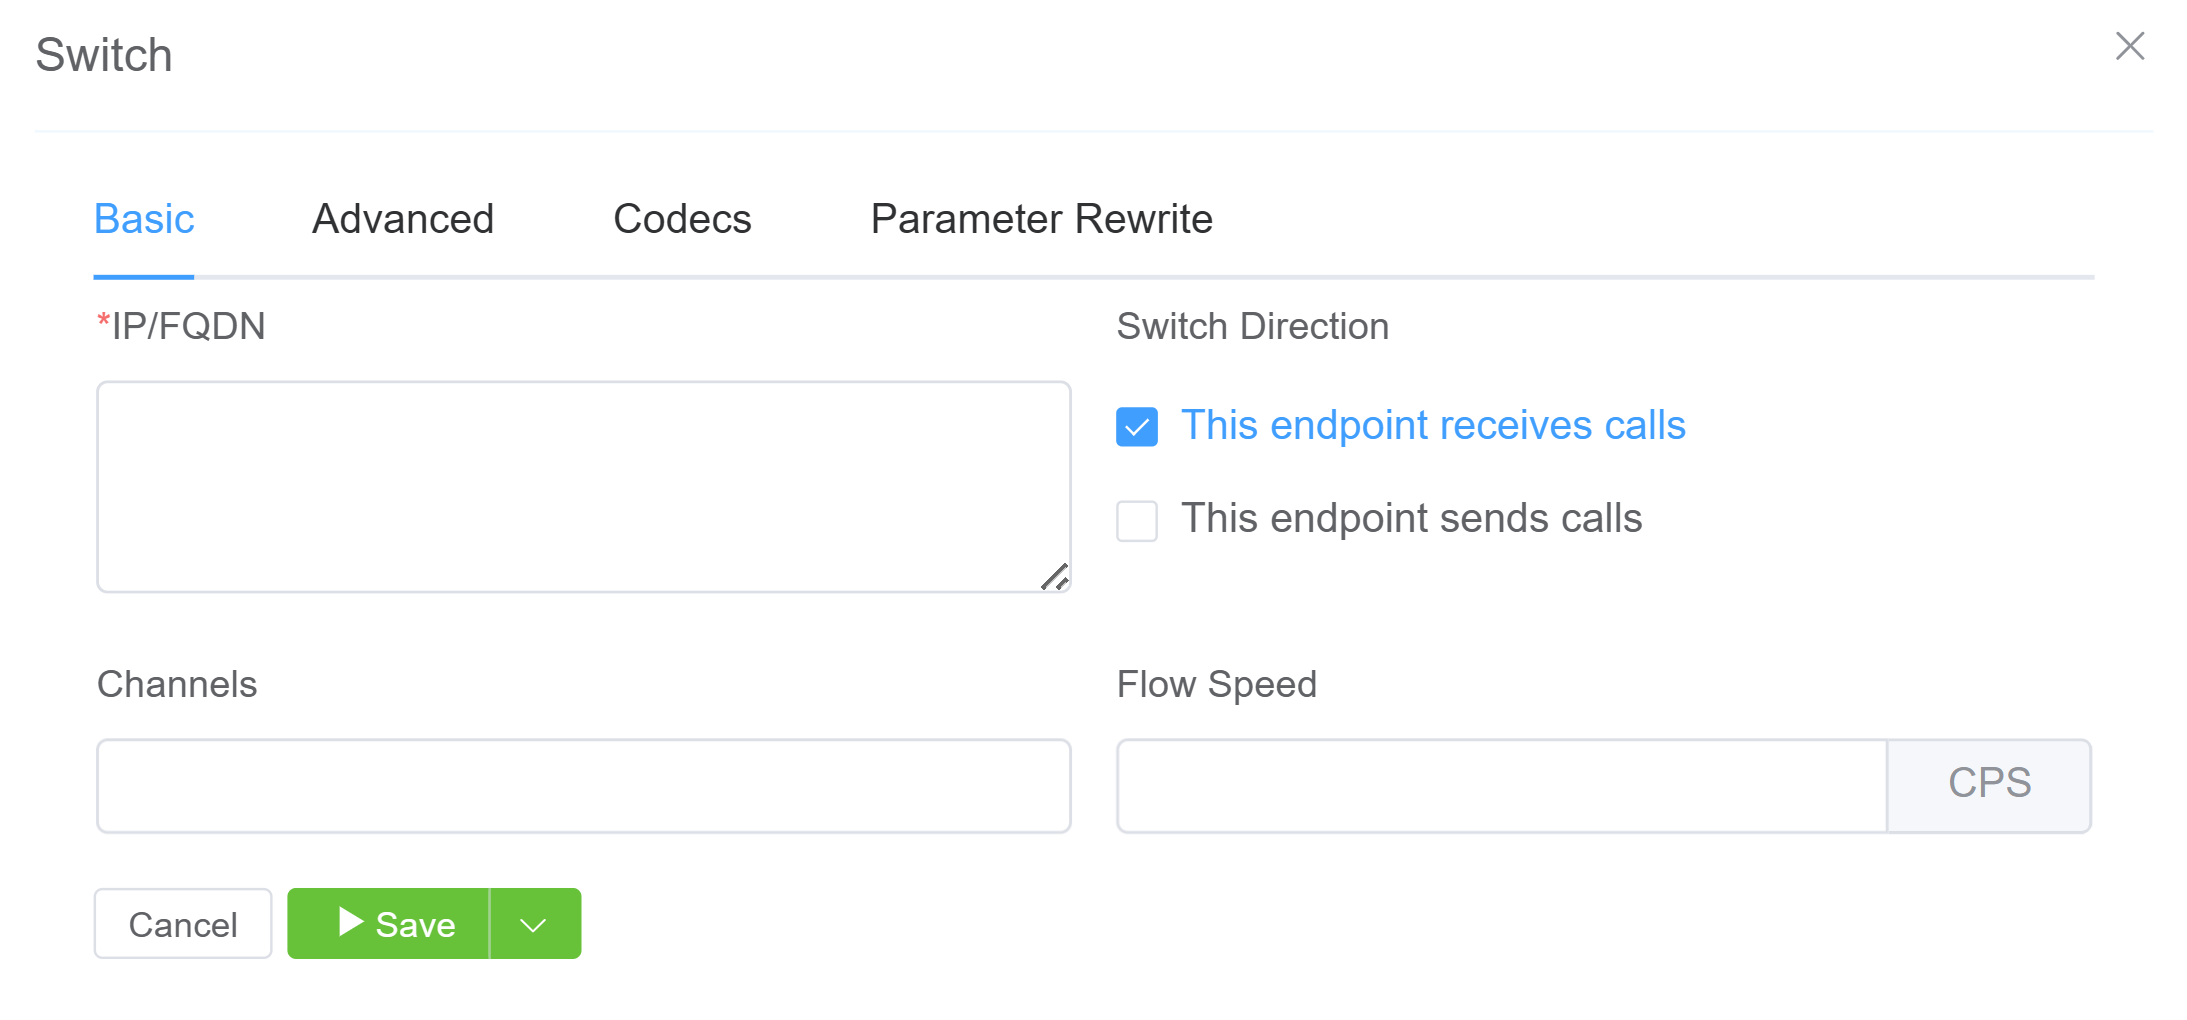
Click here for video playback.
Rate Cards
Rate Cards are structured pricing tables that specify the costs associated with terminating voice traffic to different global destinations.
- Before getting started, we recommend reviewing Building Rate Cards. You can also watch our Rate Card Setup video.
- Set up the Provider Rate Cards first, as customer cards will build upon these.
- Build the Customer Rate Cards as needed.
Click here for video playback for Provider Rate Card.
Click here for video playback for Customer Rate Card.
Create a New Customer
- Click the
+icon. - Enter the customer's name.
- Select the currency to use for this account. Note: You cannot change this later.
- Add a tax percentage, which will be calculated for each payment.
-
Click
Save.
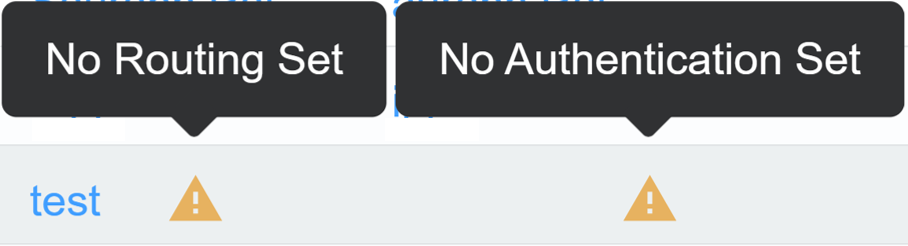
Viewing Outstanding Actions
To view outstanding actions on a customer, hover over the Warning icon. In the example below, you can see that routing and authentication haven't been set. Click the customer's name to update their routing details.
Set IP Authentication
- Select the customer to authenticate.
- Click the Auth menu item.
- Under IP Authentication, click the
+icon. - Enter the origination/customer IP address.
- Click Save.
Additional Authentication Support
We support SRV (service) records and domains.
Click here for video playback.
Set SIP User Authentication
You can authenticate a customer using a SIP username and password.
Steps to create a SIP user:
- Select the customer to authenticate.
- Click the Auth menu item.
- Under SIP User Authentication, click the
+icon. - Enter a username and password, then click the
Savebutton.
Security Notice
We block IP addresses after SIP authentication failures to enhance security.
Payments
You can add balance to a customer account.
Steps to add payments:
- Select the customer.
- Click the Payment menu item.
- Click the
+icon. - Enter a description and total amount. Select
Completedfrom the drop-down menu if the payment has been made. - Click
Save.
Click here for video playback.
Ingress Routing
To configure ingress routing:
- Navigate to Management Customer.
- Click the customer's name.
- Select Routing.
- Click
+under Ingress Routing. - Select the Rate Card.
- Click
Save.
For detailed routing configuration, see Routing.
Setup Summary
The complete setup process follows these steps:
Step 1: Create a carrier
Step 2: Create a provider rate card
Step 3: Create a customer rate card and link it to the provider rate card
Step 4: Create a customer
Step 5: Assign the customer rate card to the routing configuration
graph TD
    A[Step 1: Create a Carrier] --> B[Step 2: Create a Provider Rate Card]
    B --> C[Step 3: Create a Customer Rate Card<br/>and link it to Provider Rate Card]
    C --> D[Step 4: Create a Customer]
    D --> E[Step 5: Assign Customer Rate Card<br/>to Routing Configuration]
Deploy Servers
Follow these instructions to deploy servers:
- Navigate to Setup Settings Servers.
- Select Deploy a Server.
- Choose a server location.
- Enter a server name.
- Check the confirmation box and deploy the server.
- The server's IP address will be emailed to your registered email address. You can also find it in the server list section.
For detailed server configuration, see Servers.
Click here for video playback.
Additional Options
Timezone Settings
You can set your local time zone by clicking the "Time Top" option in the settings. This will affect the time format across the entire platform.
Click Update to apply your changes.
Help and Documentation
Throughout the platform, you'll find question mark icons. Click them to access relevant documentation and guidance.
Account Balance
Your current account balance is displayed in the dashboard. To make a payment, click on the balance for options to pay via PayPal or credit card. Ensure your account balance stays positive to avoid service interruptions.
Set Up Personal Profile
Your username and role are visible in the upper right corner. You can change your password, language settings, and other preferences from your profile.
While configuring your Personal Profile isn't required for basic setup, it's a good time to complete it.
To access your profile, click your name in the upper right corner and select Profile.
View account details such as name, role, email, and mobile number.
Note: You can only edit the Mobile field. To change your email or name, contact ConnexCS Support.
Two-Factor Authentication (2FA): This adds additional security against password guessing and theft, including brute force attacks (details here).
To configure 2FA on ConnexCS, click Enable and follow the prompts to scan the QR code. You must install a 2FA/TFA app on your phone.
Passkey (Web Auth N) / FIDO2: ConnexCS has full support for WebAuthN, enabling modern passwordless authentication mechanisms including Passkeys, hardware security keys, and biometric verification. Click here for more details.
The result is a more secure, user-friendly, and standards-compliant authentication experience across devices and browsers.
1. Enrolment & Configuration
Users can configure WebAuthN authentication directly within the ConnexCS Portal.
Steps:
- Login to your Control Panel.
- Click on your [Name] then Profile.
- Click
Enrollunder Passkey/FIDO2.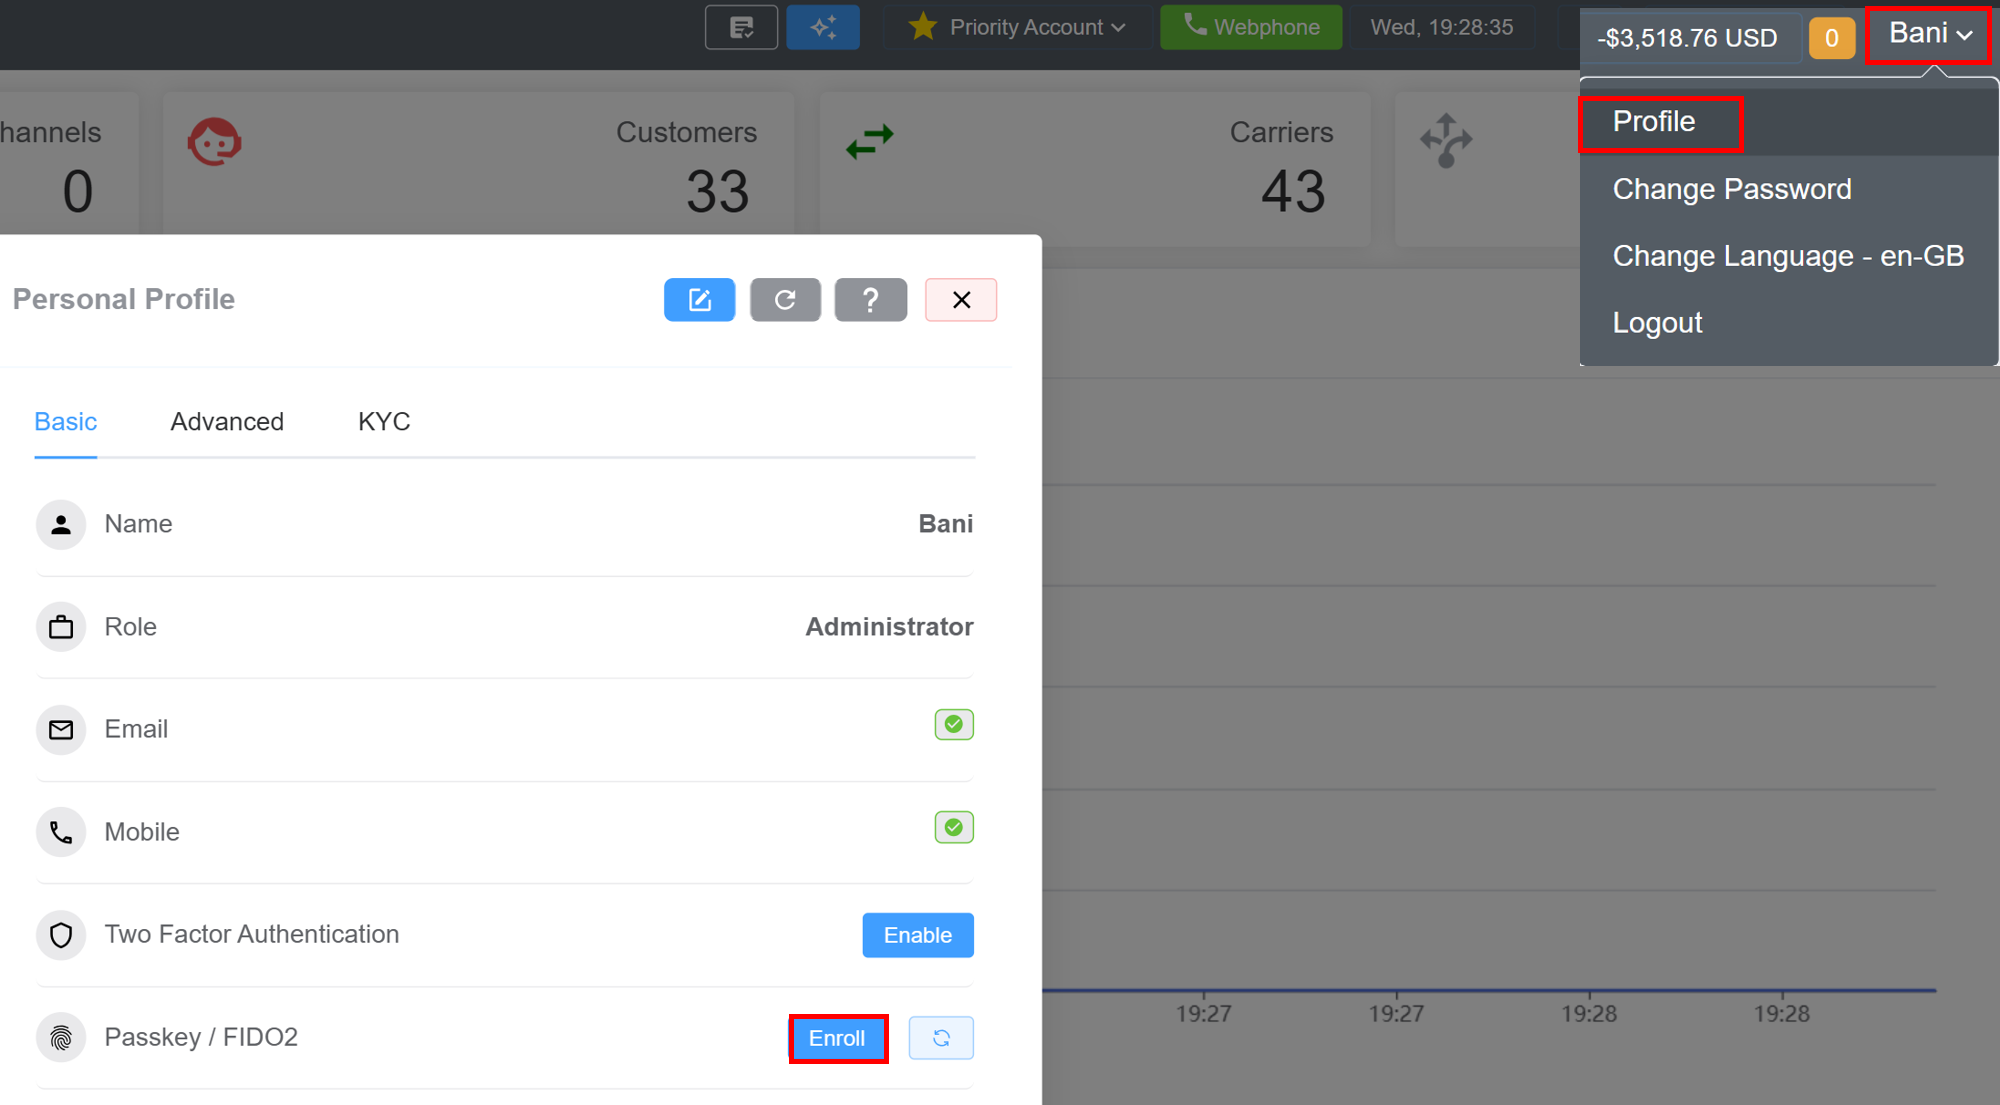
- Enter the name of the authenticator device, click on
ok.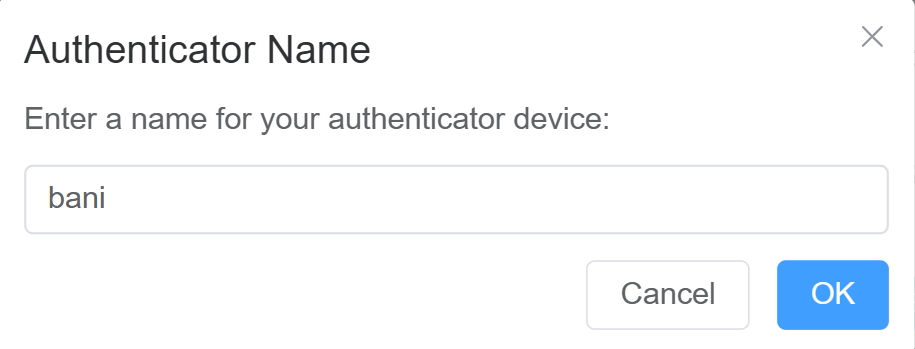
- Logout and Login again. Enter your
email(ConnexCS). Click onLogin With Passkey.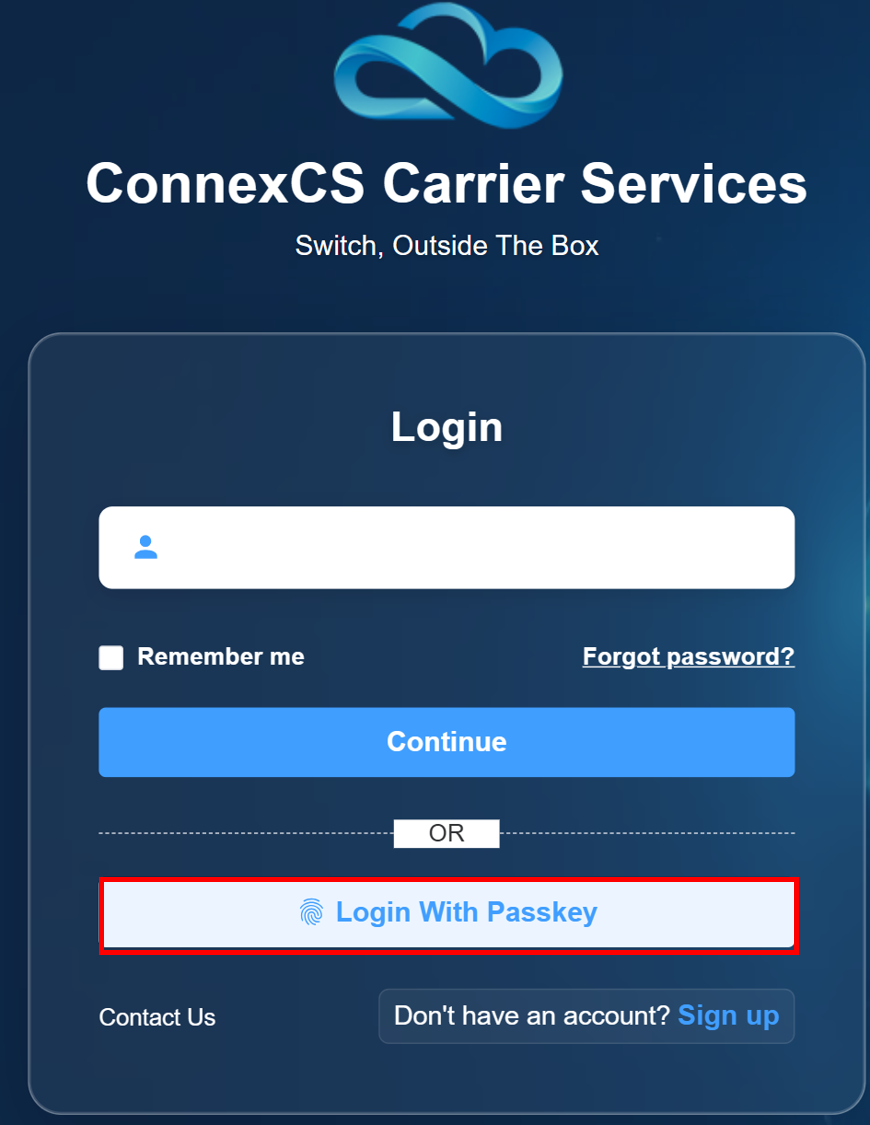
-
Once enrolled, a special login button appears on the ConnexCS login screen to initiate WebAuthN-based passwordless authentication.
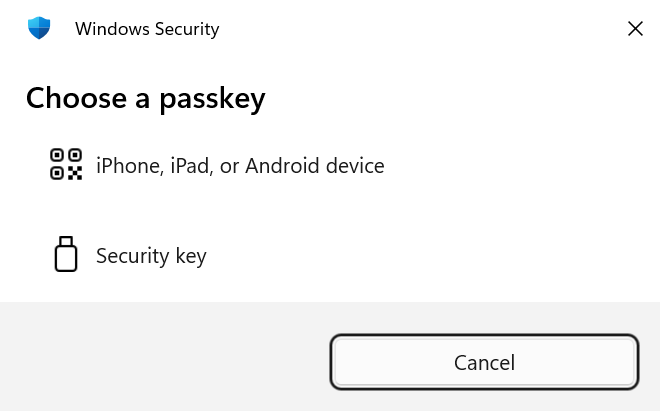
-
Choose the authentication method:
- iPhone, iPad, or Android Device
- Security
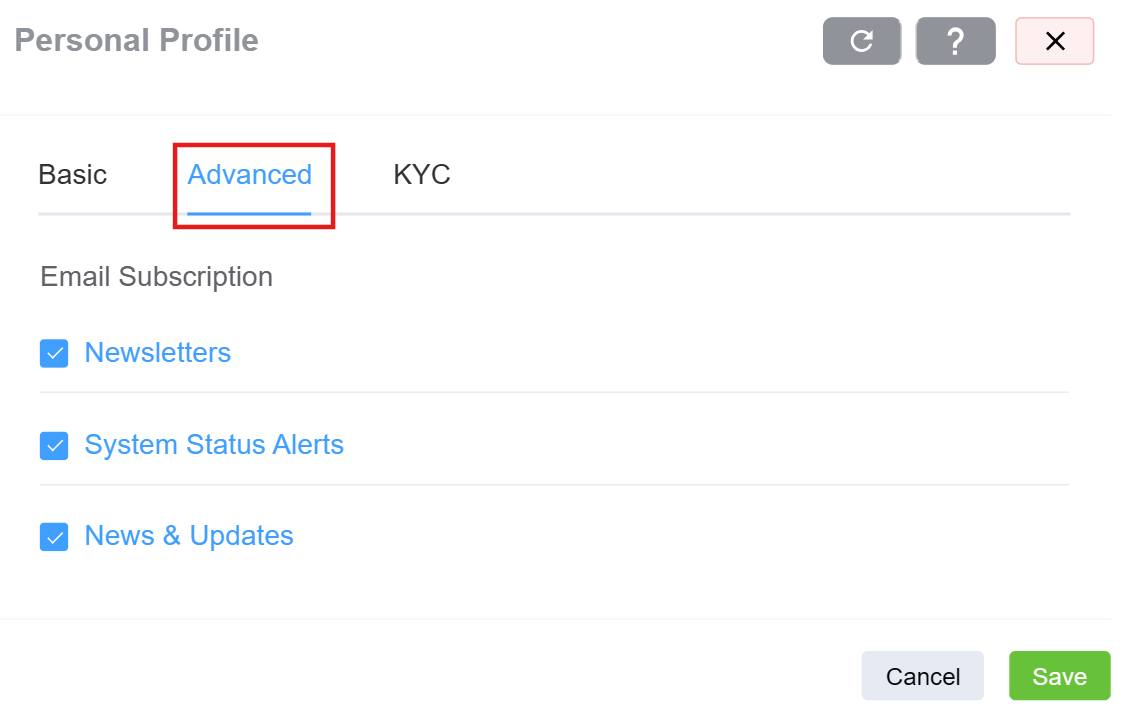
Click the blue Edit button to manage your email subscriptions.
The Know Your Customer (KYC) tab provides access to the customer identity verification workflow. When KYC verification is enabled from the backend, users can complete the verification process directly within this section.
As part of the KYC procedure, users are required to:
- Click on
verify.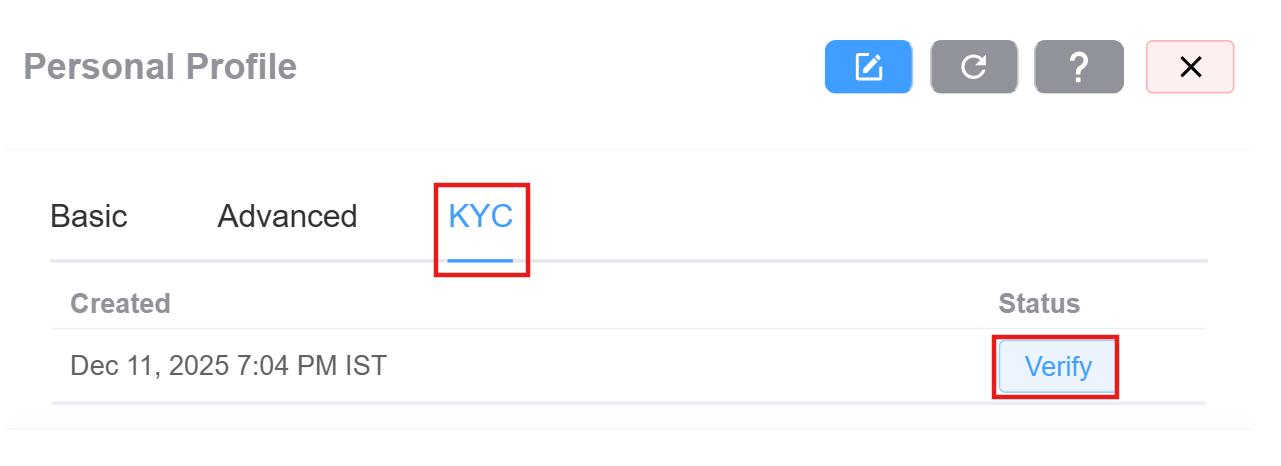
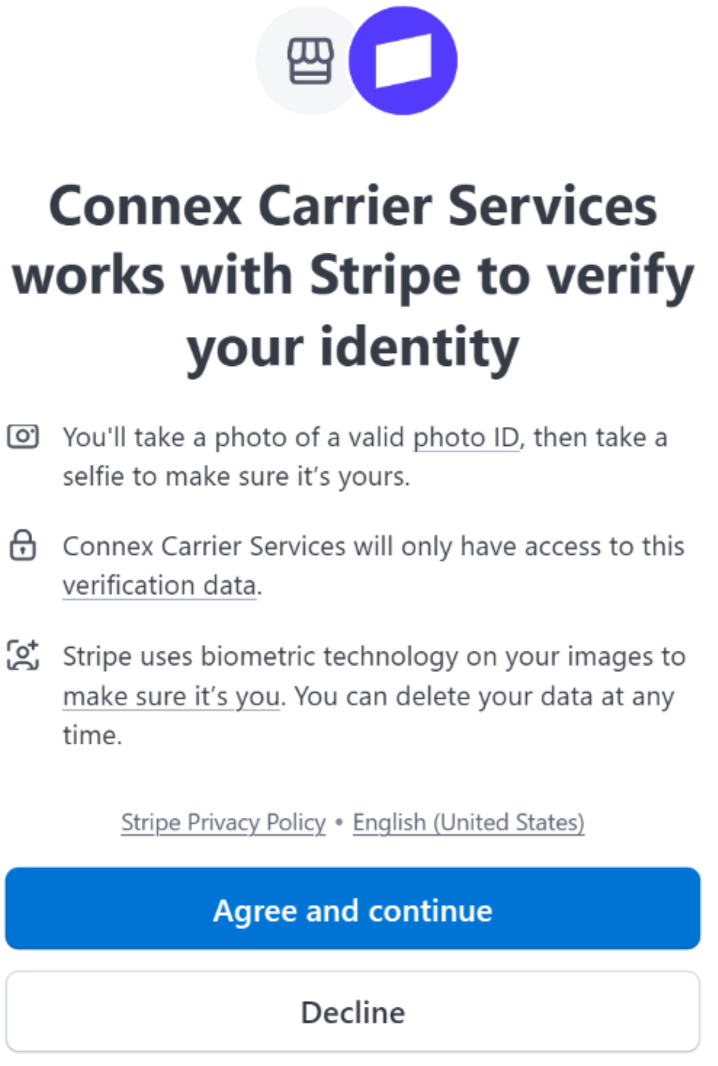
- You will get a window where you need to agree to the terms and conditions.
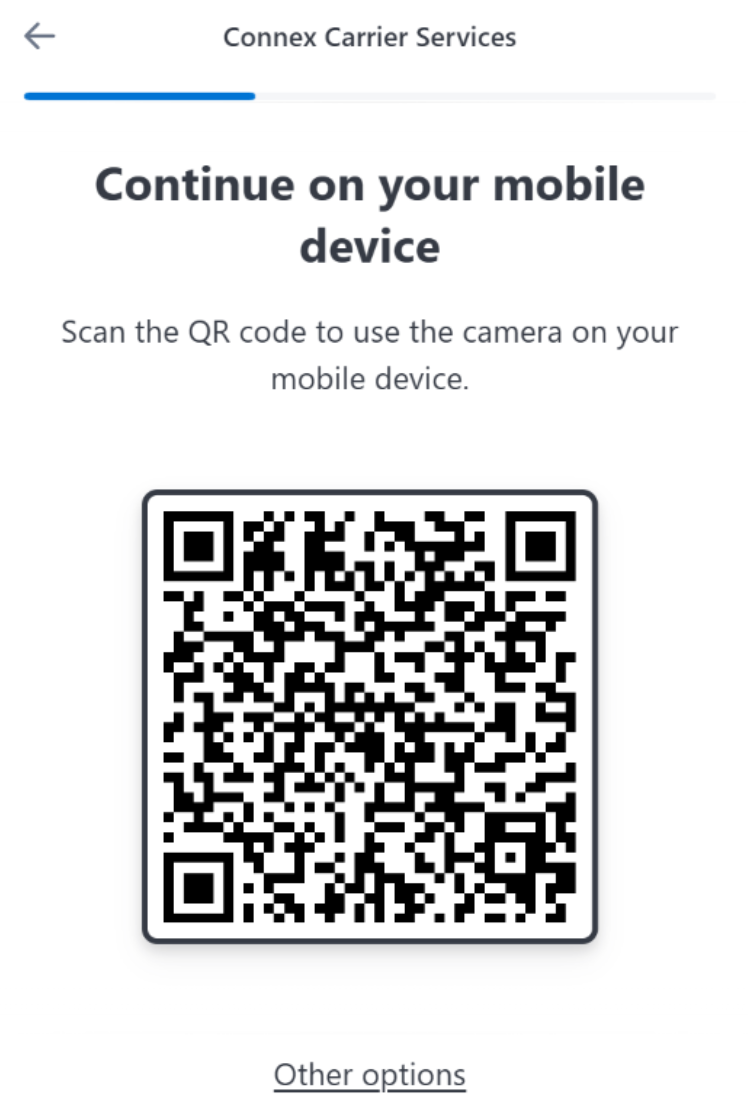
- Scan the QR Code.
- Capture and submit a live photo of themselves while holding the verification document.
- Upload a clear image of the verification document used for identity confirmation.
- These submissions are used to validate the customer’s identity and ensure compliance with regulatory requirements.