ConnexCS MCP Server App
Overview
The CX MCP App is an extendable Model Context Protocol (MCP) Server built for the ConnexCS platform.
It enables AI-powered MCP clients (e.g., VS Code and Claude Desktop) to access tools and functionality via the MCP protocol to:
- Access ConnexCS platform data
- Execute backend ScriptForge functions
- Perform diagnostics (CDR analysis, C-Trace, routing checks)
- Generate analytical reports
- Assist customers interactively via natural language
The MCP app acts as a secure bridge between:
MCP Client ↔ AI Agent ↔ MCP Server ↔ ScriptForge ↔ ConnexCS Backend APIs
High-Level Architecture
flowchart LR
    A["AI Model / Agent (e.g., Claude Sonnet 4.6)"]
    --> B["MCP Client (VS Code / Claude Desktop / Claude Code)"]

    B --> C["MCP Client Configuration (mcp.json)"]

    C --> D["Local MCP Server - CX MCP App"]

    D --> E["ScriptForge Functions"]

    E --> F["ConnexCS APIs / Backend"]
Components
| Component | Description |
|---|---|
| AI Model / Agent | The LLM that performs reasoning and generates actions (e.g., Claude Opus, Claude Sonnet, GPT-5). The model acts as the AI agent. |
| MCP Client | An application that hosts or connects to AI models and communicates with MCP servers. MCP clients can run locally or as web-based applications (e.g., VS Code, Claude Desktop, Claude Code). |
| MCP Client Configuration | Local configuration file (e.g., mcp.json) that defines available MCP servers and connection settings. |
| MCP Server | The CX MCP application running locally within the MCP client environment, exposing tools and capabilities via the MCP protocol. |
| ScriptForge | Server-side execution layer providing callable functions/tools exposed through the MCP server. |
| ConnexCS APIs | Core ConnexCS platform services accessed by ScriptForge to perform operations and retrieve data. |
Installation & Initial Setup
Step 1: Install the MCP App
- Navigate to App Store
- Search for CXMCP
- Click Install
-
Select version and confirm
After installation, the app appears inside the IDE under:
CX MCP -
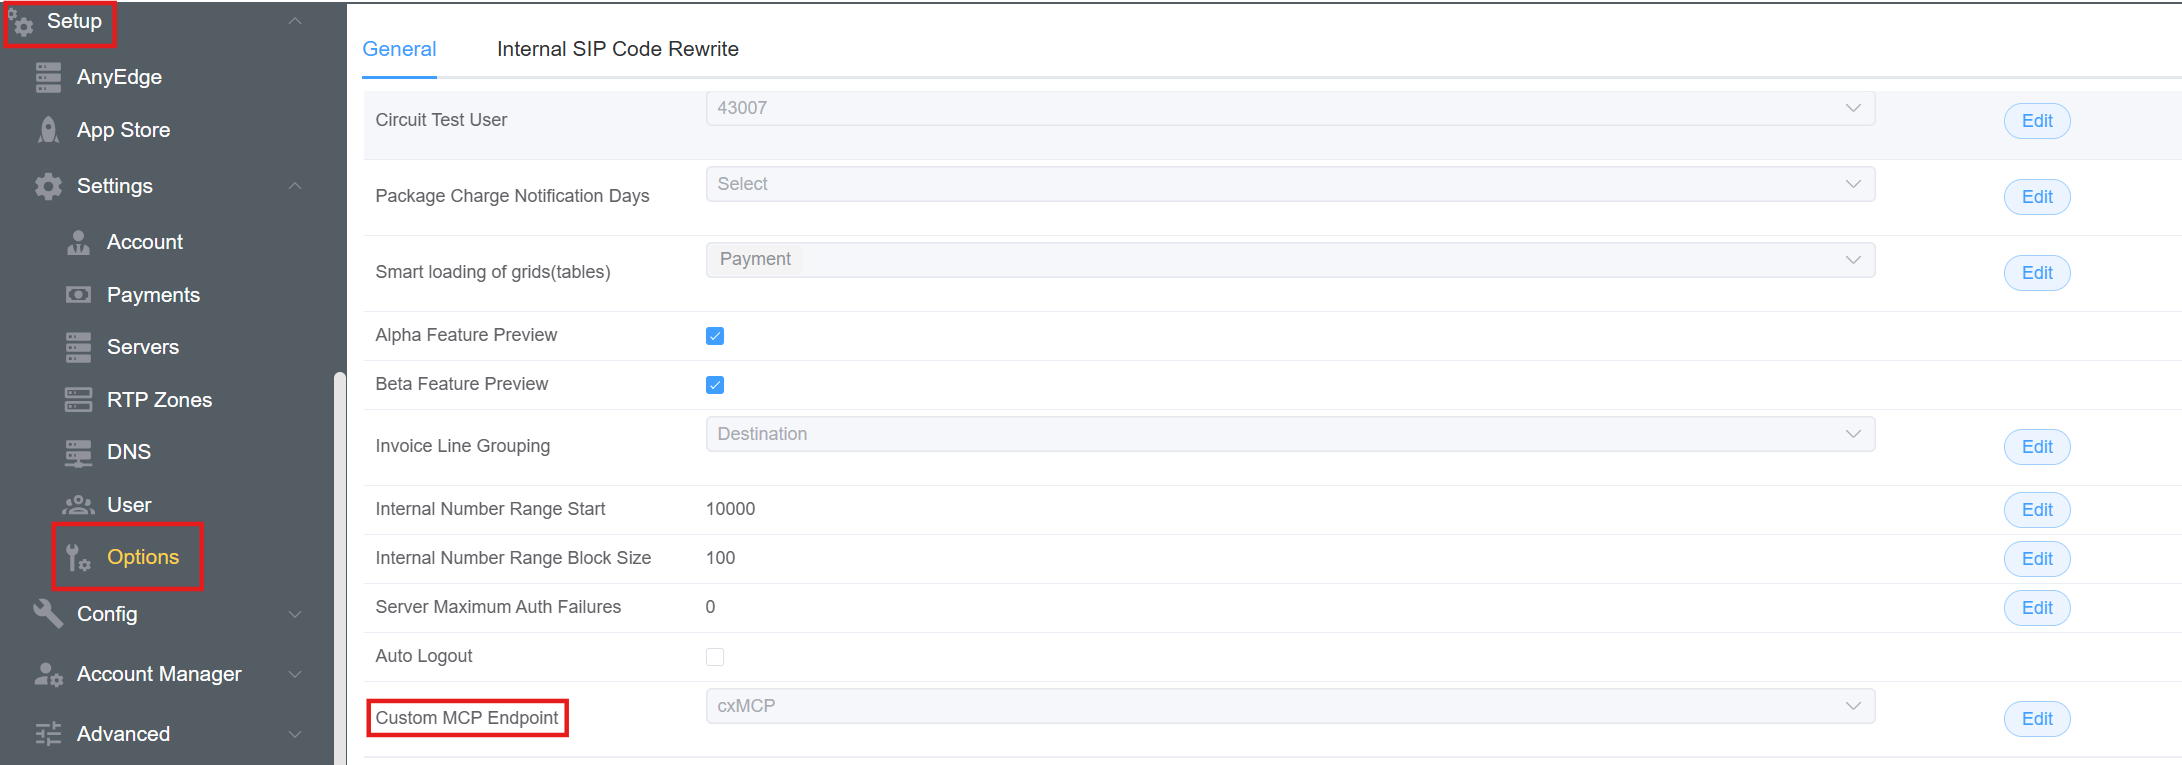
Navigate to Setup Settings Option. In the
Generaltab, select the created MCP app from theCustom MCP Endpointdrop-down menu.
Selecting the correct MCP endpoint ensures requests are executed in the intended environment; without it, tools may fail, authenticate incorrectly, or return data from the wrong system.
Step 2: Environment Configuration
Navigate to:
App → Environment Variables
Configure:
| Variable | Required | Description |
|---|---|---|
API_USERNAME |
Yes | Email of a valid ConnexCS user -> Connexcs Email |
VERBOSE |
No | Enables verbose logging for tests |
Step 3: Creating JWT Access Token
Navigate to:
Setup → Integrations → JWT Tokens
- Click Create Token
- Select Access Token
- Choose expiration period
- Save
- Copy token (displayed once)
- Paste this into:
Environment Variables → CONNEXCS_API_TOKEN
Working Modes
There are two supported development approaches.
ScriptForge files are JavaScript in both environments.
In the ConnexCS IDE, file extensions are not displayed.
In cx-tools development, files are located in the /src directory and use the .js extension.
Direct IDE Development (Inside ConnexCS)
Develop directly in:
IDE → ScriptForge Files
ScriptForge Tool Development Standard
Location
Navigate to the IDE:
IDE → Cx MCP → Scriptforge
The scriptforge folder contains all executable MCP tool scripts.
All tool logic must reside in this directory.
Creating a New MCP Tool
-
Create a new
JavaScriptfile. -
Implement the tool logic inside the file.
-
Export the function using the existing ScriptForge tool pattern.
-
Follow the same execution structure as other tools in the folder.
-
Register the tool in the MCP configuration. Also, registration happens in the
mcp javascriptfile. -
Tools must be registered within the MCP server configuration. If a tool is defined in a separate file, it must be exported from that file and imported into the MCP server where tool registration occurs.
export function toolName () { // Tool }import { toolName} from './toolFile'
-
Reload / Restart MCP (if required).
Once registered and reloaded, the tool becomes available to the AI Agent.
Local Development via CX Tool (Recommended)
ConnexCS provides a CLI tool:
https://www.npmjs.com/package/@connexcs/tools
Key commands:
cx configure
cx configure app
cx run <file_name>
Benefits
- Work from VS Code or preferred IDE
- GitHub integration
- Version control
- CI/CD via GitHub Actions
- Backup protection
- Automated testing
- AI-assisted coding
CI/CD Integration
The MCP template repository includes:
https://github.com/connexcs/app-cx-mcp
- GitHub Actions workflow
- Automated test execution
- Pull Request validation
- 24 automated tests (example)
When a PR is submitted:
- Tests run automatically
- Pass/Fail status returned
- Prevents broken deployments
MCP Server Implementation
Core File
The most important file:
mcp.js
This file:
- Imports tools (functions)
- Instantiates MCP server
- Registers tools
- Defines parameters & metadata
Tool Definition Structure
Each MCP tool consists of:
- Name
- Description
- Handler function
- Parameter schema
Example
    Pattern:
    mcp.addTool(
      toolName,           // 👈 tool name
      toolDescription,    // 👈 description
      handlerFunction     // 👈 handler
    )
      .addParameter(
        paramName,        // 👈 name
        paramType,        // 👈 type
        paramDescription, // 👈 description
        isRequired        // 👈 required
      )

    Example:
    mcp.addTool(
      'getSipTrace',
      'Fetch and analyze SIP trace for a call. Returns full SIP flow with timing, auth, NAT detection, codecs, and identified issues. PRIMARY debugging tool — every call has trace data (7 days retention). Use this first when debugging any call. Endpoint: log/trace',
      getSipTraceHandler
    )
      .addParameter('callid', 'string', 'SIP Call-ID (required, non-empty, max 255 chars)', true)
      .addParameter('callidb', 'string', 'Internal call identifier (optional)', false)
Tool Execution Flow
- AI decides which tool to call
- Parameters validated
- Handler function executes
- ScriptForge function runs
- Backend API queried
- Response returned to AI
Authentication Flow
All tools call:
export function getApi () {
    const apiUsername = process.env.API_USERNAME

    if (!apiUsername || apiUsername.trim() === '') {
        throw new Error(
            'API_USERNAME environment variable is required but not set. ' +
            'Please set API_USERNAME in your environment variables to authenticate with ConnexCS API.'
        )
    }

    return cxRest.auth(apiUsername)
}
Authentication occurs using:
API_USERNAME
Requests fail only when a valid API username is not available. The ConnexCS API token is optional and is used solely during MCP server configuration within the MCP client. If a token is not provided, authentication can occur via OAuth login..
VS Code MCP Client Setup
Create folder:
.vscode/
Create file:
mcp.json
Example:
{
   "servers": {
          "cx-mcp-app": {
                   "url": "https://app.connexcs.com/api/cp/mcp/",
                     "type": "http",
                      "headers": { "Authorization": "Bearer YourJWTTokenHere" }
          }
     },
   "inputs": []
}
Required Values
| Field | Source |
|---|---|
| url | ConnexCS instance URL https://app.connexcs.com/api/cp/mcp/ |
| jwt | Access Token |
Example Tool Calls
Call Analytics
User asks:
Give me a 30-day report
AI calls:
searchCallLogssearchDocumentationinvestigateCall
Returns:
- Total calls
- Talk time
- Active customers
- Routing failures
- Revenue insights
C-Trace Investigation
User:
Run C-trace on failed call
AI calls:
investigateCall
Returns:
- SIP Flow
- 503 Errors
- Routing diagnostics
- Prefix errors
- Provider issues
- Recommendations
Example Diagnostic Output
The AI agent can:
- Detect repeated 0-duration calls
- Identify routing gaps
- Detect dial prefix duplication
- Identify SIP 503 "No route available"
- Recommend corrective actions
Available Tool Categories
| Category | Examples |
|---|---|
| CDR Analysis | searchCallLogs |
| Documentation | searchDocumentation |
| C-Trace | getCTrace |
| Call Investigation | investigateCall |
| Switch Health | Analytics queries |
| Customer Data | Customer management tools |
AI Model Flexibility
Users may use:
- Free models
- Paid models
- High reasoning models
Because MCP handles backend logic, even lower-cost models perform well.
Better models provide:
- Improved reasoning
- Follow-up questioning
- Better summarization
- Stronger diagnostic insight
Security Considerations
- JWT Access Tokens required
- Tokens should be stored securely
- Never commit tokens to GitHub
- Token expiration recommended
- Access scope should be minimal
Benefits to Customers
Operational Benefits
- Faster troubleshooting
- Guided onboarding
- Automated diagnostics
- Call analytics via chat
- Reduced training dependency
Development Benefits
- GitHub integration
- CI/CD pipeline
- Version control
- IDE flexibility
- Self-healing workflows
Use Cases
- Monthly switch health report
- CDR analysis by customer name
- Identify top revenue calls
- Detect repeated routing failures
- Debug AI agent calls
- Run C-Trace without UI navigation
Summary
The ConnexCS MCP App provides:
- AI-powered access to platform intelligence
- Secure backend integration
- Tool-based execution model
- IDE and GitHub compatibility
- CI/CD-ready development workflow
- Enterprise-grade extensibility
It transforms ConnexCS from a UI-driven platform into a programmable, AI-interactive system.
Click here to get a more comprehensive toolkit.