DID Purchase
Document Metadata
Category: Setup / Application Store & App Deployment
Audience: Administrators, Support Team, Product Team
Difficulty: Beginner
Time Required: Approximately 10–15 minutes
Prerequisites: Active ConnexCS account with Setup privileges; a valid ConnexCS API User Token; carrier-configured DID inventory available for distribution.
Related Topics: App Store
Next Steps: Install and configure the DID Purchase app with your API User Token, currency, and mask size settings, then verify the DID Purchase button appears correctly in the Customer Portal for end customers to search, select, and purchase numbers.
Overview
The DID Purchase application allows customers to browse and acquire DIDs (phone numbers) that are made available by their carrier through the ConnexCS platform.
ConnexCS does not sell or resell DIDs directly — instead, it provides the infrastructure for carriers to list, manage, and distribute their own DID inventories to their customers.
Each DID may have a different subscription plan, which can include flexible billing options such as monthly, weekly, or daily cycles, depending on how the carrier has configured its offerings.
Why Use DID Purchase?
Provisioning new phone numbers is often a manual, back-and-forth process involving support tickets or carrier portals. DID Purchase removes that friction by giving customers a self-service storefront for numbers, so they can:
- Search available DIDs by number prefix (e.g. area code or country code).
- View setup cost, recurring cost, and billing interval for each number before purchasing.
- Select one or multiple DIDs and add them to a cart.
- Review a running cart total, including setup cost, before checkout.
- Complete the purchase and provision the number without leaving the app.
Key Features
-
DID Search: Quickly find available numbers by entering a prefix, area code, or partial number in the search bar.
-
Transparent Pricing: View the one-time Setup Cost, Recurring charge, and billing Interval (e.g. Month) for every number before adding it to the cart.
-
Multi-Select Purchasing: Select multiple DIDs at once using checkboxes, allowing bulk purchases in a single transaction.
-
Live Shopping Cart: See selected numbers, their pricing, and a running Setup Total update in real time as items are added or removed.
-
Flexible Checkout Flow: Choose to Add to Cart and keep browsing, or jump straight to Checkout to complete the purchase immediately.
-
Self-Service Provisioning: Numbers are purchased and provisioned directly through the app, without needing to raise a support request.
Benefits
- Eliminates manual, ticket-based number requests.
- Gives customers full visibility into costs before committing to a purchase.
- Speeds up number acquisition with an instant, self-service checkout flow.
- Reduces administrative overhead for support and provisioning teams.
- Supports bulk purchasing for customers who need multiple numbers at once.
- Improves the overall customer experience with a familiar, e-commerce-style interface.
Steps to Use the App
-
Navigate to Setup App Store DID Purchase and click
Install. A window will open hit theInstallbutton again.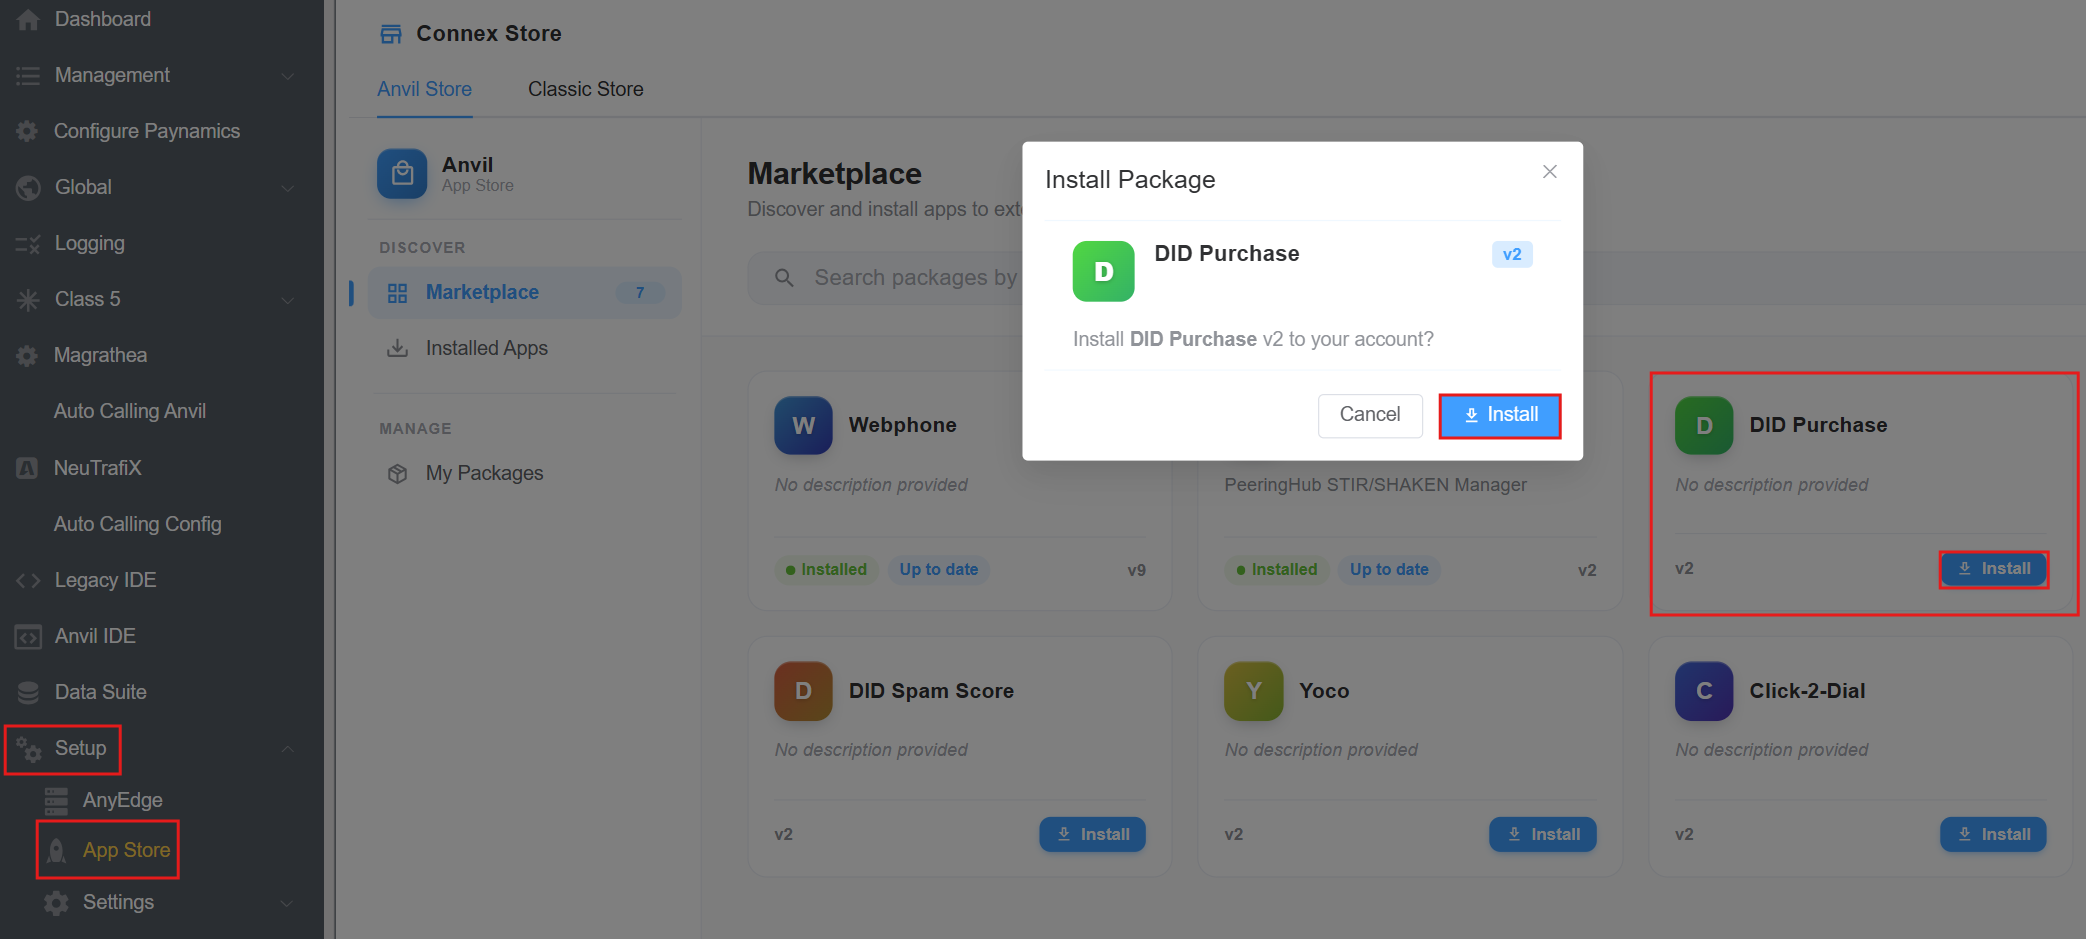
-
Click on the installed App and click on
Config.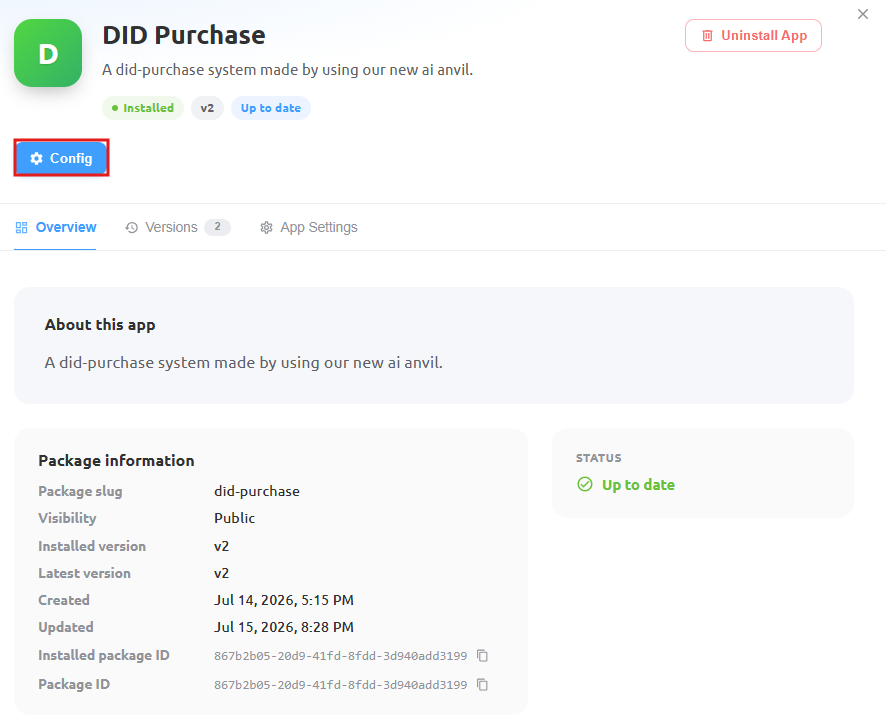
-
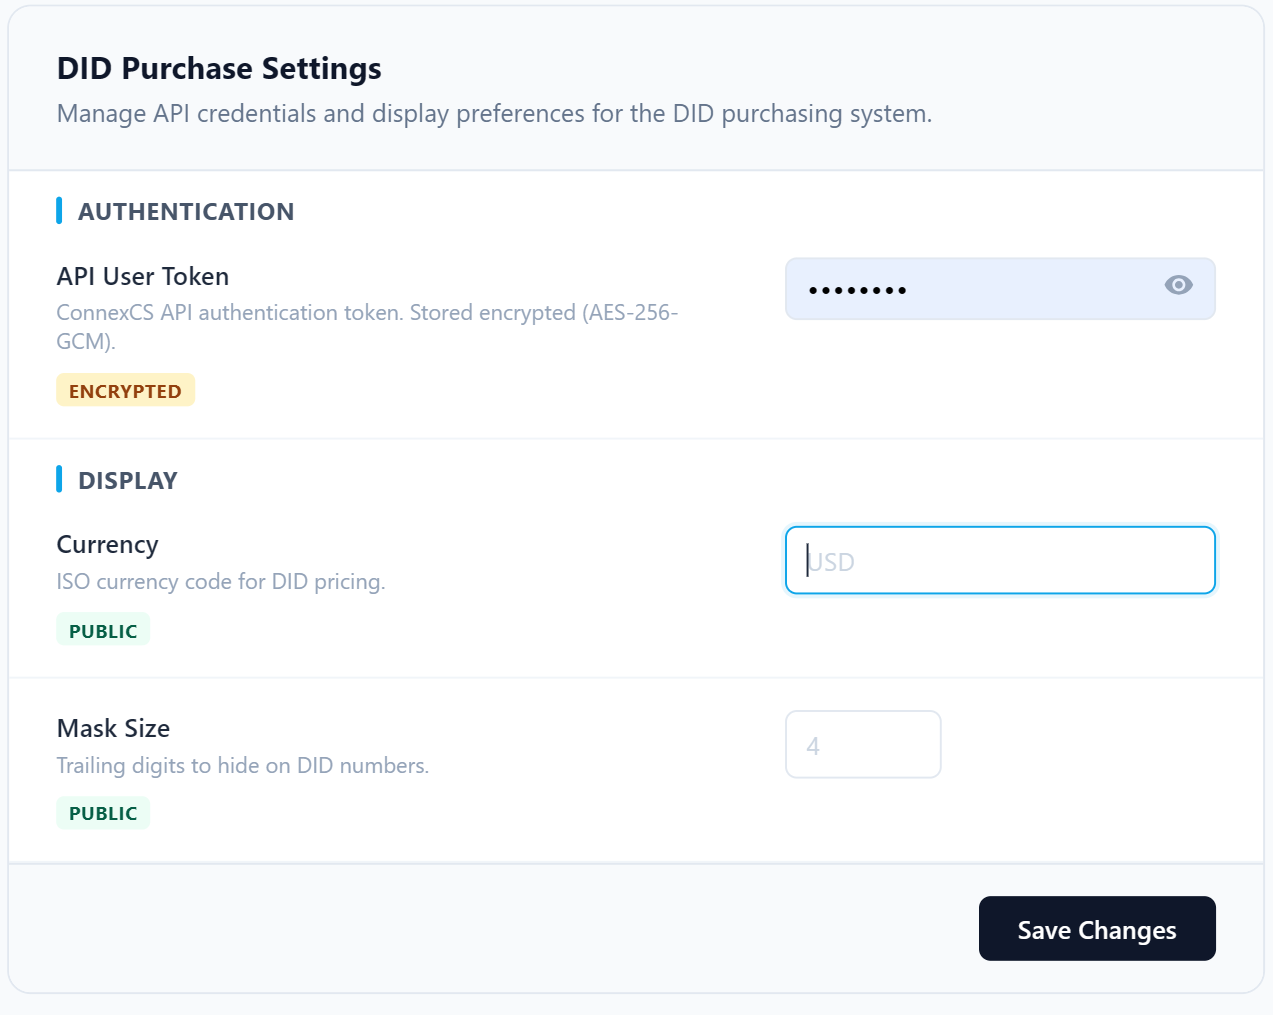
A config window will open, prompting you to enter the following details:
API User Token: The ConnexCS API authentication token used by the DID Purchase app to communicate with the platform's DID provisioning API. The value is masked by default (click the eye icon to reveal it) and is stored encrypted using AES-256-GCM. It's taggedENCRYPTED, indicating this field is never exposed in plain text once saved.Currency: The ISO currency code (e.g.USD,EUR,GBP) used to display DID setup and recurring pricing throughout the app. TaggedPUBLIC, meaning this value is visible to end users.Mask Size: The number of trailing digits to hide when displaying DID numbers in search results (e.g. showing1423xxxxxxxinstead of the full number until purchased). Default appears to be4. TaggedPUBLIC, so this setting affects what end users see.- Click
Save Changes.
-
The DID Purchase button is displayed in the Customer Portal under the Payments section, where end customers can securely complete their payment transactions.